

Fall Leaf Garland Buffet Runner
A bare dining sideboard can look plain before the feast. This handmade runner frames the serving area while still leaving room for heavy platters. Doubling two affordable garlands creates thicker texture and warm autumn color where guests gather for their plates.

Supplies Needed for This Runner
- Two 6 foot faux maple leaf garlands in warm amber and rust tones
- One roll of 22 gauge floral wire and wire cutters
- One pack of clear removable command hooks
- Extra loose fabric fall leaves and mini faux berries
- Hot glue gun with clear glue sticks
Step by Step Craft Assembly
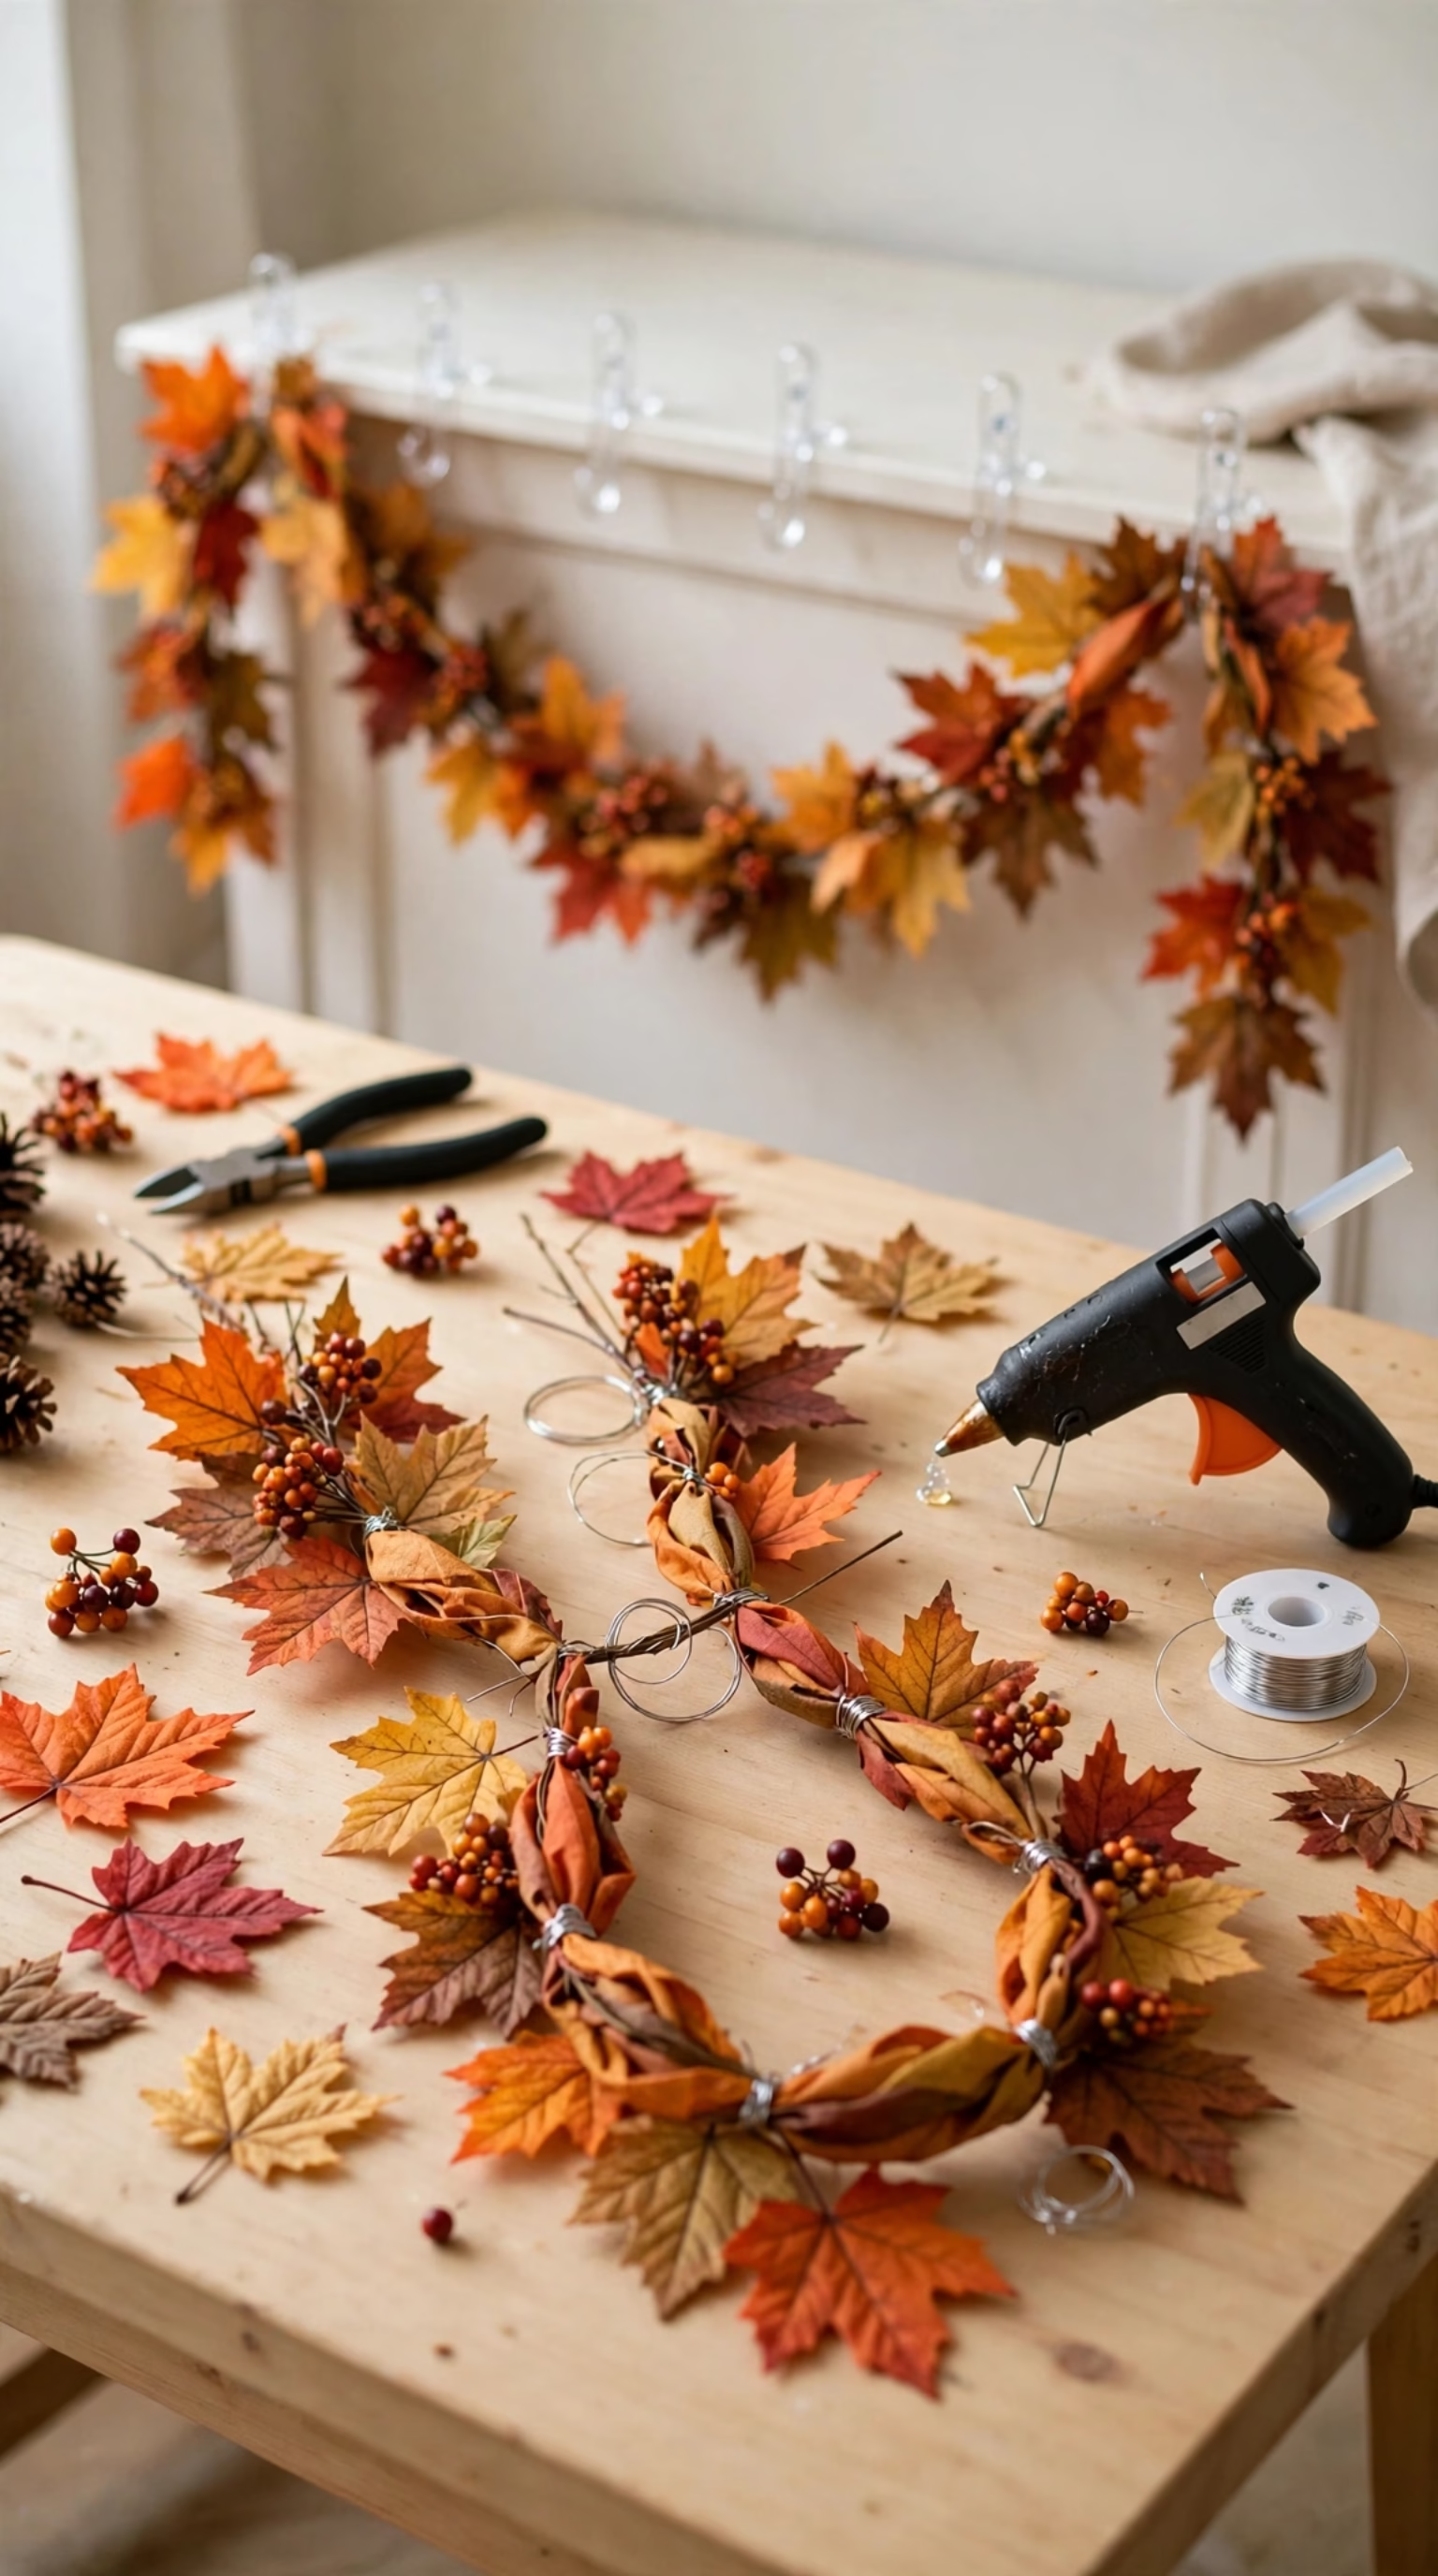
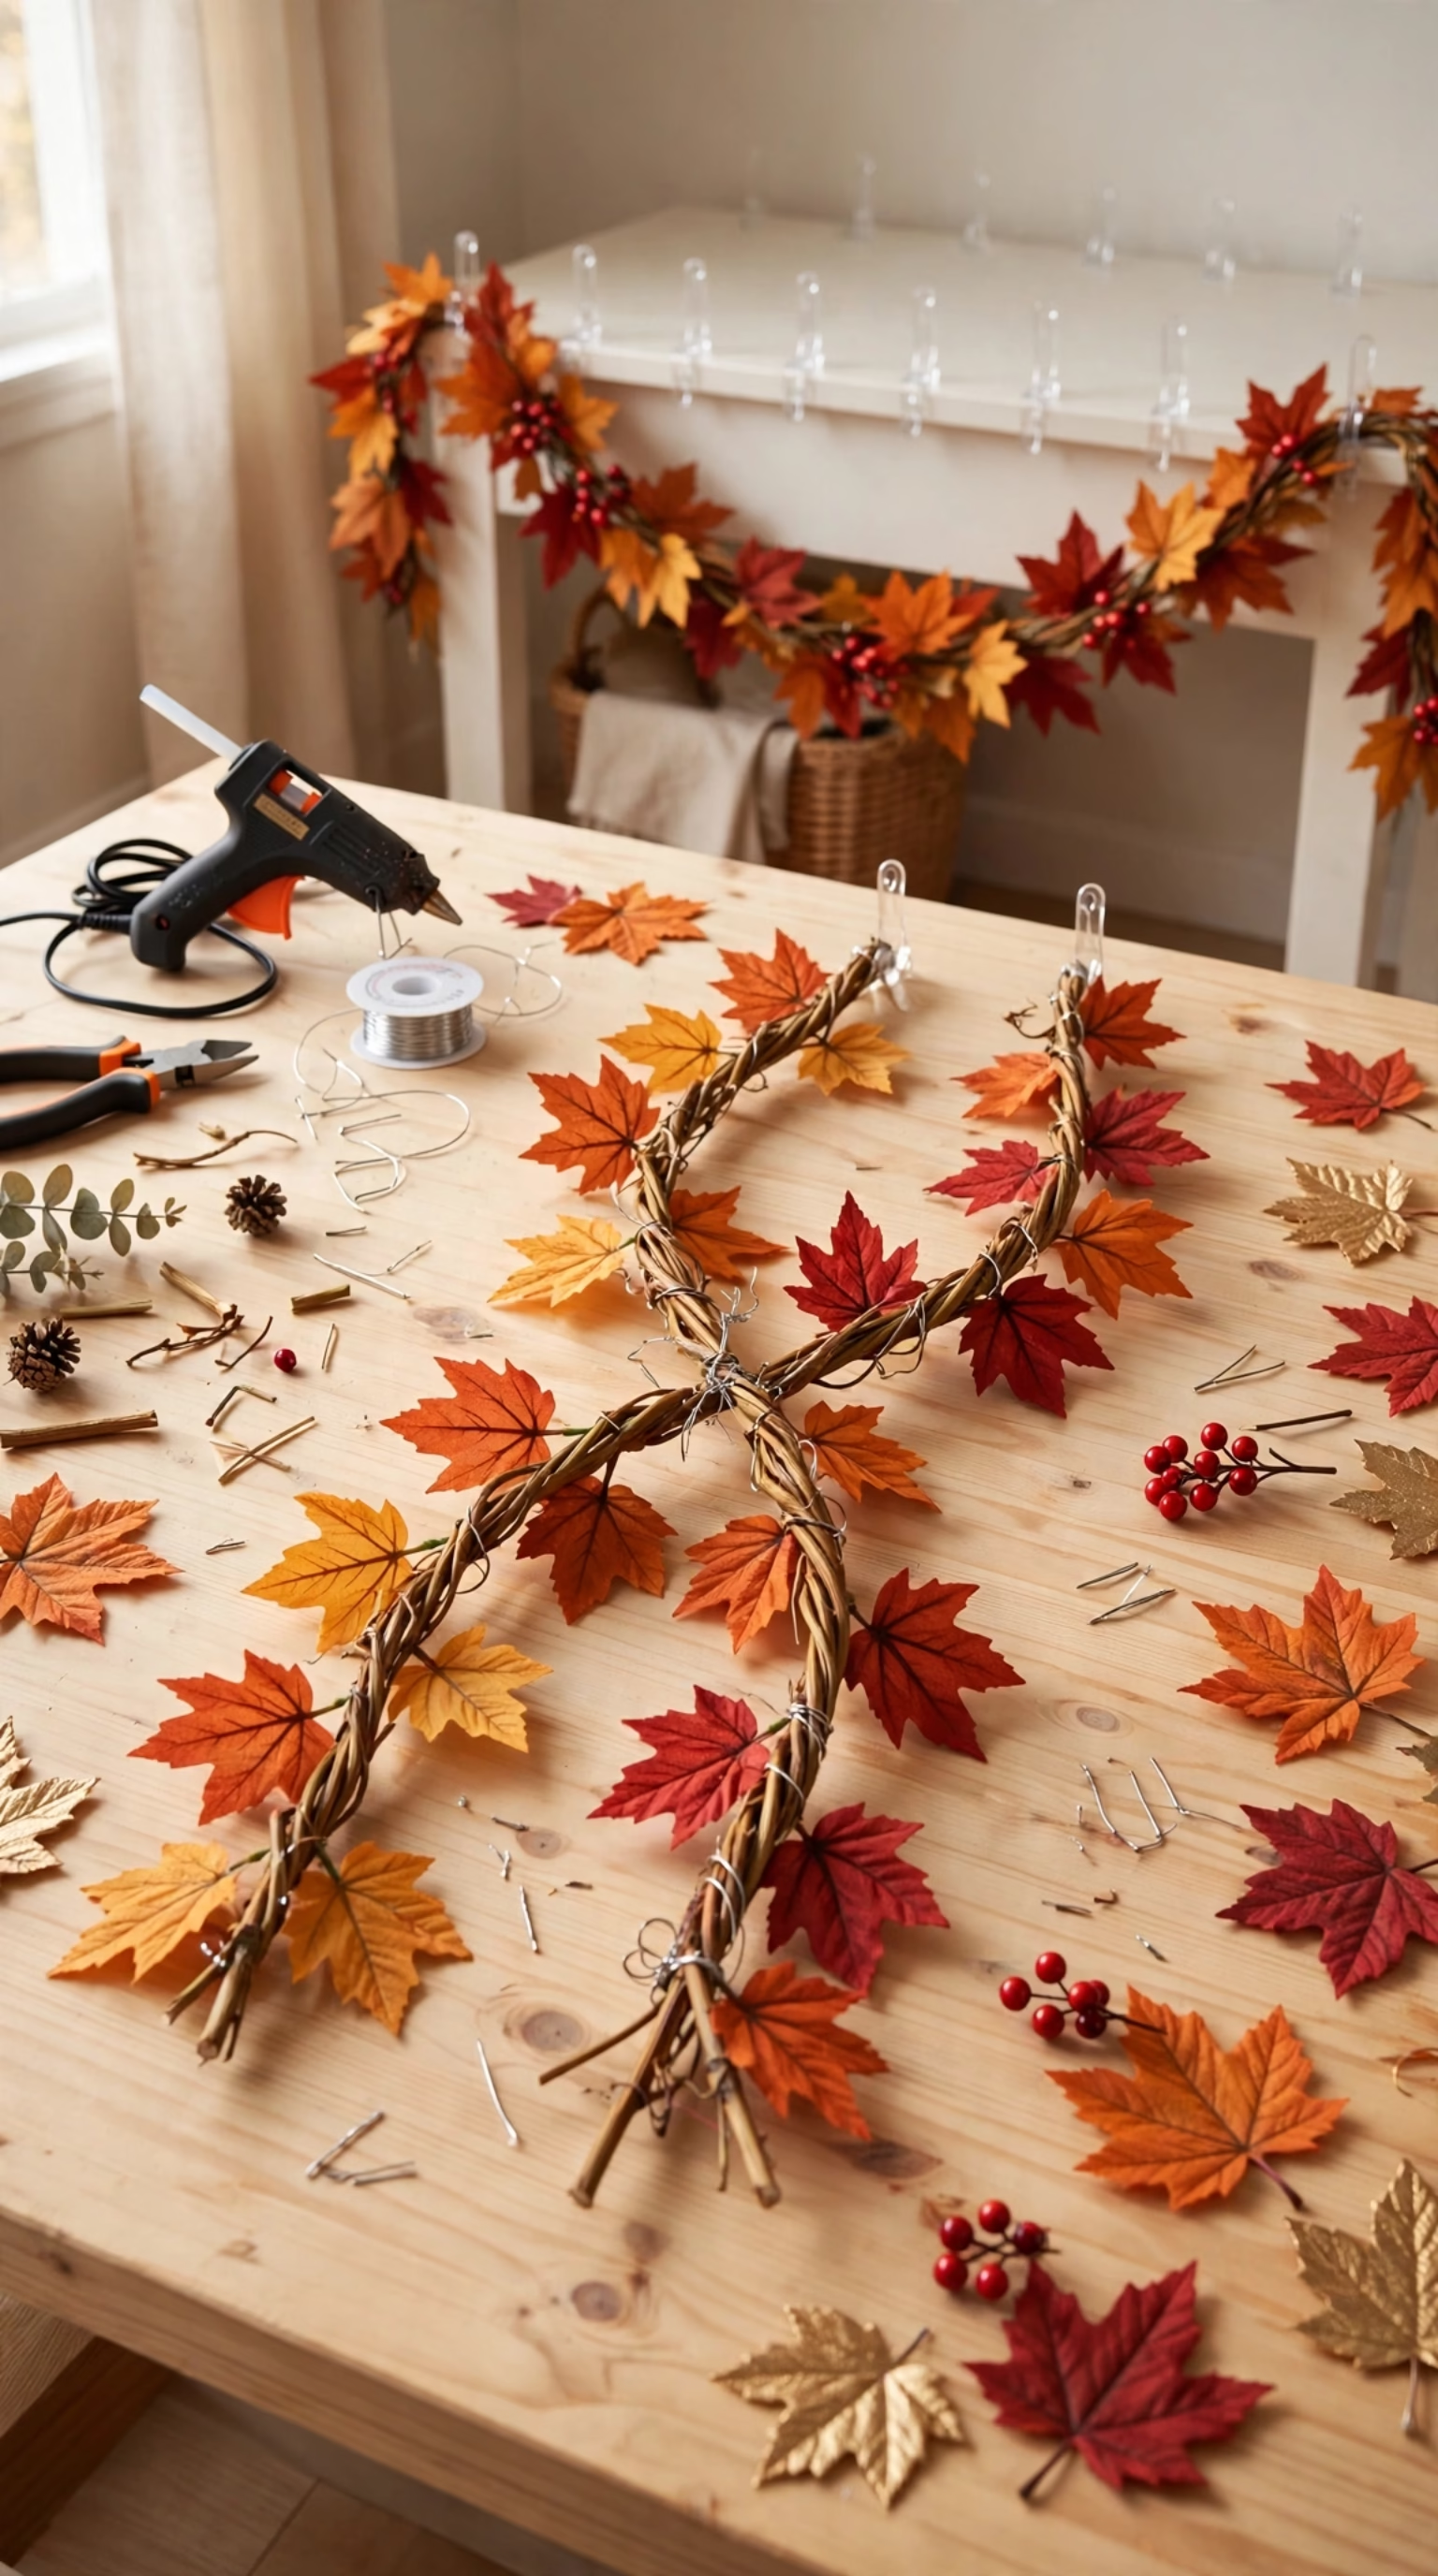
Place both garlands side by side on a flat surface and twist them together loosely. Secure the stems every 8 inches with small pieces of floral wire. Hot glue loose fabric leaves and berry clusters onto the main vine to fill bare gaps.
Attach clear removable hooks along the top edges of the console or buffet, drape the thickened garland across the front edge, and loop its ends onto the hooks.
Jump to:
- Fall Leaf Garland Buffet Runner
- Supplies Needed for This Runner
- Step by Step Craft Assembly
- Harvest Pitcher Centerpiece
- Materials for the Arrangement
- How to Build the Centerpiece
- Pumpkin Spice Candle Tray
- Craft Supplies Required
- Candle Crafting & Tray Styling Steps
- Cozy Hearth & Warm String Lights
- What You Need for This Setup
- How to Assemble the Light Display
- Tall Foraged Amber Branch Vases
- Gather These Craft Supplies
- Preserving & Arranging Instructions
- Plaid & Gingham Fabric Pumpkin Banner
- Banner Materials List
- Step by Step Banner Instructions
- Modern Minimalist Painted Gourd Trio
- Supplies You Will Need
- Painting & Finishing Steps
- Mason Jar Turkey Candle Holders
- Craft Supplies Required
- How to Craft the Turkey Jars
- Pinecone Turkey Place Card Holders
- Supplies Needed for 6 Place Cards
- Assembly Instructions
- Burlap “Give Thanks” Welcome Banner
- Materials Required
- How to Stencil & String the Banner
- Dried Wheat Sheaf Bundle Centerpiece
- Supplies for the Wheat Bundle
- Bundling & Shaping Steps
- Modern Metallic Painted Pumpkin Stacks
- Craft Materials List
- Spray Painting & Stacking Steps
- Cinnamon Stick Pillar Candle Wraps
- Supplies Needed
- Wrapping Instructions
- Paper Fan Turkey Window Displays
- Paper Craft Supplies
- Folding & Hanging Steps
- Autumn Acorn Mason Jar Votives
- Supplies You Will Need
- Quick Votive Assembly Steps
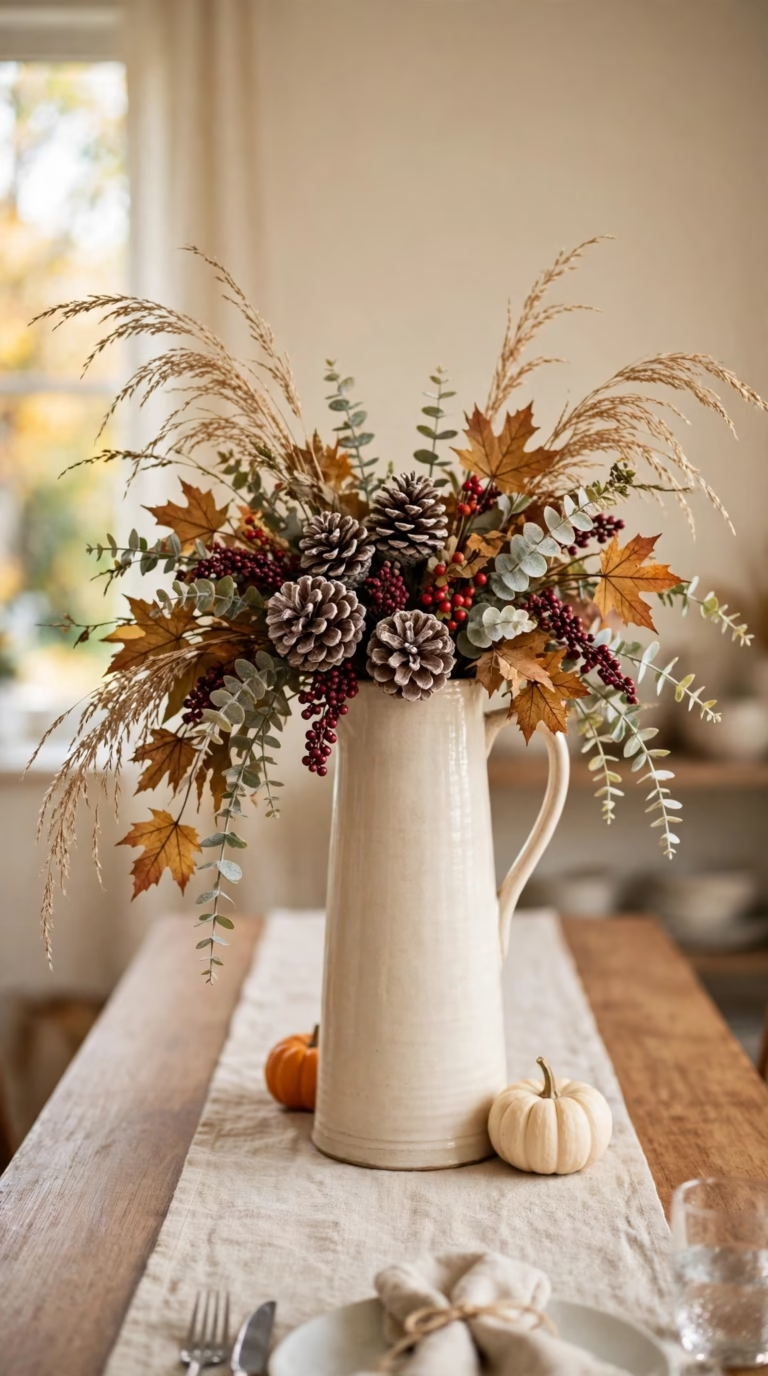
Harvest Pitcher Centerpiece
A narrow dining table needs a centerpiece that will not block passing dishes. A tall ceramic pitcher adds vertical height while taking up little surface space. This movable arrangement works well before dinner, and bending the wires so stems drape naturally over the lip helps faux stems look more expensive.
Materials for the Arrangement
- One large white ceramic pitcher, at least 10 inches tall
- One round rustic wood slice charger, 12 inches wide
- One floral foam block and a butter knife
- Five faux autumn berry branches and four dried eucalyptus stems
- Six medium pinecones, white acrylic craft paint, and a foam brush
How to Build the Centerpiece
Trim the floral foam with a knife and wedge it tightly inside the bottom of the pitcher. Lightly dab white acrylic paint onto the pinecone tips and let them dry for 20 minutes.
Place the tallest berry branches in the center of the foam, bending the stems slightly outward. Tuck eucalyptus stems around the lower rim to hide the foam. Set the pitcher on the wooden charger and arrange the pinecones around its base.
Pumpkin Spice Candle Tray
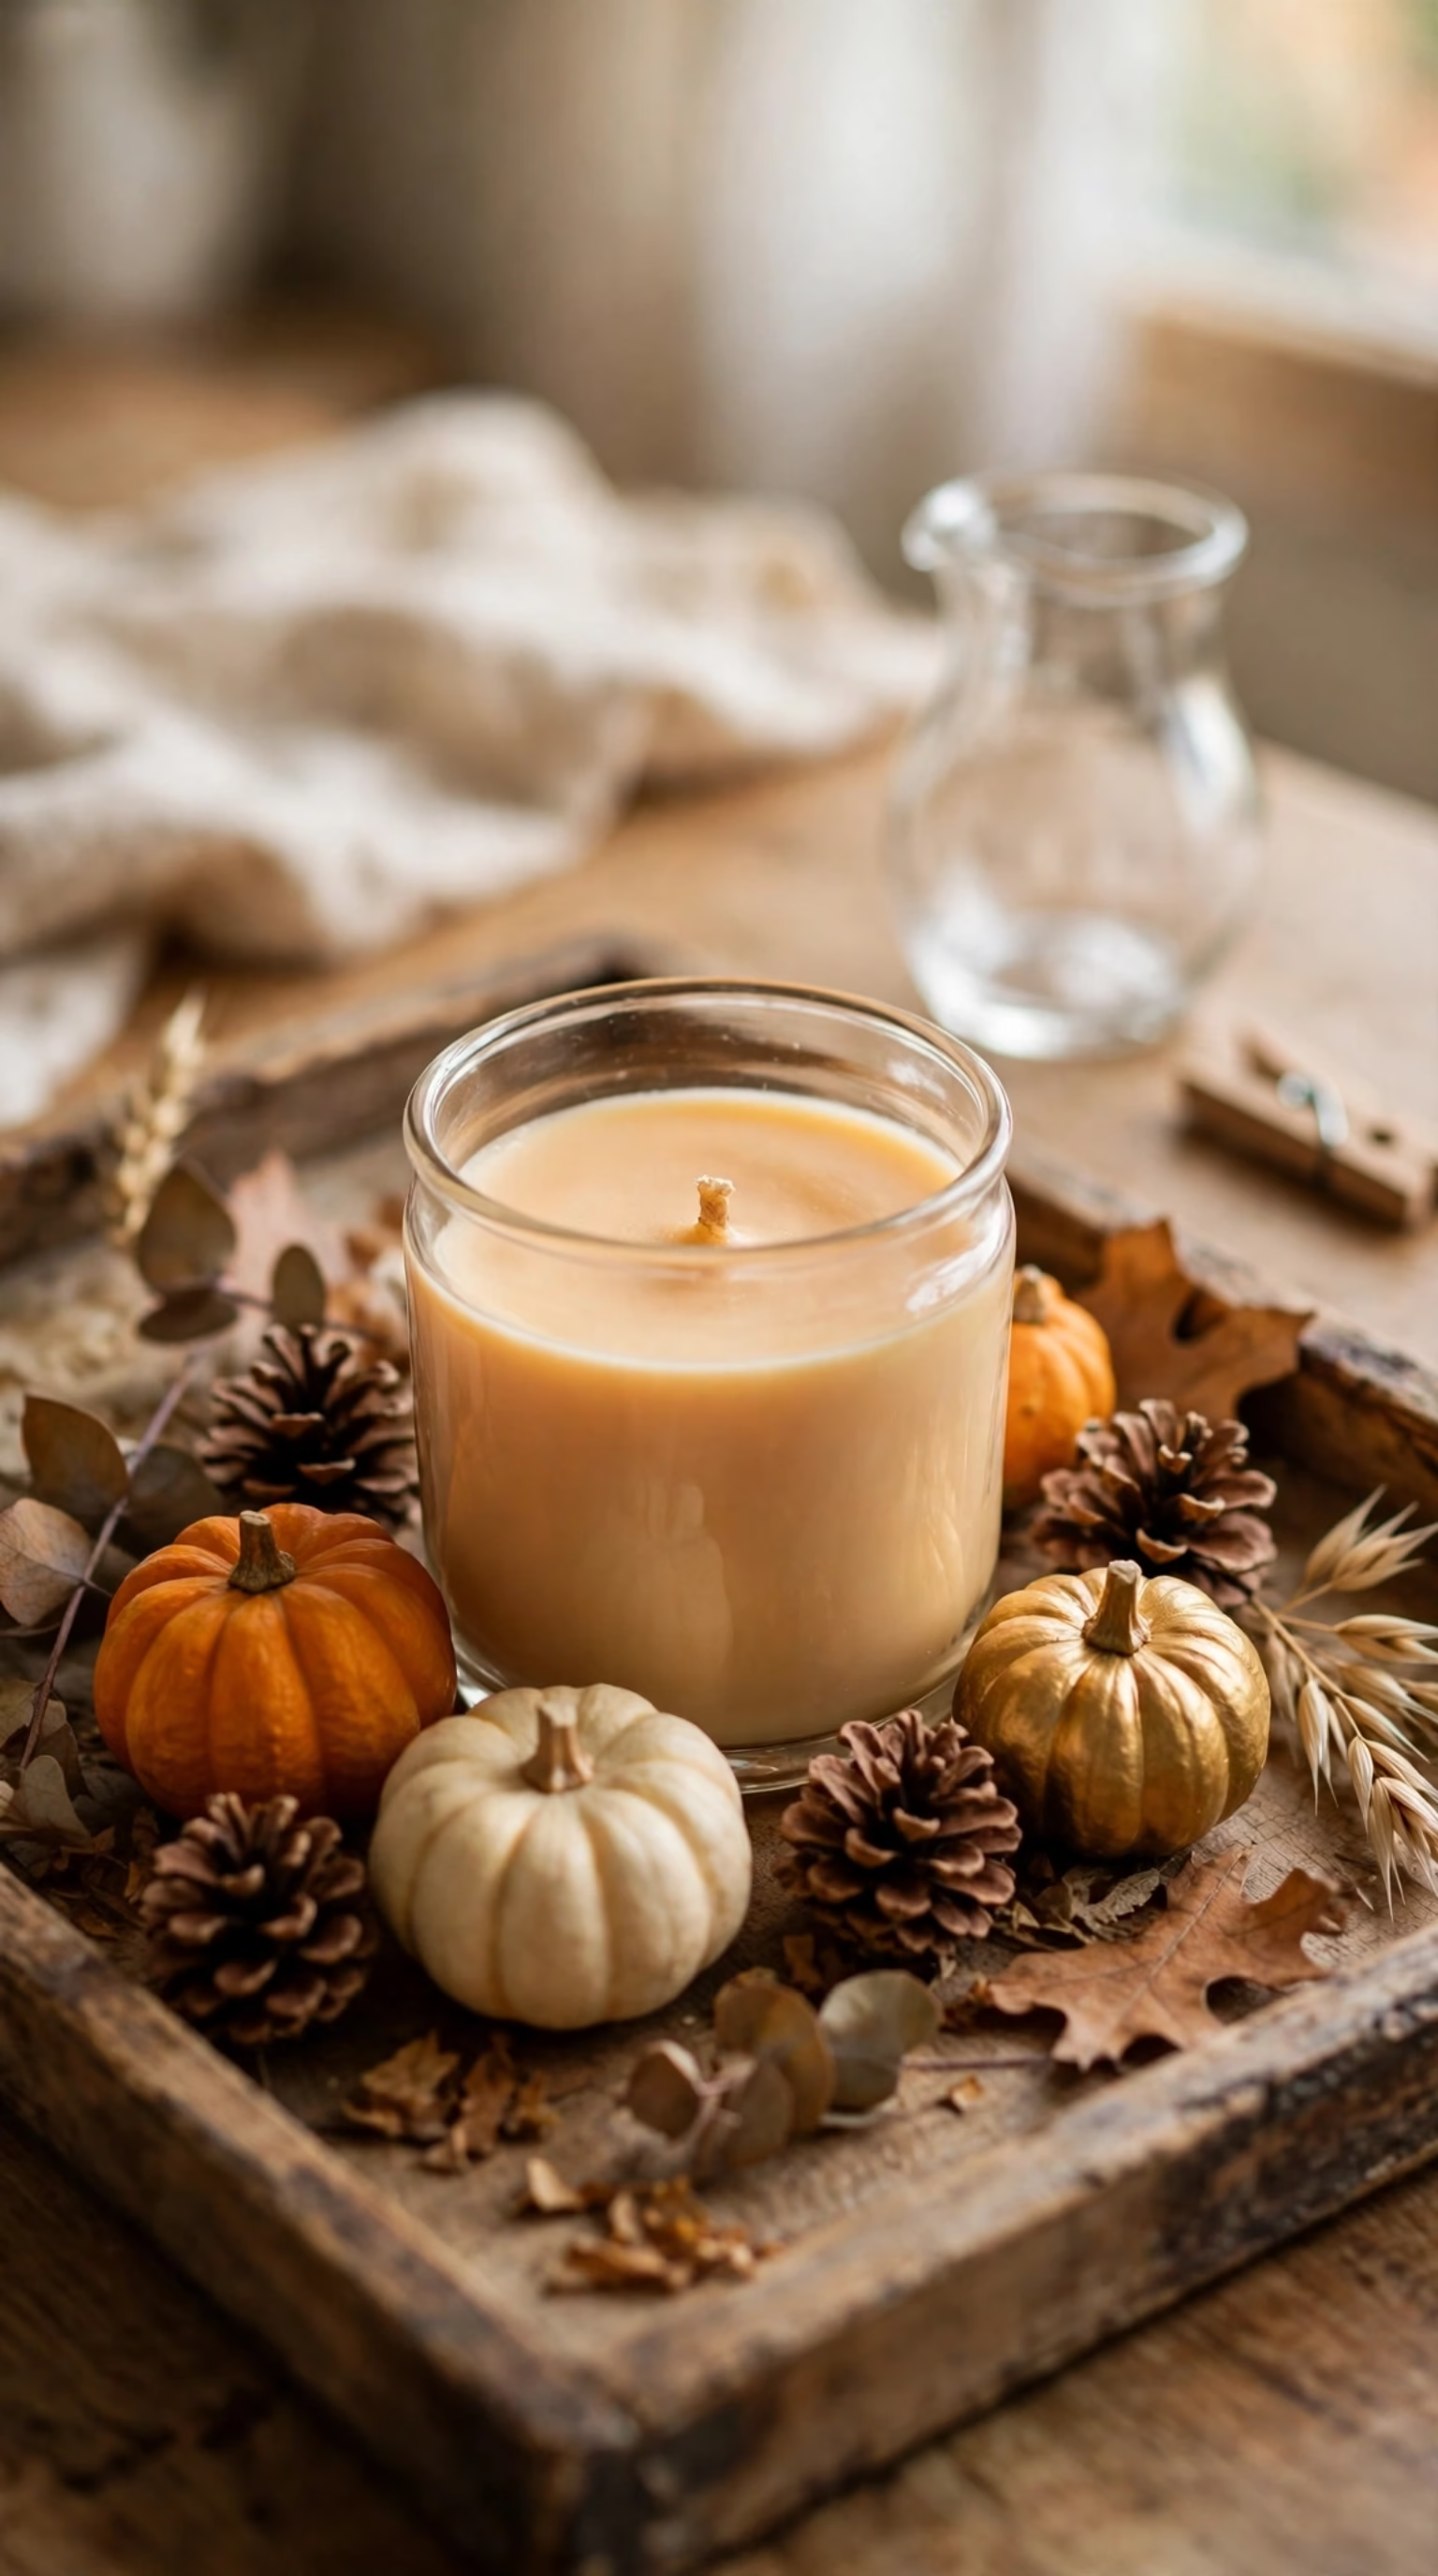
Scattered pieces on a coffee table can make the room feel messy. Grouping smaller seasonal pieces onto a single wooden tray keeps the display intentional and neat. A homemade scented soy candle in the center makes the house smell like baking pies and can also serve as a handmade gift.
Craft Supplies Required
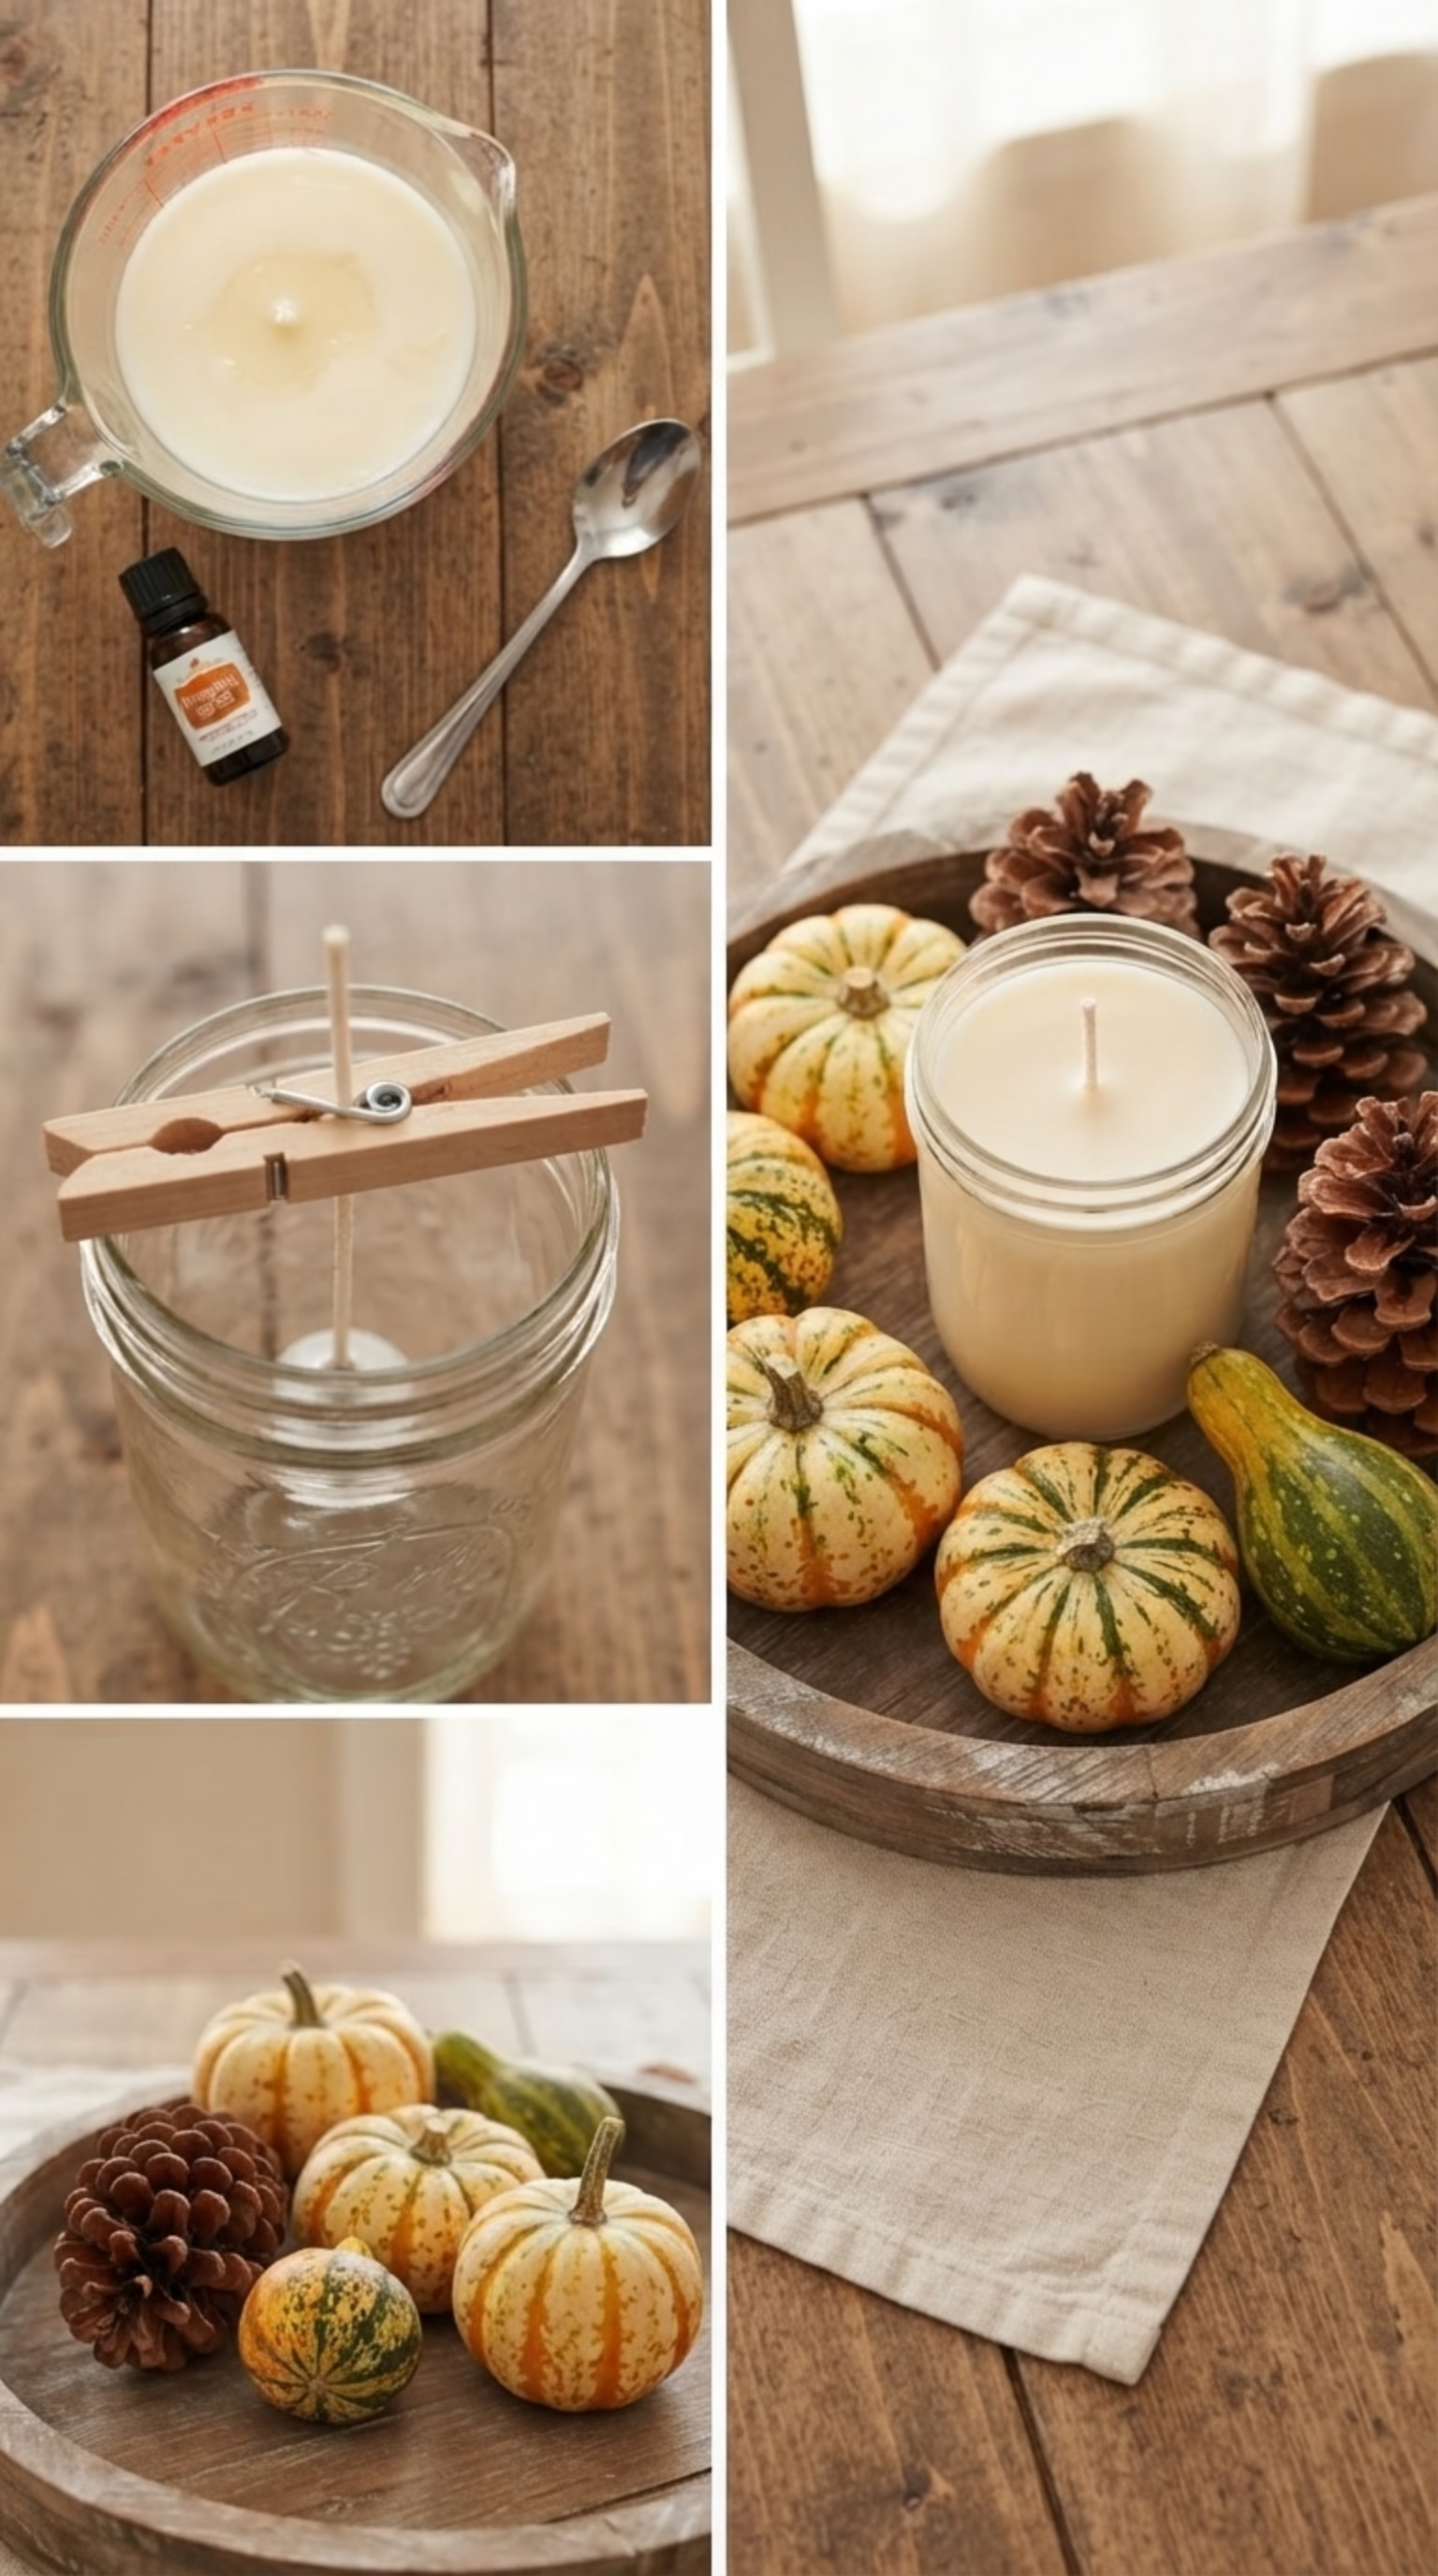
- One 8 ounce glass mason jar and one pre waxed cotton wick
- 2 cups of soy wax flakes and 1 tablespoon of pumpkin spice fragrance oil
- One clean rectangular wooden serving tray
- Four mini orange gourds and five dried natural pinecones
- One wooden clothespin and a microwave safe glass pouring pitcher
Candle Crafting & Tray Styling Steps
Glue the wick base to the bottom center of the jar and hold it upright by laying a clothespin across the jar top. Melt the soy wax in the glass pitcher in the microwave in 30 second bursts, then stir in the fragrance oil.
Pour the wax in slowly, allow it to harden for 4 hours, and trim the wick to a quarter inch. Set the candle on the tray and arrange the mini gourds and pinecones around its base.
Cozy Hearth & Warm String Lights
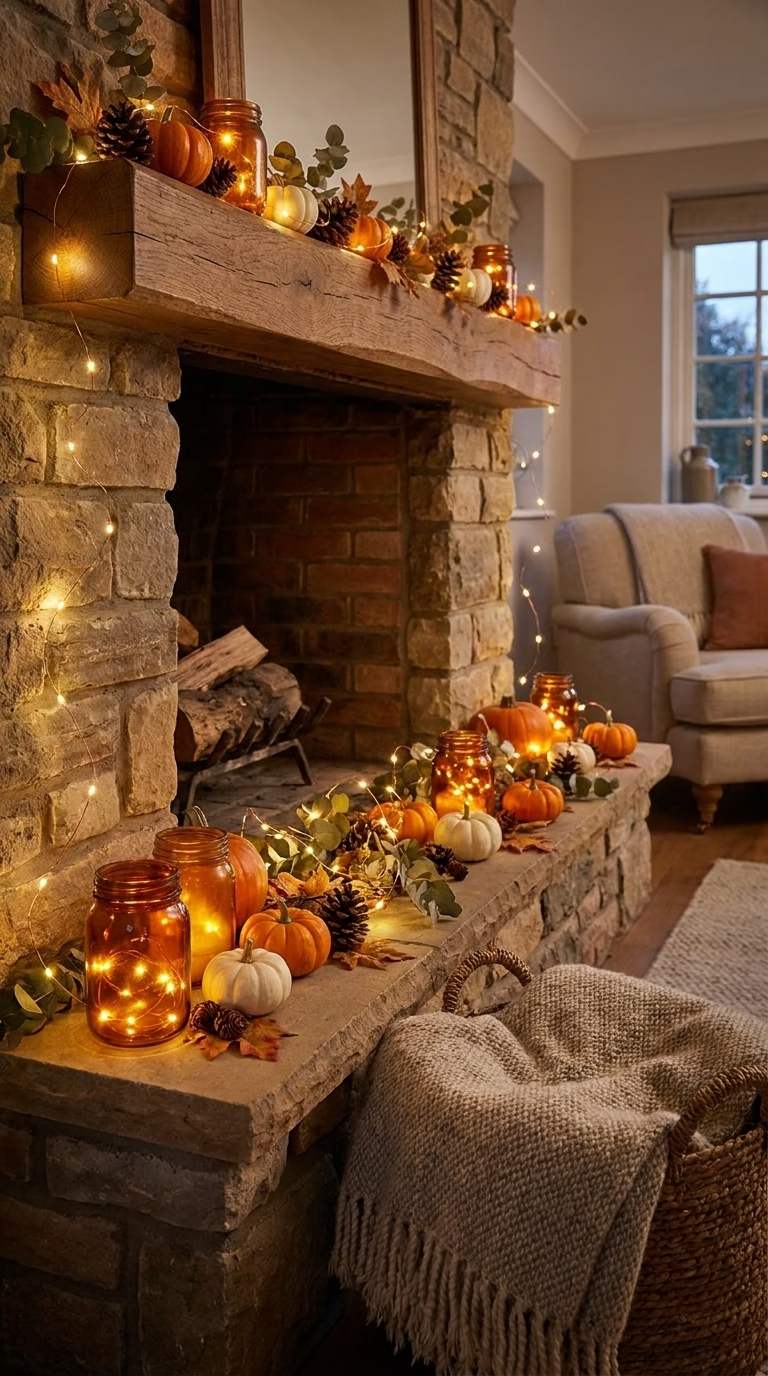
Early dark evenings in November can make an unlit fireplace look like a cold black void. Weaving battery operated copper wire lights around harvest accents is an instant fix for that gloomy corner.
A working chimney is not required, and tucking the battery pack inside an amber glass jar hides the plastic box while making the glass glow. For more mantel inspiration, see Easy Thanksgiving mantel decor ideas.

What You Need for This Setup
- 2 strands of battery operated warm white copper wire fairy lights
- 3 amber glass apothecary jars in varying heights
- 6 miniature orange pumpkins, real or faux
- 1 bundle of dried birch logs or faux fireplace branches
- Double sided clear adhesive putty
How to Assemble the Light Display
Place the birch logs at the back of a clean hearth or mantel shelf as a textured backdrop. Group the three amber jars on the left and right sides.
Coil one strand of fairy lights loosely inside the largest jar with the battery switch hidden at the bottom. Line miniature pumpkins along the front ledge, using a tiny dot of clear putty to stop stems from rolling.
Weave the second strand in and out of the pumpkins so the bulbs reflect off their skins.
Tall Foraged Amber Branch Vases
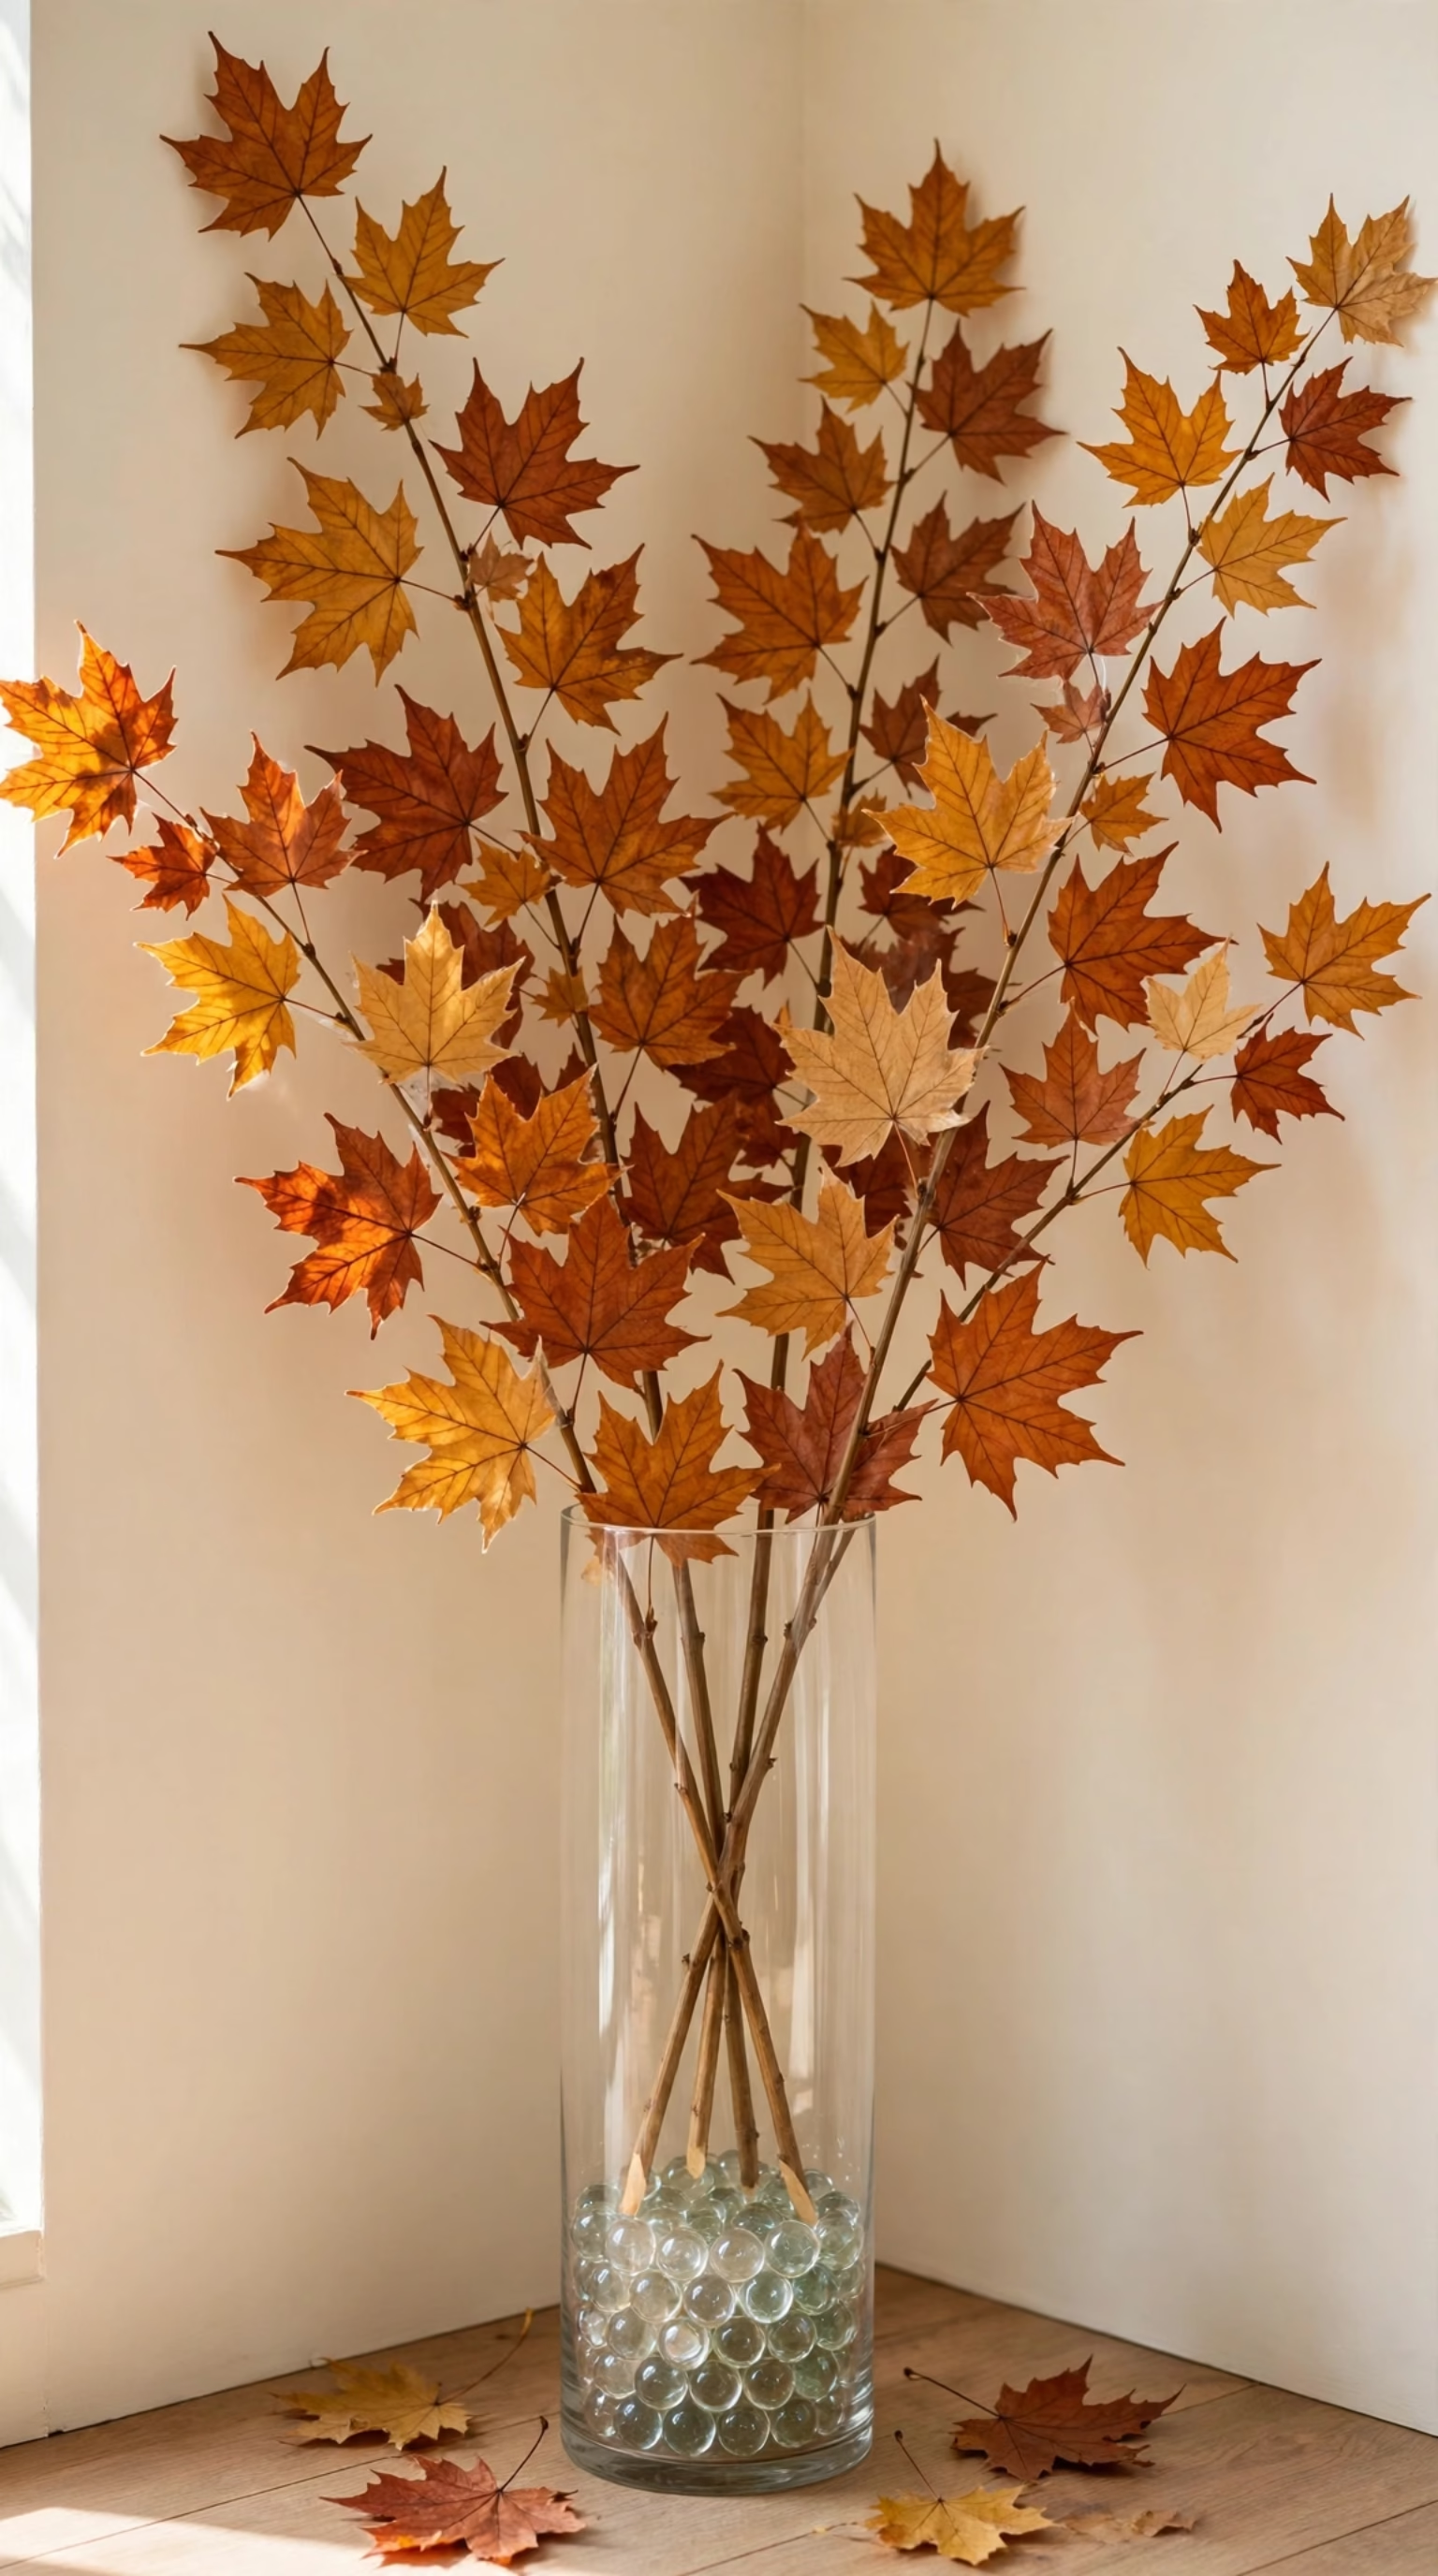
Empty corners by an entryway or dining room are often overlooked for fall gatherings. A tall floor vase filled with oversized leafy branches draws the eye upward and fills vertical space for free. For real branches cut outside, seal the leaves to prevent crumbling and help the vibrant colors last through December.
Gather These Craft Supplies
- One tall heavy transparent glass cylinder floor vase, 18 to 24 inches high
- 4 to 5 tall foraged branches, 3 to 4 feet long, with golden and orange leaves
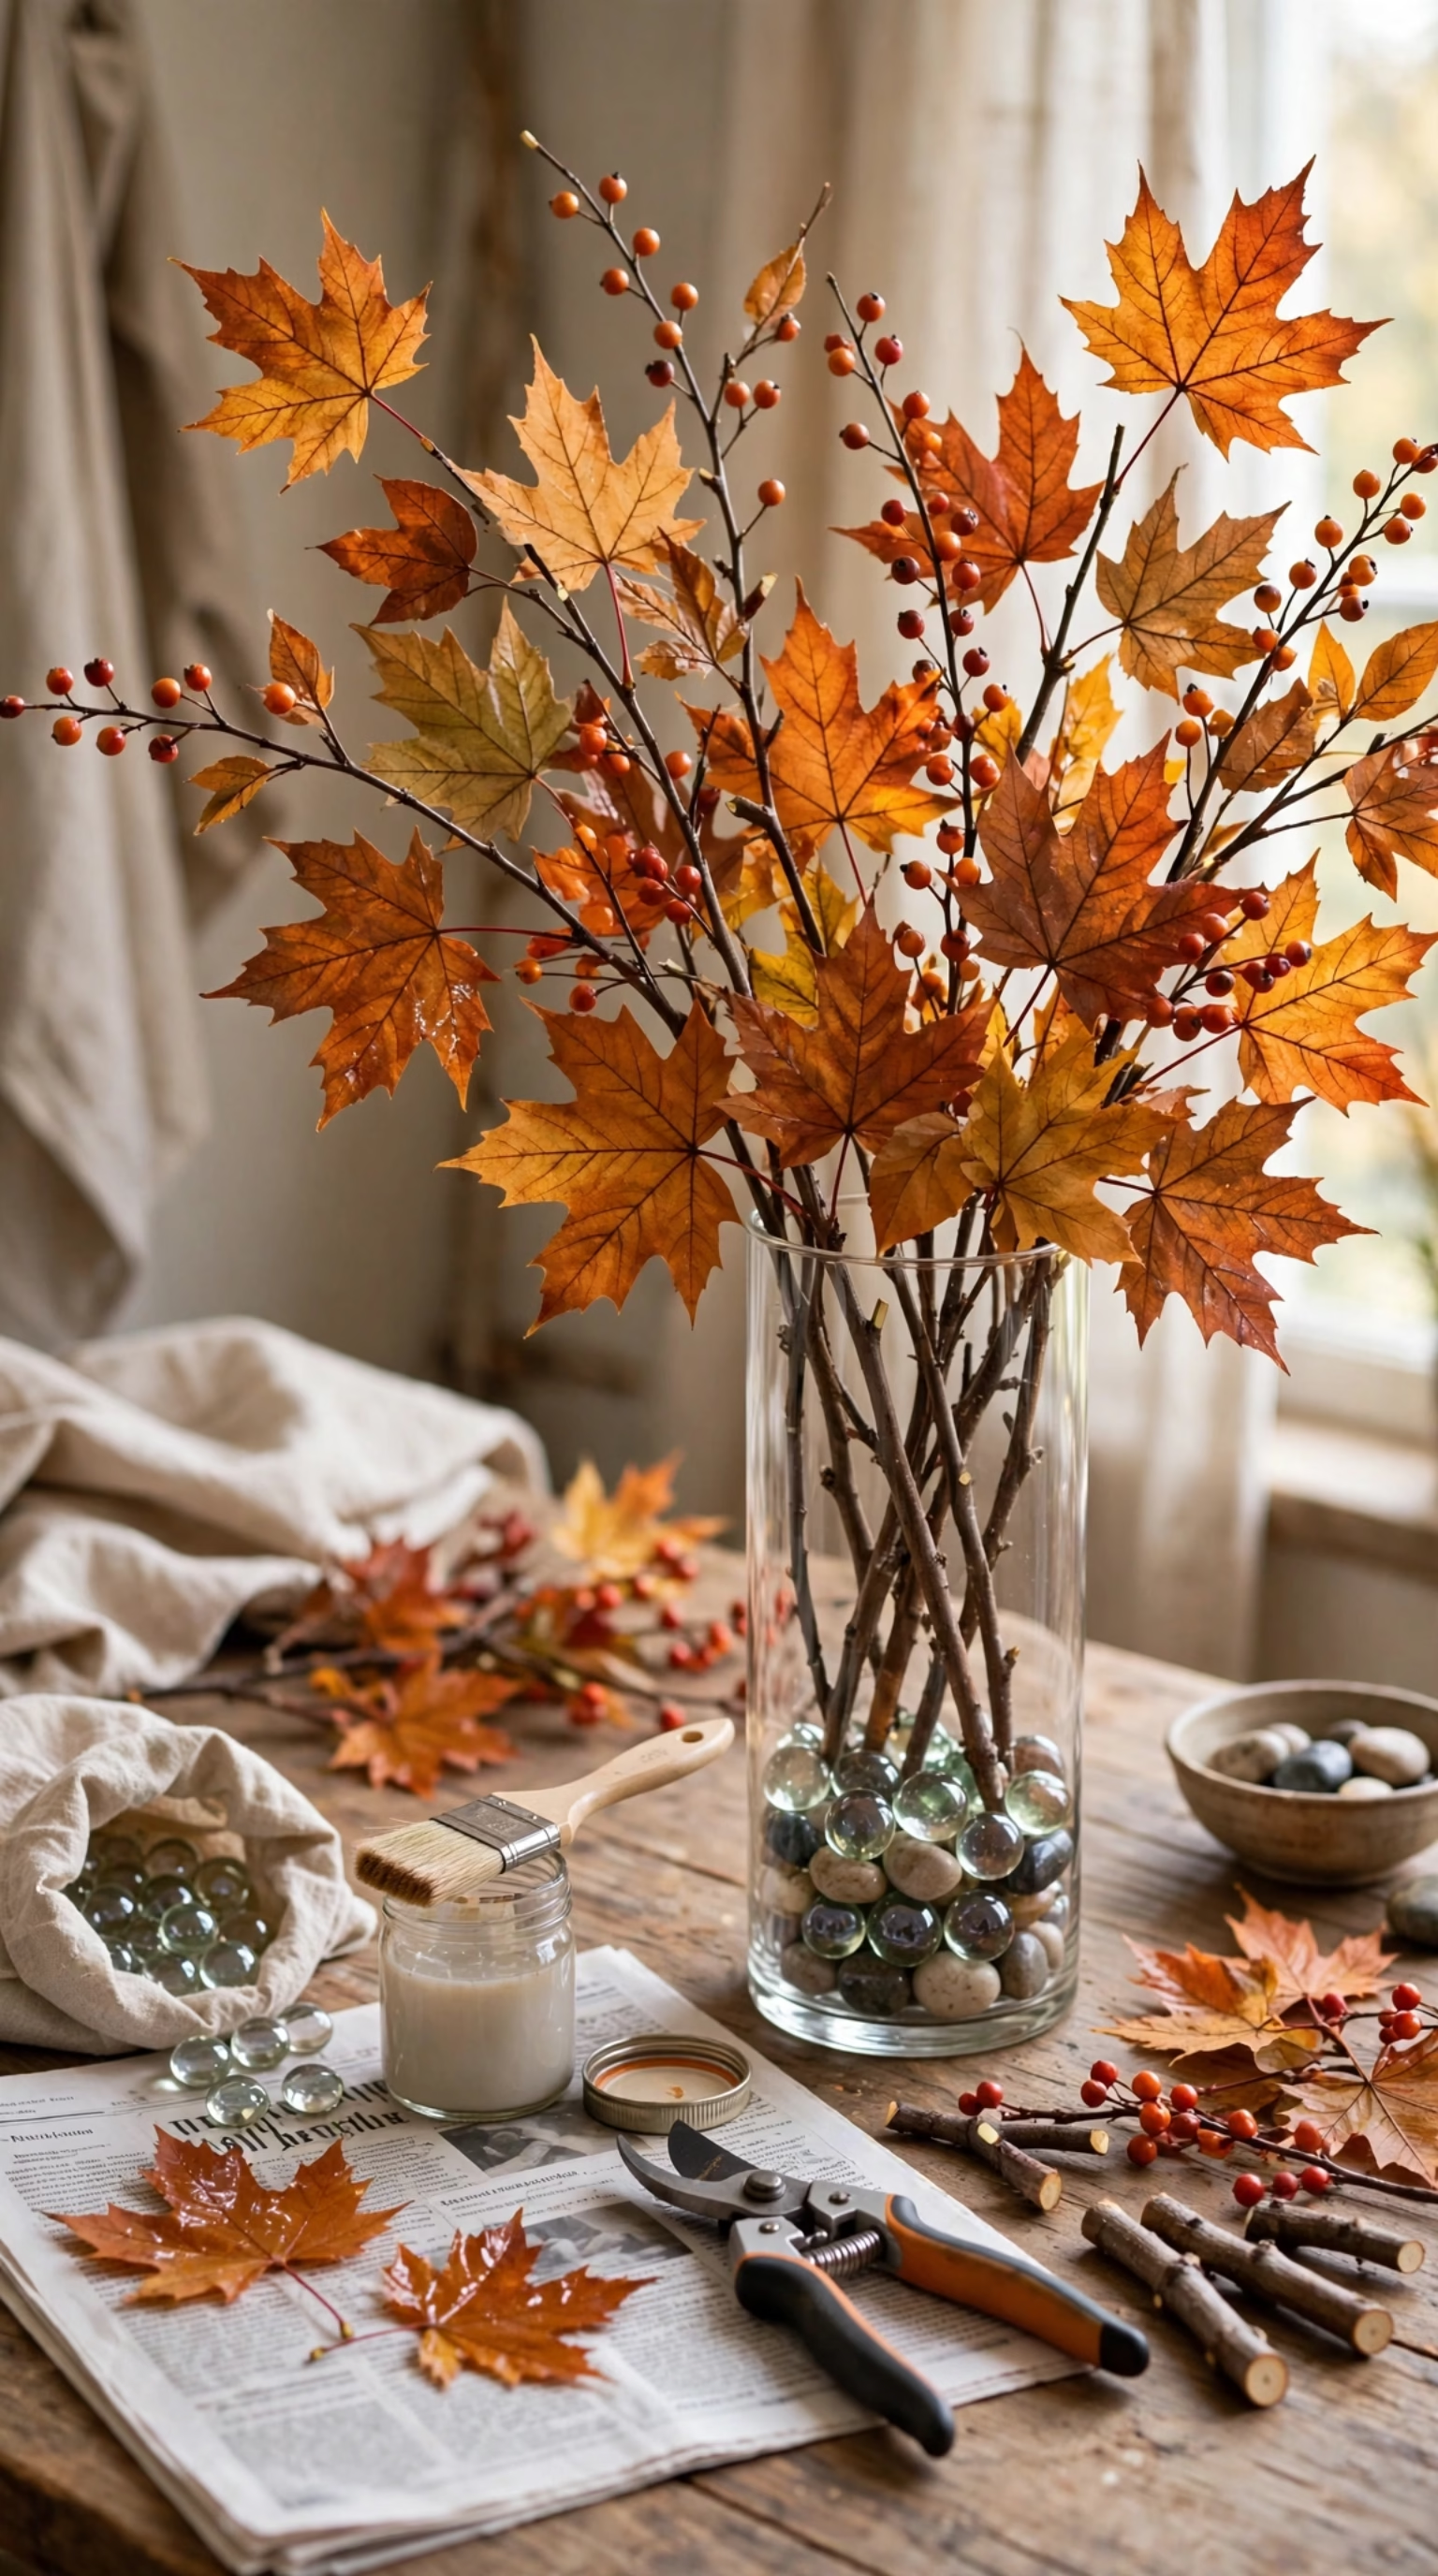
- Matte finish decoupage sealer and a wide foam brush
- Heavy floral pruning shears
- Clear glass marbles or smooth river stones to weight the vase
Preserving & Arranging Instructions
Angle cut the lower ends of the branches at 45 degrees with pruning shears. Place them on newspaper and coat each leaf on both sides with a thin coat of matte decoupage sealer to reduce shedding.
Allow two hours for the coating to dry fully, becoming clear while staying flexible. Add a 3 inch layer of clear glass marbles or river stones in the vase base.
Set the stems into the stones, overlapping them slightly, so the foliage spreads broadly against the wall.
Plaid & Gingham Fabric Pumpkin Banner
A handmade fabric banner can soften a bare brick fireplace or plain hallway mirror that looks unfinished for guests. It adds pattern without needing sewing machine skills. The example uses leftover flannel shirts and scrap burlap, mixing classic autumn plaids with small checks for a playful homemade look.

Banner Materials List
- Half yard scraps of orange plaid flannel, brown gingham cotton, and stiff natural burlap
- Two sheets of stiff craft cardstock and a black marker
- Fabric scissors and one bottle of no sew fabric glue
- Six feet of thick natural jute twine
- Twelve mini wooden craft clothespins and brown felt scraps for stems
Step by Step Banner Instructions
Draw and cut out a 6 inch pumpkin template from cardstock. Trace it onto the backs of the plaid, gingham, and burlap, and cut out 8 to 10 fabric pumpkins. Glue each fabric piece to a matching cardstock backing to prevent curling.
Add a small brown felt rectangle to the top back of each pumpkin as a stem. Hang the twine across the fireplace mantel and clip the pumpkins to it with mini wooden clothespins spaced 4 inches apart.
Modern Minimalist Painted Gourd Trio
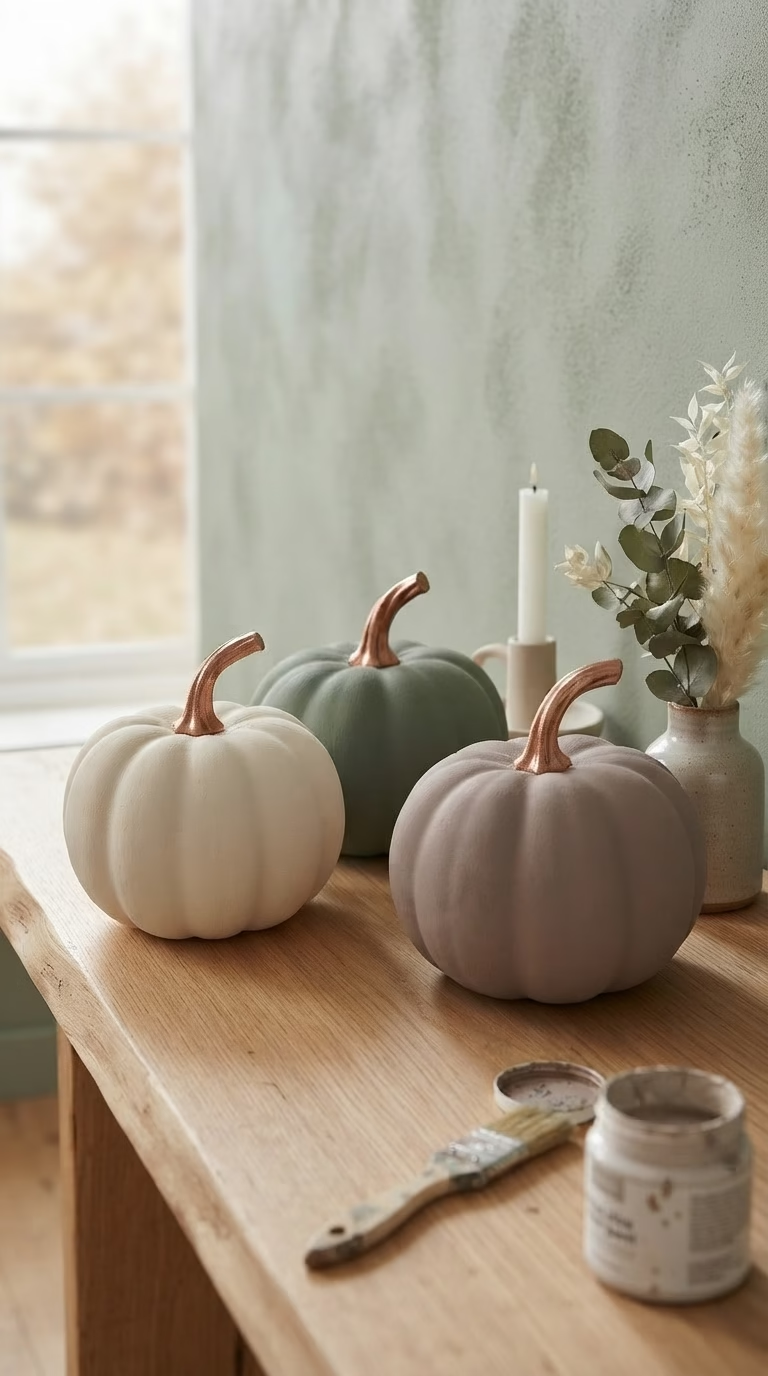
For rooms decorated in neutral whites, grays, and greens, bright orange plastic decor may clash. Painting real dried gourds in muted chalk tones creates modern Thanksgiving decor that matches the furniture. Chalk paint dries to an ultra matte, velvety finish that resembles expensive ceramic pottery, and a set of three can be completed quickly.

Supplies You Will Need
- Three dried gourds, real or faux, in different shapes and heights
- Matte chalk paint in warm cream, muted sage green, and soft taupe
- Two 1 inch flat synthetic paintbrushes
- Fine grit sandpaper, 220 grit
- Copper metallic leafing pen for the stems
Painting & Finishing Steps
Clean each gourd by wiping it with a dry cloth, then lightly scuff the surface with fine grit sandpaper to help the paint adhere. Paint the first gourd cream, the second sage green, and the third taupe, leaving the stems bare.
Allow the first coat to dry for 30 minutes before adding a second even coat to cover any orange showing through.
Color the natural stems with the copper metallic pen, then arrange the three gourds in a tight triangle on a floating wall shelf or as a dining table centerpiece.


Mason Jar Turkey Candle Holders
This project turns ordinary pantry mason jars into glowing turkey silhouettes. It is an easy way to involve children in holiday preparation without glitter. With a battery tea light inside, warm light shines through the twine ribs, adding a playful turkey accent and evening lighting to the kids table without real open flames near little hands.
Craft Supplies Required
- Three pint sized smooth clear glass mason jars
- One roll of medium weight brown jute twine
- Stiff craft felt sheets in red, yellow, orange, and dark brown
- Six large wiggle craft eyes and a hot glue gun
- Three battery operated flickering LED tea light candles
How to Craft the Turkey Jars
Glue the end of brown twine to the bottom edge of a mason jar, then wrap it tightly around the lower half until the glass is covered to the midpoint and glue the end in place.
Cut four large feather shapes from red, orange, and yellow felt, plus a small red teardrop for the wattle and an orange triangle beak.
Glue the felt feathers in a fan on the back upper glass, attach two wiggle eyes, the beak, and the wattle to the twine wrap on the front, and place an LED tea light inside.
Pinecone Turkey Place Card Holders
These handmade pinecone turkeys placed at each plate help avoid confusion about where guests should sit at holiday dinners and can be taken home as keepsakes. Because pinecones have layered scales, a name card needs no glue. Thick cardstock slid between the front scales will stand upright all night.

Supplies Needed for 6 Place Cards
- Six medium natural pinecones with wide bottoms that stand flat without rolling
- Craft felt scraps in mustard yellow, rust orange, burgundy, and tan
- One sheet of heavy cream cardstock and a black calligraphy pen
- Twelve small 5mm craft googly eyes
- Low temperature hot glue gun and sharp embroidery scissors
Assembly Instructions
Brush loose dirt from the pinecones and, if a cone wobbles, trim its bottom scales flat with scissors. For each pinecone, cut five 2 inch oval feathers from the mustard, rust, and burgundy felt, then tuck and hot glue their bottom tips into the back scales so they fan out like a turkey tail.
Glue two small eyes and a tiny folded tan felt beak onto the narrow front tip. Cut the cream cardstock into 1 by 3 inch rectangles, write guest names on them, and wedge each card into the top front scales.
Burlap “Give Thanks” Welcome Banner
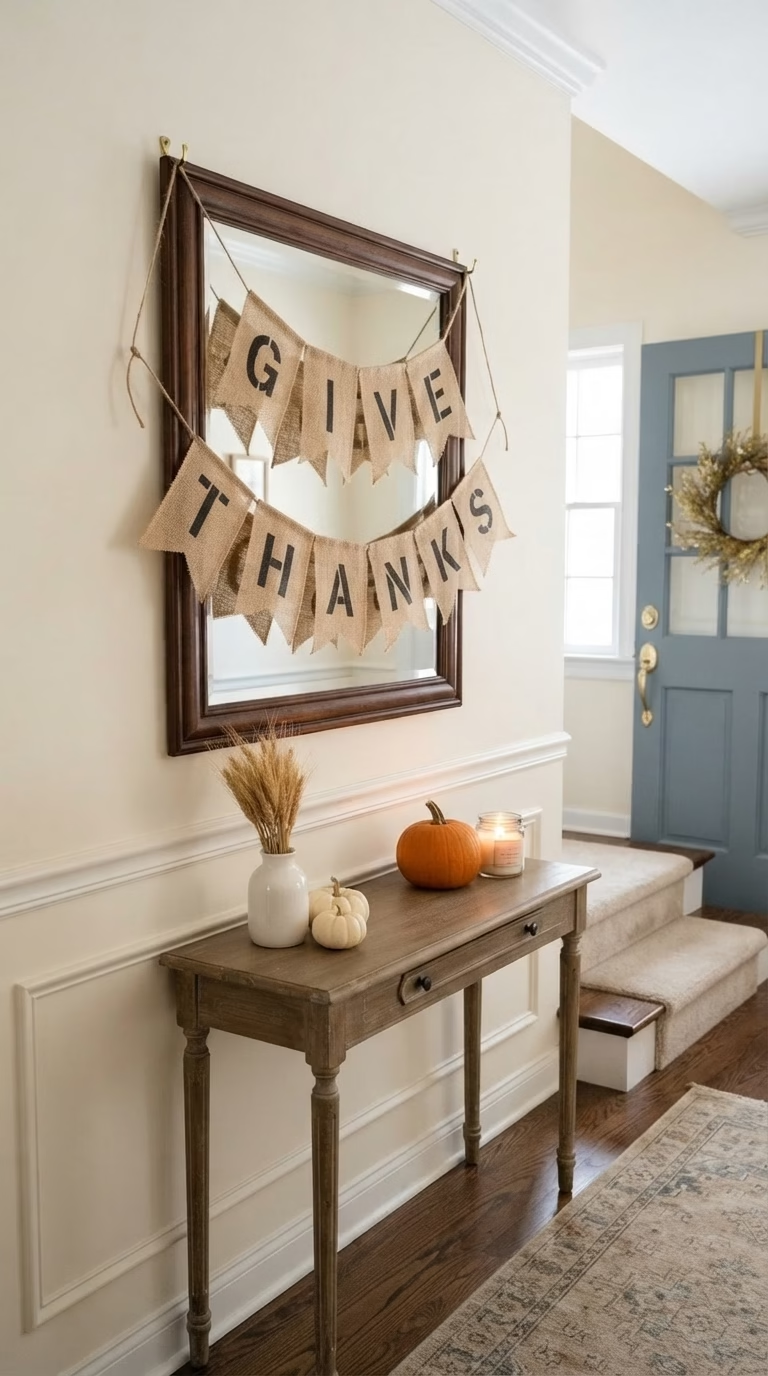
A stenciled burlap banner hung over an entry mirror or foyer wall helps the front entry feel welcoming as soon as guests arrive.
Because cut burlap frays quickly, sealing the edges with a thin line of clear glue prevents unraveling and allows the banner to be stored and reused the following year.
More inspiration for DIY Thanksgiving decorations for a warm home can help you plan the rest of the entry.

Materials Required
- 12 pre cut 5 by 7 inch stiffened burlap pennant flags, or half a yard of burlap fabric
- 2 inch modern sans serif alphabet letter stencils
- Matte black acrylic craft paint and a flat stencil dabber brush
- 8 feet of thick braided jute rope
- Clear fabric fray check liquid or watered down white school glue
How to Stencil & String the Banner
Place 10 burlap flags on wax paper and brush fray block liquid along their raw edges. Tape a letter stencil centered on each flag to spell GIVE THANKS, then use a dry stencil brush lightly loaded with black acrylic paint, blotted on a paper towel, dabbing vertically over the letters.
Remove the stencils immediately and let the paint dry completely for 1 hour. Fold the top half inch of each flag over the braided jute rope and hot glue the flap closed, keeping one blank flag at each end.
Dried Wheat Sheaf Bundle Centerpiece
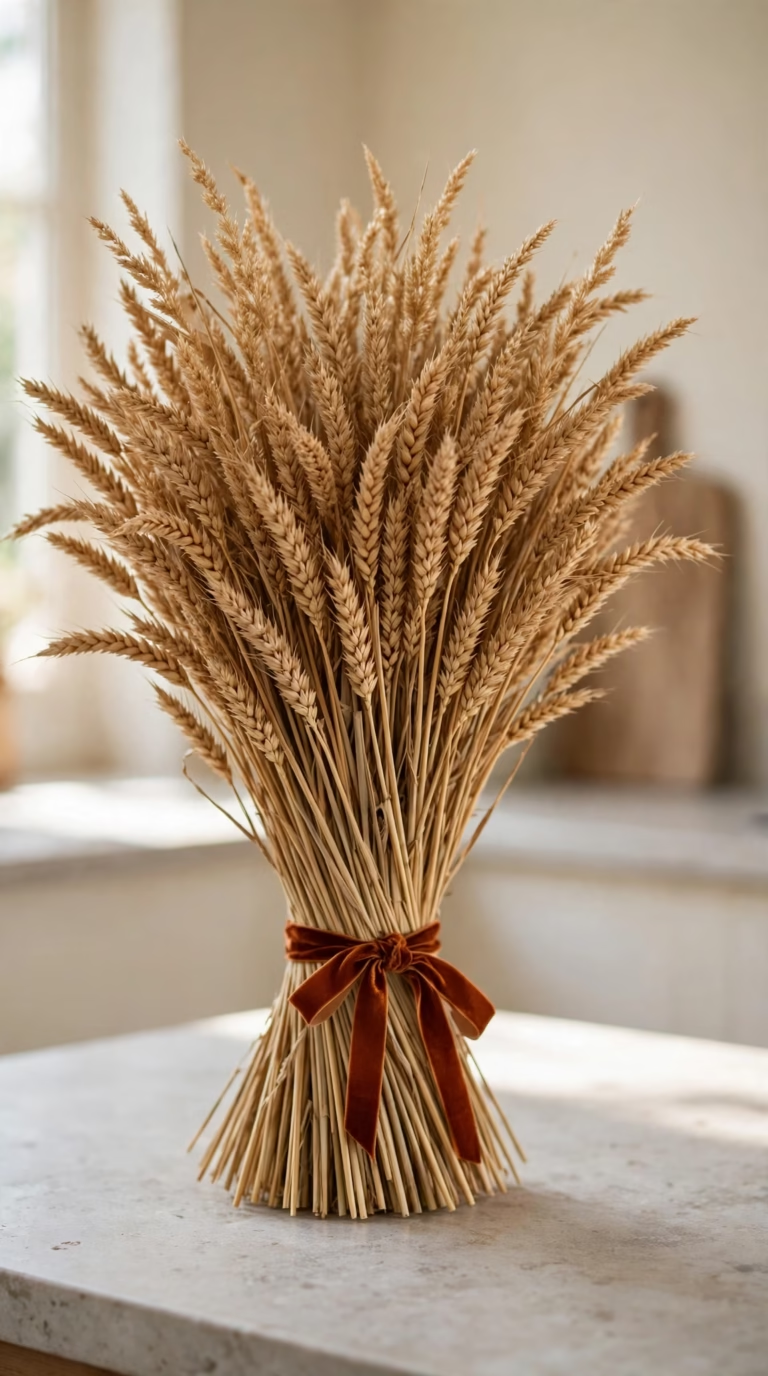
A thick bundle of dried golden wheat stalks tied with velvet ribbon makes a fast freestanding centerpiece for a kitchen island. It needs no water, does not wilt under hot kitchen lights, and adds natural texture against smooth stone countertops.
Its small footprint lets it remain on the island all month. Pair it with Practical DIY Thanksgiving kitchen decor ideas for a coordinated kitchen.
Supplies for the Wheat Bundle
- Two large bundles of natural dried golden bearded wheat, roughly 150 to 200 stems total
- Four thick rubber bands in tan or brown
- One yard of 2 inch wide burnt orange velvet ribbon
- Sharp heavy duty kitchen shears
- One long sewing pearl pin to secure the ribbon
Bundling & Shaping Steps
Unwrap both bundles and tap the bottom stems against a hard table to align the wheat heads evenly. Grip the stalks about 5 inches above the cut ends and bind the middle tightly with two thick rubber bands.
Twist the lower stems slightly in the opposite direction from the top, fanning the base outward like a tripod so the sheaf stands on its own. Trim the bottom flat with heavy duty shears until it sits level without leaning.
Wrap the velvet ribbon twice around the bands to conceal them, tie a neat knot with trailing tails, and fasten the center with the pearl pin.
Modern Metallic Painted Pumpkin Stacks
This idea offers a more upscale, contemporary option by replacing rustic wood with black metal and gold paint. Spray painted faux pumpkins are stacked on matte black taper candlesticks to add height on a mantel or dining table. The lightweight foam pumpkins balance easily on the narrow holders when secured with floral putty.
Craft Materials List
- Six small to medium lightweight foam craft pumpkins with removable stems
- One can of metallic gold spray paint and one can of matte crisp white spray paint
- Three matte black metal taper candle holders in staggered heights of 6, 8, and 10 inches
- Sticky floral mounting putty and a toothpick
- Hot glue gun
Spray Painting & Stacking Steps
Remove the plastic stems from the foam pumpkins and insert a toothpick in the base of each one to hold it during painting.
In a well ventilated area, apply two light coats of metallic gold spray paint to three pumpkins and matte white paint to the remaining three.
Coat all six detached stems in metallic gold, allow everything to dry for 1 hour, then glue stems back onto three pumpkins.
Place a thick ball of floral mounting putty on the top cup of each black metal candlestick and press a pumpkin without a stem firmly onto each pedestal.
Add hot glue to the top of the lower pumpkins and stack a stemmed pumpkin on each, forming three two tiered towers.
Cinnamon Stick Pillar Candle Wraps
Wrapping whole cinnamon sticks around an unscented pillar candle provides a subtle warm spice scent as the wax warms, avoiding the artificial, overpowering smell of some scented store candles.
The wrap also turns a plain grocery store candle into a textured rustic accent for a bathroom counter or hallway table. Keep the sticks slightly below the top rim so the flame remains clear.

Supplies Needed
- 2 unscented cream pillar candles, 3 inches wide by 4 inches tall
- 2 large bulk bags of 4 inch whole dried cinnamon sticks
- 4 thick rubber bands
- 2 yards of natural braided jute twine and a few dried orange slices
- Low temperature hot glue gun
Wrapping Instructions
Place two rubber bands around the middle of each unscented pillar candle. Slide cinnamon sticks vertically beneath the bands all the way around until the wax sides are fully covered.
Tap the candle gently on a flat counter to align the bottom ends of the sticks flush and level with the base. Wrap jute twine tightly four times around the center of the sticks over the bands, then snip and remove the rubber bands.
Finish with a double knot at the front and tuck a dried orange slice under the twine.
Paper Fan Turkey Window Displays
Accordion fans made from heavyweight cardstock create crisp, geometric turkey silhouettes that hang against front windows and catch afternoon light. Unlike flimsy tissue paper that tears easily, thick scrapbook paper keeps sharp pleats throughout the season. The project offers large visual impact on a budget using only paper and glue.

Paper Craft Supplies
- Six sheets of 12 by 12 inch heavyweight cardstock in brown, terracotta, mustard yellow, and cream
- One bone folder tool, or the back of a metal butter knife, and a ruler
- Double sided strong craft tape and a hot glue gun
- Clear nylon fishing line and two window suction cup hooks
- One 4 inch brown cardstock circle and small orange and red paper scraps
Folding & Hanging Steps
Score and fold four colored sheets into half inch accordion pleats using the ruler and bone folder. Fold each pleated sheet in half and tape the inner touching edges with double sided tape to form four small fan wedges.
Tape the four wedges side by side into one large semi circle fan for the tail feathers. Glue the 4 inch brown cardstock circle onto the lower front center, then add two white paper eyes, an orange triangle beak, and a red wattle.
Tie clear fishing line through a tiny hole punched at the top center feather and hang from a suction cup hook on the living room window.
Autumn Acorn Mason Jar Votives
Small glass votives filled in the bottom third with real dried acorns provide a woodland base for tea light candles and quick ambient lighting along a long folding table or kitchen counter, taking five minutes to assemble.
Acorns gathered from a backyard should be baked first at 200 degrees F for an hour to dry the shells and prevent bugs reaching the dinner table.

Supplies You Will Need
- 4 half pint wide mouth clear glass mason jars
- 4 cups of clean oven dried natural acorns that still have their caps
- 4 white unscented tea light candles in metal cups, or flameless LED tea lights
- 1 roll of thin 1/4 inch gingham check ribbon
- Craft scissors and a long candle lighter
Quick Votive Assembly Steps
Check the dried acorns first and reattach any loose caps with a tiny dot of hot glue. Add about one cup of acorns to the bottom of each clean half pint jar and shake lightly so they sit evenly, then nestle a metal cup tea light in the center with its top rim level.
Cut four 12 inch pieces of the thin gingham ribbon, tie a small bow around the threaded neck of each jar, arrange the votives evenly along the center of a dining table or on a windowsill, and light them just before guests arrive.


