
15 Practical DIY Thanksgiving Kitchen Decor Ideas That Actually Leave Room to Cook
Prepping a twenty pound turkey can leave almost no room for rolling pie dough, chopping vegetables, or clearing dishes. This collection favors vertical spots, trays, and movable accents, so your kitchen can feel warm and festive while still working hard on Thanksgiving Day.
Choose just two or three projects, not all fifteen at once, and start with ideas that clear fast. Explore Thanksgiving decor ideas and Practical DIY Thanksgiving kitchen decor ideas to find a look that fits your cabinets, windows, and island.
Jump to:
- 15 Practical DIY Thanksgiving Kitchen Decor Ideas That Actually Leave Room to Cook
- 1. DIY Mason Jar Turkey Centerpiece
- Supplies You Need for This Craft
- How to Assemble the Mason Jar Turkeys
- 2. Thankful Garland for the Window
- Materials for the Window Banner
- Step by Step Crafting Instructions
- 3. Festive Cabinet Wreath Hangers
- What You Need to Make Mini Wreaths
- How to Craft and Hang Them
- 4. Pumpkin and Spice Counter Tray
- Supplies for the Spice Tray
- How to Prep and Style the Tray
- 5. Cinnamon Stick Candle Holders ️
- Materials Needed for the Candle Craft
- Crafting the Cinnamon Luminaries
- 6. Burlap Utensil Holders for Dinner
- Supplies for the Utensil Pouches
- How to Make the Silverware Pockets
- 7. Fall Leaf Kitchen Rug or Mat
- Materials Needed for the Stamped Rug
- How to Stamp the Leaf Pattern
- 8. Acorn and Fairy Light Apothecary Jars
- Supplies for the Lit Acorn Jars
- How to Assemble the Glowing Canisters
- 9. Corn Husk Votive Holders ️
- What You Need for Corn Husk Luminaries
- Step by Step Assembly
- 10. Thanksgiving Tiered Shelf Display
- Materials for the Shelf Craft Set
- How to Craft and Style the Shelf
- 11. Embroidered Flour Sack Towels
- Supplies for Custom Kitchen Towels
- How to Stitch the Towels
- 12. Mini Indian Corn Bunches
- What You Need for the Corn Swags
- How to Bundle the Ornamental Corn
- 13. Wheat Sheaf Table Centerpiece
- Supplies for the Freestanding Wheat Bundle
- How to Bind and Shape the Sheaf
- 14. Wood Slice Thanksgiving Coasters
- Materials Needed for Wood Slice Coasters
- How to Burn and Seal the Coasters
- 15. Paper Pumpkin Place Cards ️
- Supplies for 3D Paper Pumpkins
- How to Fold and Assemble the Place Cards
1. DIY Mason Jar Turkey Centerpiece
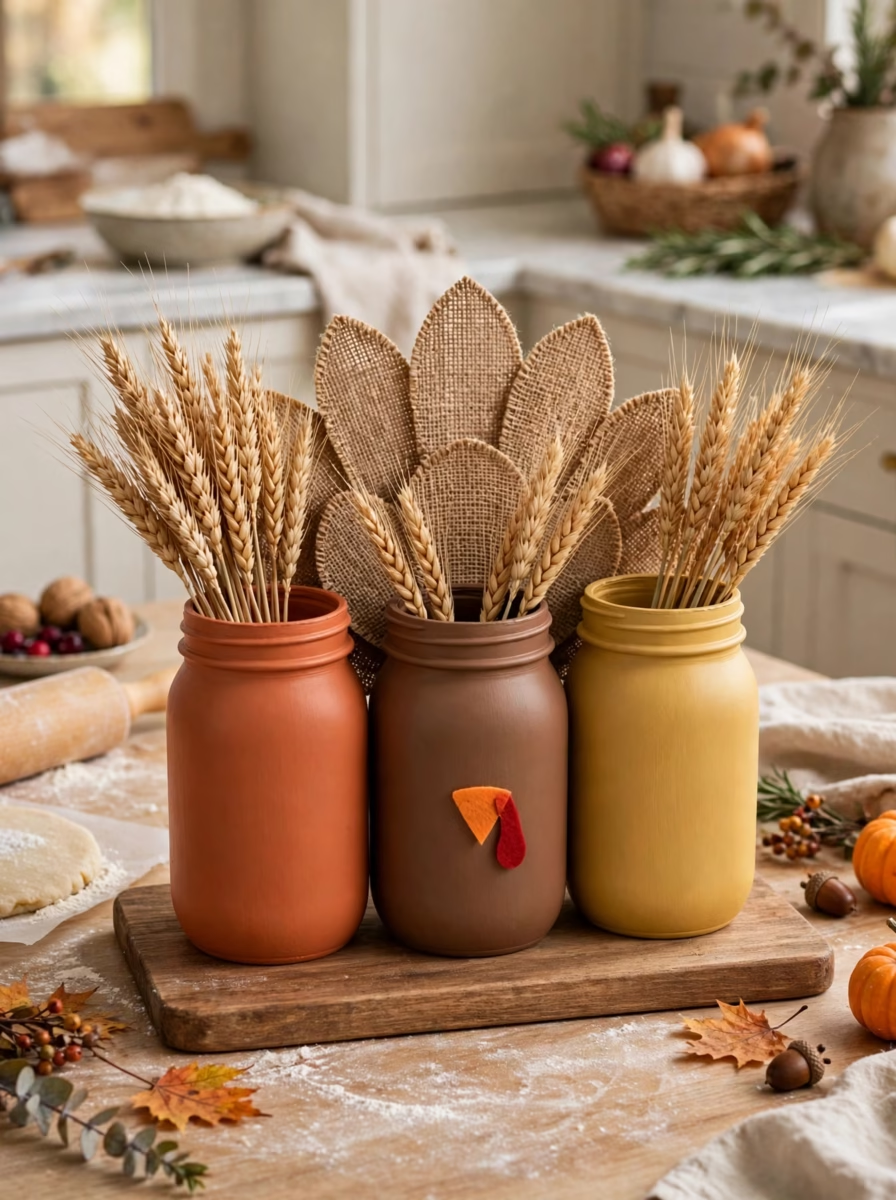
This centerpiece moves in ten seconds. Three painted jars on a small board give harvest color without blocking pie dough or chopping.
Supplies You Need for This Craft
- Three clean quart size mason jars
- Chalk paint in burnt orange, mustard yellow, and deep brown
- Stiff burlap and orange felt
- A hot glue gun
- Faux wheat stalks
How to Assemble the Mason Jar Turkeys
Paint each jar twice and dry it for an hour. Fan five burlap feathers behind the middle brown jar, add a felt beak and painted dot eyes, then fill the jars with wheat stalks.
2. Thankful Garland for the Window
Counter space is precious in November, so this garland goes above the sink. It lifts the eye upward and catches afternoon light while you wash dishes. For more space saving ideas, see DIY Thanksgiving kitchen decorations that save counter space.
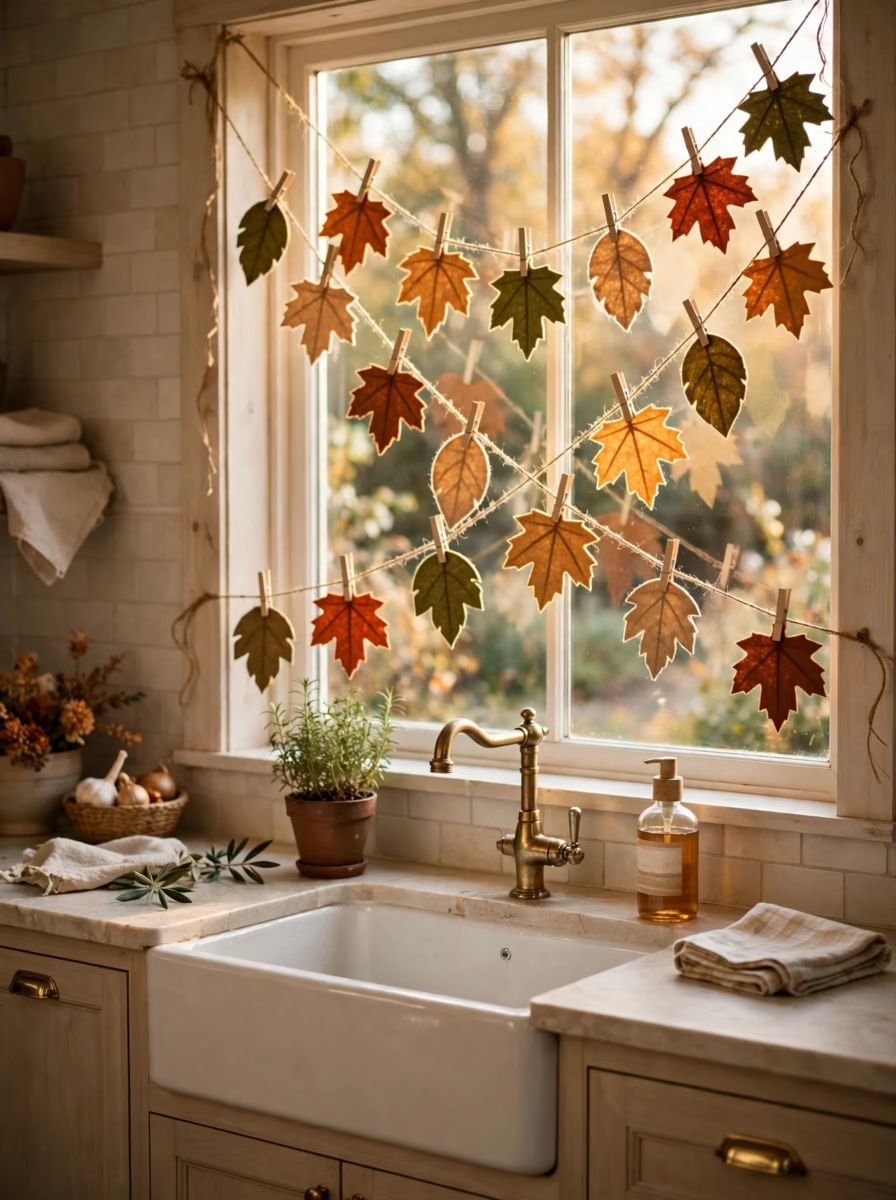
Materials for the Window Banner
- Thick kraft cardstock
- Wool felt in rust, olive, and gold
- Natural jute twine
- Fifteen mini wooden clothespins
- Black fine tip marker and fabric scissors
- A leaf template
Step by Step Crafting Instructions
Cut fifteen maple and oak leaves from kraft paper and felt. Write grateful notes on the kraft leaves, clip them alternately to twine with extra length at each end, and hang the twine from removable hooks at the top window corners.
3. Festive Cabinet Wreath Hangers
When slow cookers and mixing bowls fill lower surfaces, upper cabinets offer free space. Mini wreaths at eye level add holiday color without using prep space.
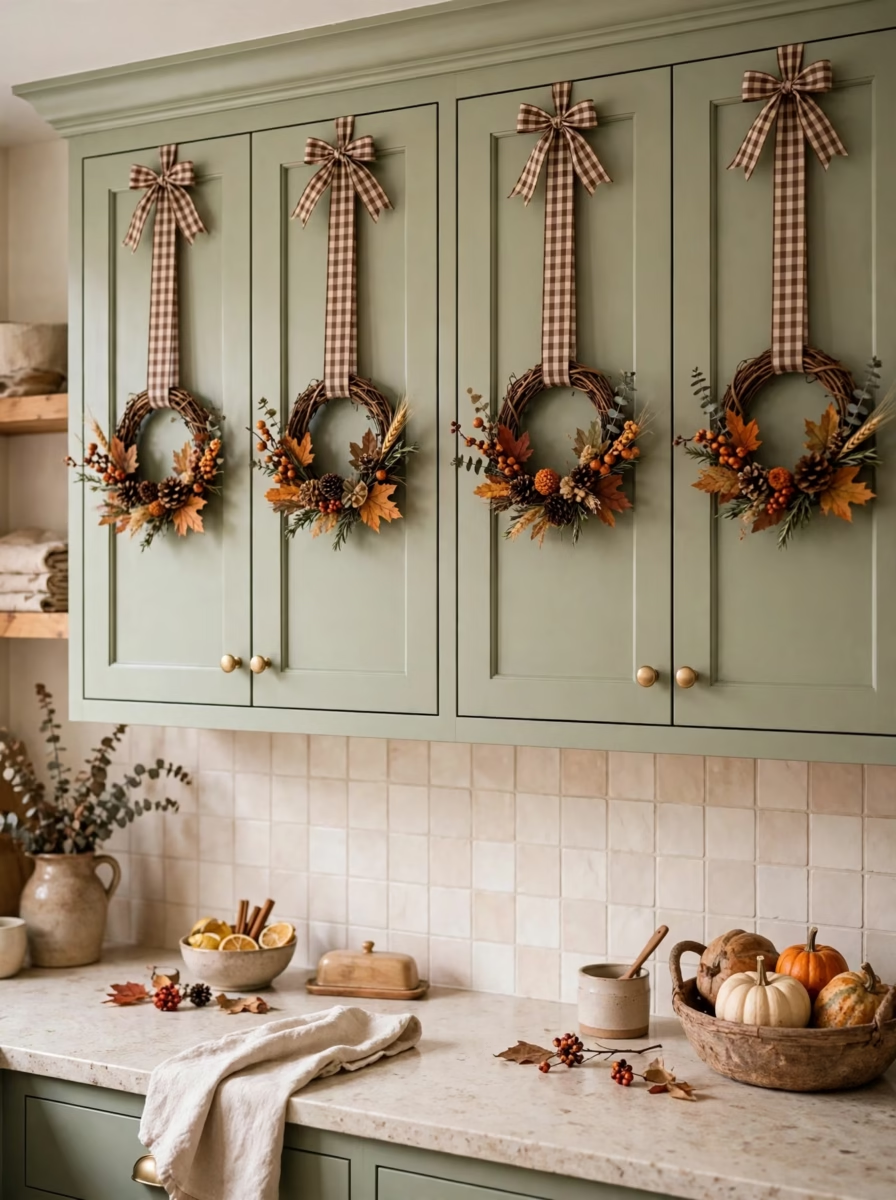
What You Need to Make Mini Wreaths
- Six 6 inch grapevine bases
- Small pinecones and faux rosehips
- Brown gingham ribbon
- Floral wire and a hot glue gun
- Masking tape or flat command strips
How to Craft and Hang Them
Wire rosehips to the bottom right curve, glue three pinecones over the wire, loop a 24 inch ribbon through the top, and secure the ends inside the door so the wreath hangs over the panel, not the handle.
4. Pumpkin and Spice Counter Tray
Loose gourds and botanicals can look like clutter, especially near mail and keys. A two tier wooden stand turns them into one intentional focal point.
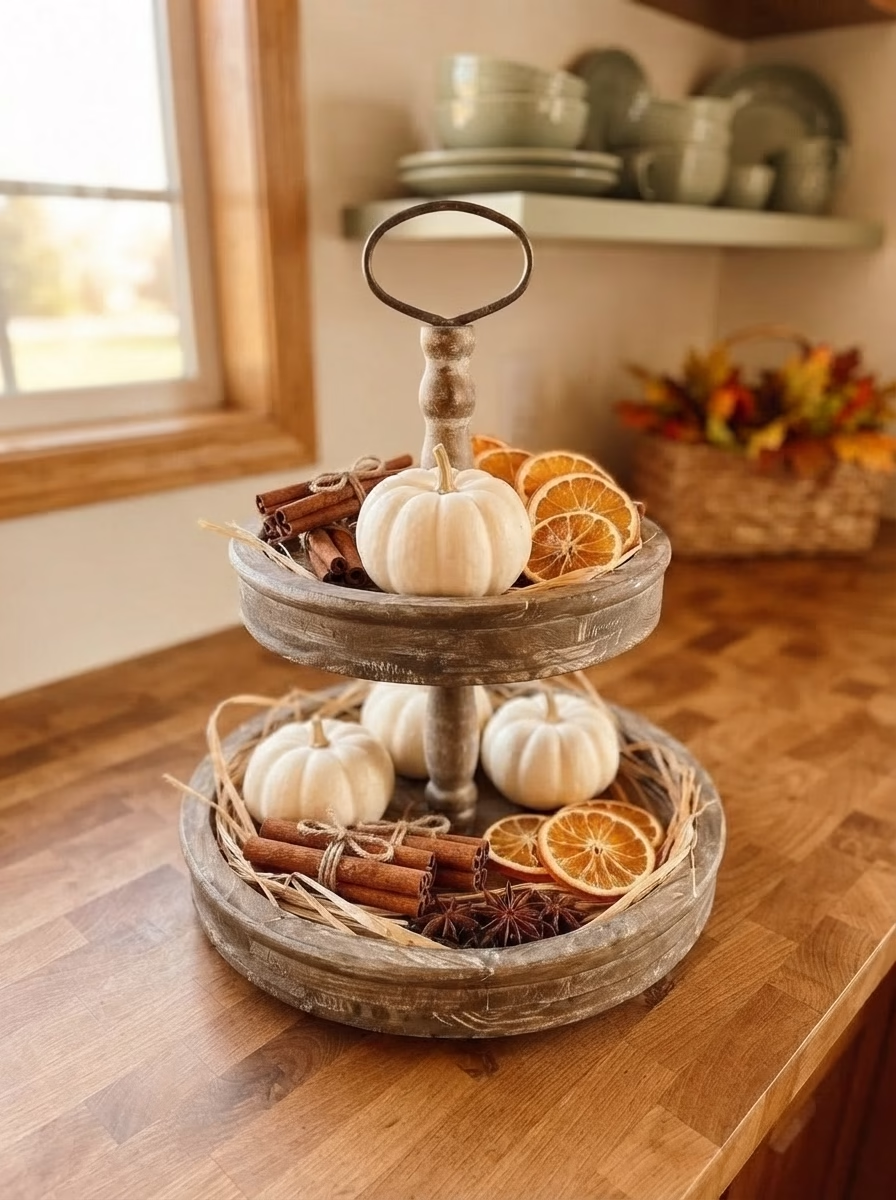
Supplies for the Spice Tray
- A two tier wooden stand with raised edges
- Two fresh navel oranges, sliced thin
- Four mini white Baby Boo pumpkins
- Cinnamon sticks and star anise
- Raffia or Spanish moss
How to Prep and Style the Tray
Dry orange slices at 200 degrees for three hours, turning halfway, until fully dry. Line both tiers with raffia, stagger two pumpkins per tier, tuck cinnamon bundles into gaps, and scatter orange wheels and star anise around them.
5. Cinnamon Stick Candle Holders ️
After dishes are done and overhead lights are off, these candles give a soft glow. The project takes under fifteen minutes, and warm wax releases a subtle spicy scent.
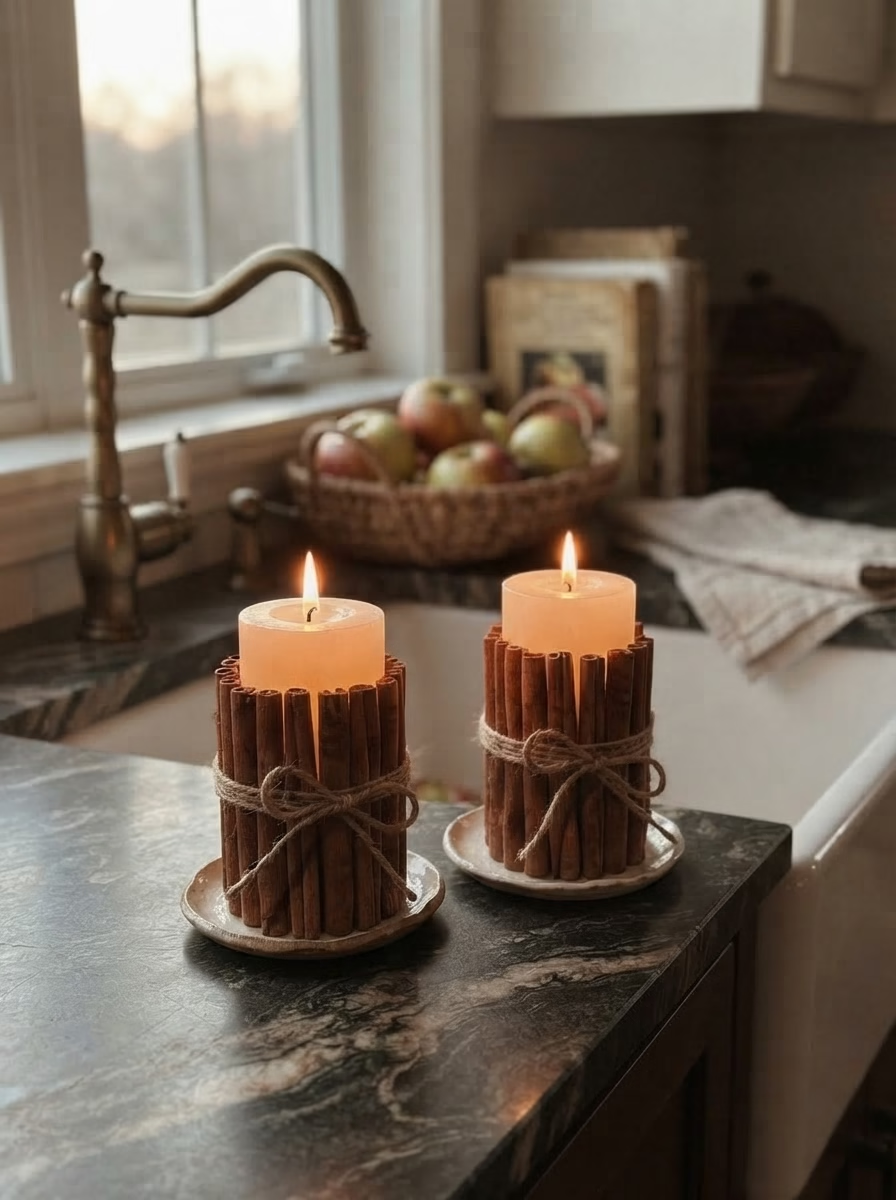
Materials Needed for the Candle Craft
- Two unscented cream pillar candles
- About forty whole cinnamon sticks
- Thick rubber bands and natural jute twine
- A hot glue gun or craft tape
- Small ceramic saucers or slate coasters
Crafting the Cinnamon Luminaries
Stretch a rubber band around each candle, slide cinnamon sticks vertically under it until the wax is covered, with bottoms flush to the base. Wrap twine three times around the middle, tie a bow, remove the band, and set it on a heat safe saucer. Never leave it unwatched.
6. Burlap Utensil Holders for Dinner
Handmade burlap pockets make dinner feel considered without fancy china. They also bundle a fork and knife together for a buffet line at the counter.
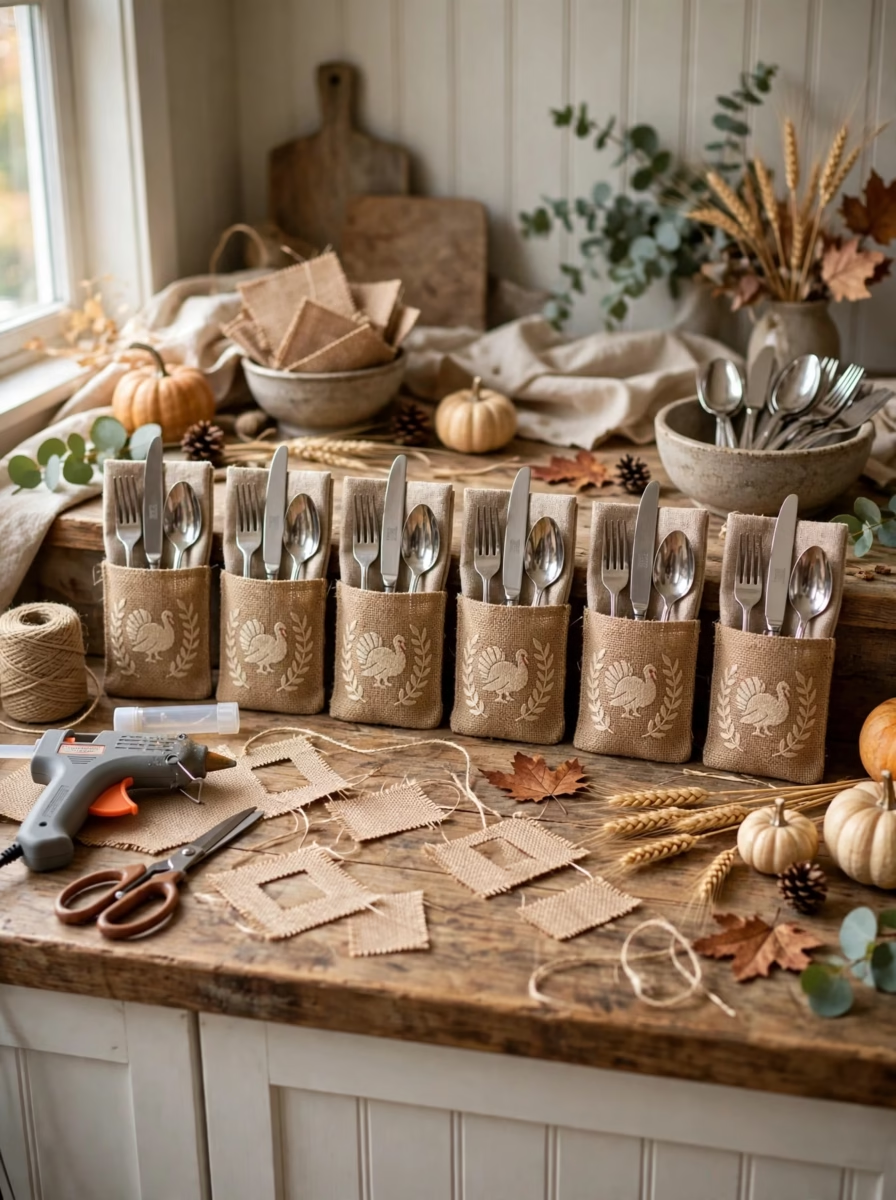
Supplies for the Utensil Pouches
- One yard of tight weave craft burlap
- White lace or cotton twill ribbon
- Letter stencils and cream fabric paint
- A foam pouncer brush
- Fabric fuse tape or needle and thread
- Fabric scissors
How to Make the Silverware Pockets
Cut a 5 inch by 12 inch burlap rectangle per guest, fold the bottom four inches up to form a pocket, and stencil Give Thanks on the front. Let the paint dry for 30 minutes, seal both side edges, tie ribbon around the middle, and add a napkin, fork, knife, and spoon.
7. Fall Leaf Kitchen Rug or Mat
A plain mat by the sink can add seasonal color during long tasks such as peeling potatoes. Real leaves stamped on canvas give a custom look that can handle heavy foot traffic.
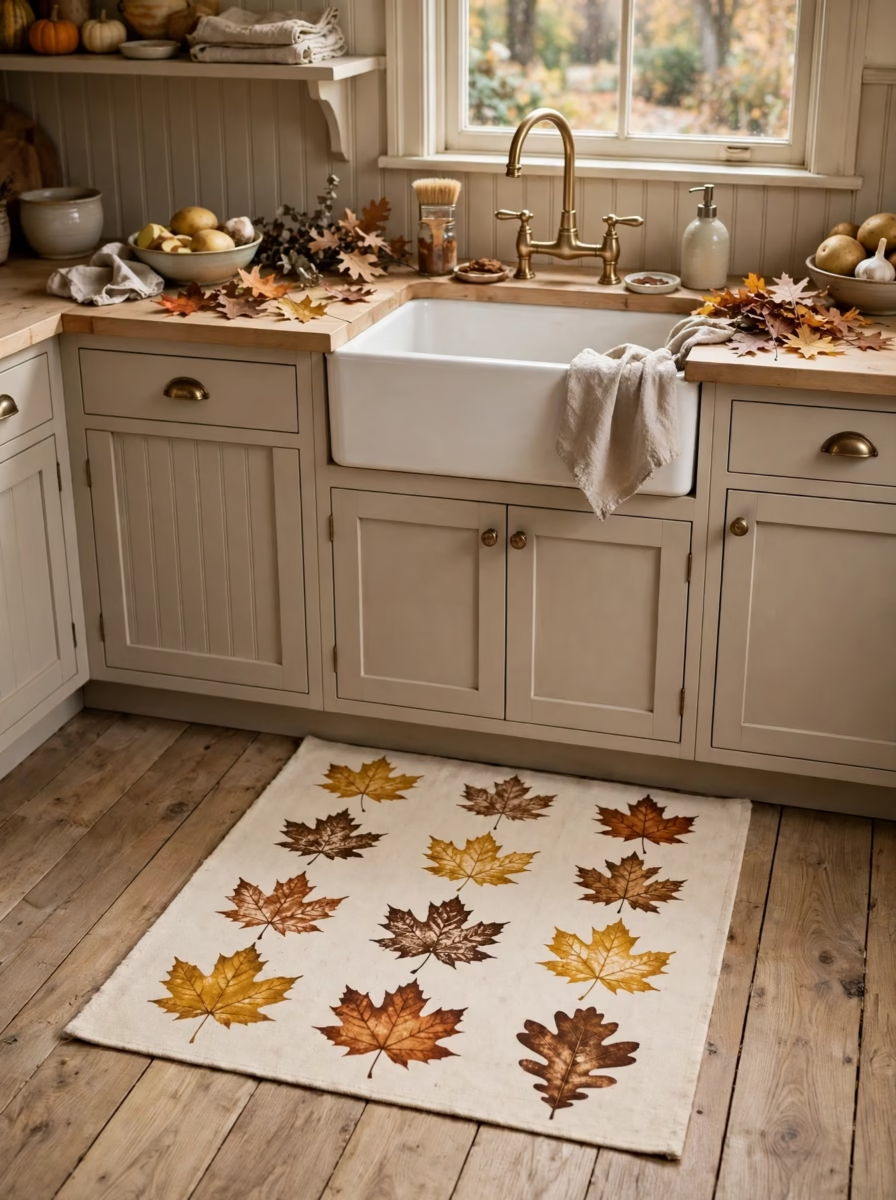
Materials Needed for the Stamped Rug
- A heavy cotton canvas rug, 2 feet by 3 feet
- Pliable maple and oak leaves
- Outdoor acrylic or fabric paint in terracotta, ochre, and espresso brown
- A foam roller
- Clear matte fabric sealer spray
How to Stamp the Leaf Pattern
Roll paint onto the veined back of a leaf, press it face down through a paper towel without shifting it, and lift it straight up. Vary colors and leaf shapes, dry for 24 hours, then add a light coat of sealer. Choose leaves that are still flexible, because brittle leaves will crumble when pressed.
8. Acorn and Fairy Light Apothecary Jars
Clear canisters filled with acorns and micro lights can turn a dark upper shelf corner into a warm nightlight, especially after daylight saving time ends.
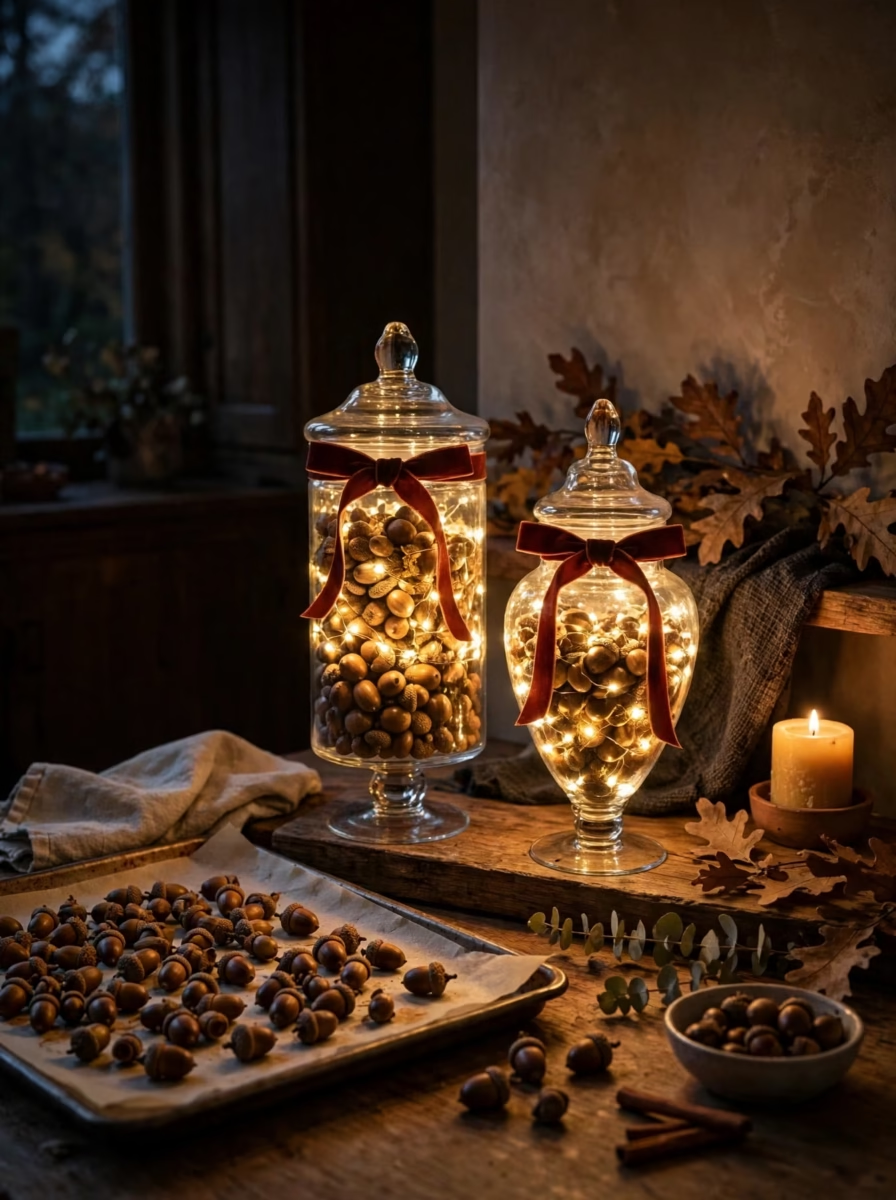
Supplies for the Lit Acorn Jars
- Two tall clear glass jars with lids
- Four cups of cleaned acorns or faux acorns
- Two strands of battery operated warm white fairy lights with a timer
- Velvet ribbon in rust or burgundy
How to Assemble the Glowing Canisters
Bake foraged acorns at 200 degrees for one hour before use, so no tiny backyard bugs come inside. Wipe the jars clean, layer acorns and lights to three quarters full, set the timer for six hours, close the lid, and tie ribbon around the neck.
9. Corn Husk Votive Holders ️
Dried corn husks from the grocery international aisle can wrap simple glass cylinders and soften candlelight across an island. One five dollar bag can cover a whole room.
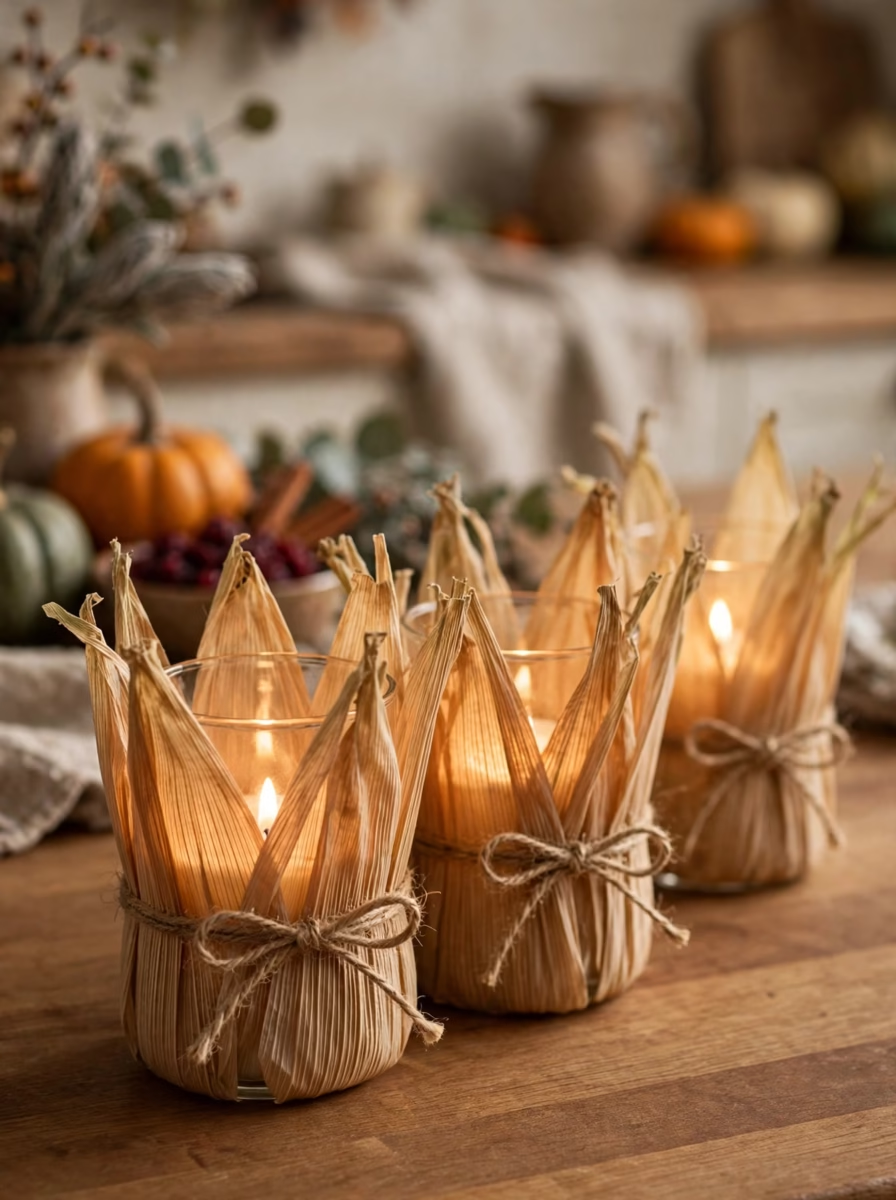
What You Need for Corn Husk Luminaries
- Three clear glass cylinder votive holders
- One package of dried corn husks
- Sharp kitchen shears and a ruler
- A hot glue gun
- Braided raffia string and LED tealight candles
Step by Step Assembly
Soak husks in warm water for five minutes until flat, then pat them completely dry. Cut strips about one inch wide and half an inch taller than the holders, glue them vertically with slight overlaps, trim the tops just above the rim, wrap raffia twice around the center, and add an LED tealight.
10. Thanksgiving Tiered Shelf Display
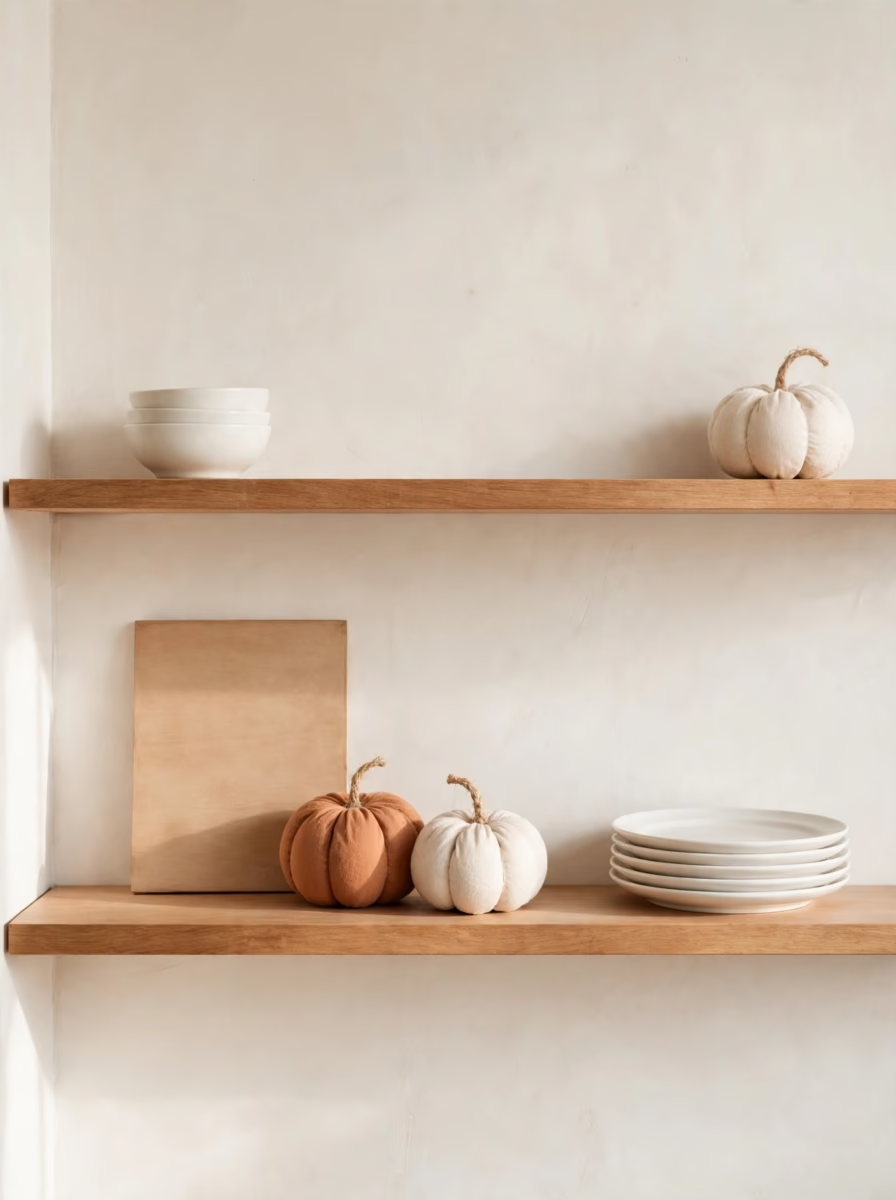
Styling open shelves can easily become cluttered, but a hand painted sign and soft fabric pumpkins soften the hard lines of everyday white plates. Explore Genius kitchen organization ideas while you plan the shelf, and limit the palette to three shades so the display looks clean.
Materials for the Shelf Craft Set
- A scrap pine board, 1 inch by 6 inches and 10 inches long, with dark walnut stain
- White chalk paint, a fine detail brush, and carbon transfer paper
- Rust and cream flannel or velvet, polyfill, and real dried pumpkin stems
- A small stoneware pitcher with dried bunny tails or wheat
- Needle and strong upholstery thread
How to Craft and Style the Shelf
Stain the board and let it dry, trace Gathered in cursive with carbon paper, and fill it with white paint.
Cut a 10 inch velvet circle, sew a running stitch around the edge, pull it partly closed, stuff it with polyfill, pull it tight, and glue a dried stem in the center.
Lean the sign against the back wall beside everyday bowls, tuck pumpkins in front, and place the pitcher at the opposite end.
11. Embroidered Flour Sack Towels
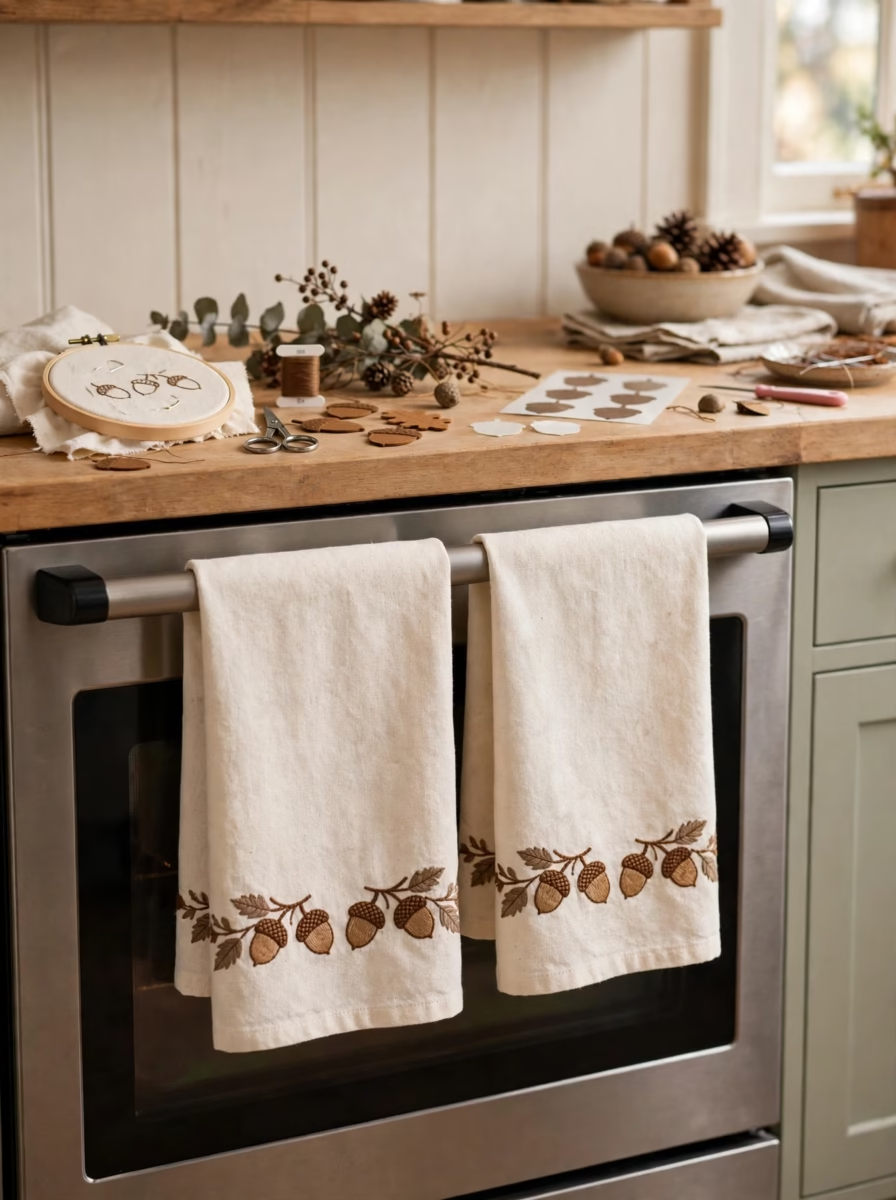
Thin holiday towels often push water around rather than drying hands well. Heavy cotton flour sack towels with a seasonal motif look attractive draped over an oven handle and still work hard.
Supplies for Custom Kitchen Towels
- Two prewashed white flour sack towels
- Embroidery floss in burnt orange, dark brown, and golden yellow, plus a needle
- A 6 inch wooden embroidery hoop and a water soluble fabric pen
- Small embroidery scissors
How to Stitch the Towels
Iron the bottom center hem flat and mark a short phrase such as Talk Turkey to Me or three small acorns.
Hold the fabric taut in the hoop, backstitch letters with three strands of dark brown floss, fill acorn caps or bodies with satin stitch in burnt orange, erase pen lines with cold water, and press from the back. Iron on matte vinyl is a ten minute alternative.
12. Mini Indian Corn Bunches
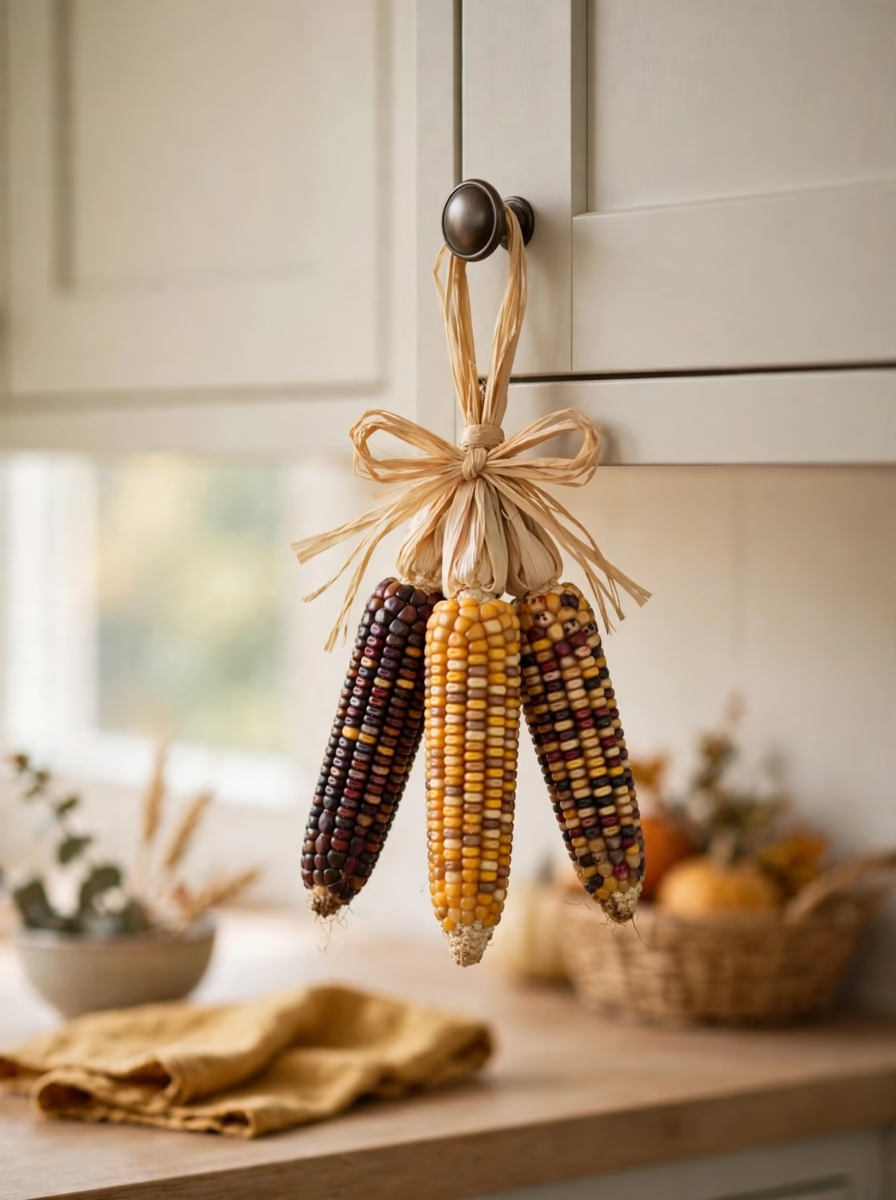
This idea takes less than five minutes and uses natural texture as it is. Three ears of colorful flint corn bring burgundy, gold, and calico tones to plain cabinetry.
What You Need for the Corn Swags
- Six ears of dried mini ornamental Indian corn with husks intact
- Natural raffia ribbon
- Thin green floral wire and wire cutters
- Two small brass ring hangers or twine loops
- Clear matte acrylic spray sealer, optional
How to Bundle the Ornamental Corn
Pull husks back so kernels show and husks point upward. Hold three ears together with the middle ear half an inch lower than the outer ears, wrap floral wire tightly around the base of the husks, tie raffia over the wire in a loose bow with a 2 inch loop at the back, mist lightly with sealer if you wish, and hang it from a pantry or cabinet knob.
13. Wheat Sheaf Table Centerpiece
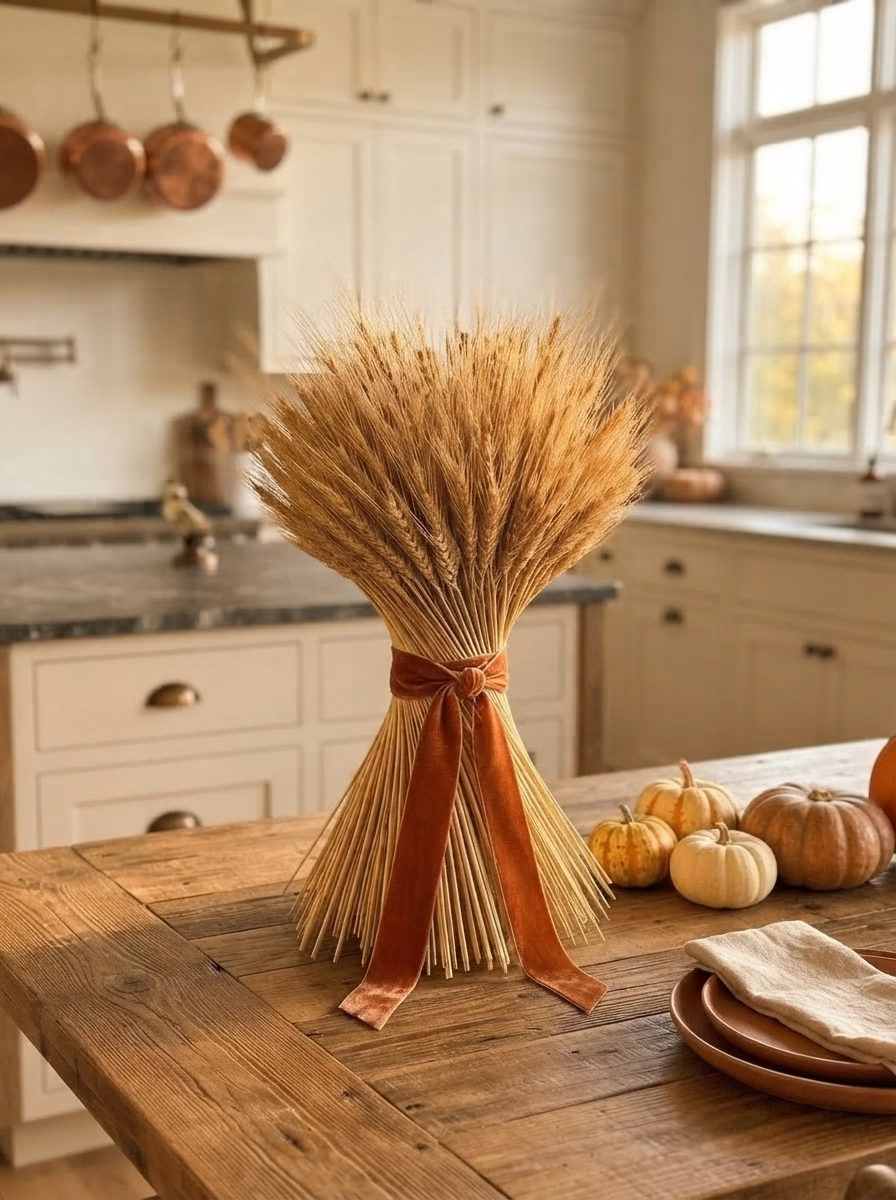
A freestanding sheaf of dried golden wheat gives classic harvest texture without blocking conversation across the table. Its slim profile moves easily when serving begins.
Supplies for the Freestanding Wheat Bundle
- Three large bundles of dried natural blond beardless wheat, about 150 to 200 stalks in total
- Heavy duty rubber bands
- One yard of 2 inch wide wired velvet or burlap ribbon in copper brown
- Sharp garden pruning shears
- Newspaper to catch loose chaff
How to Bind and Shape the Sheaf
Tap stem ends on a table to align the heads, grip the bundle about four inches below the heads, and wrap two rubber bands tightly around that point.
Twist the lower stems slightly in a spiral, spread the base outward so it stands on its own, trim the bottom until it sits level, then wrap copper ribbon over the bands and tie a knot with long tails. Move it one handed to the sideboard once dinner begins.
14. Wood Slice Thanksgiving Coasters
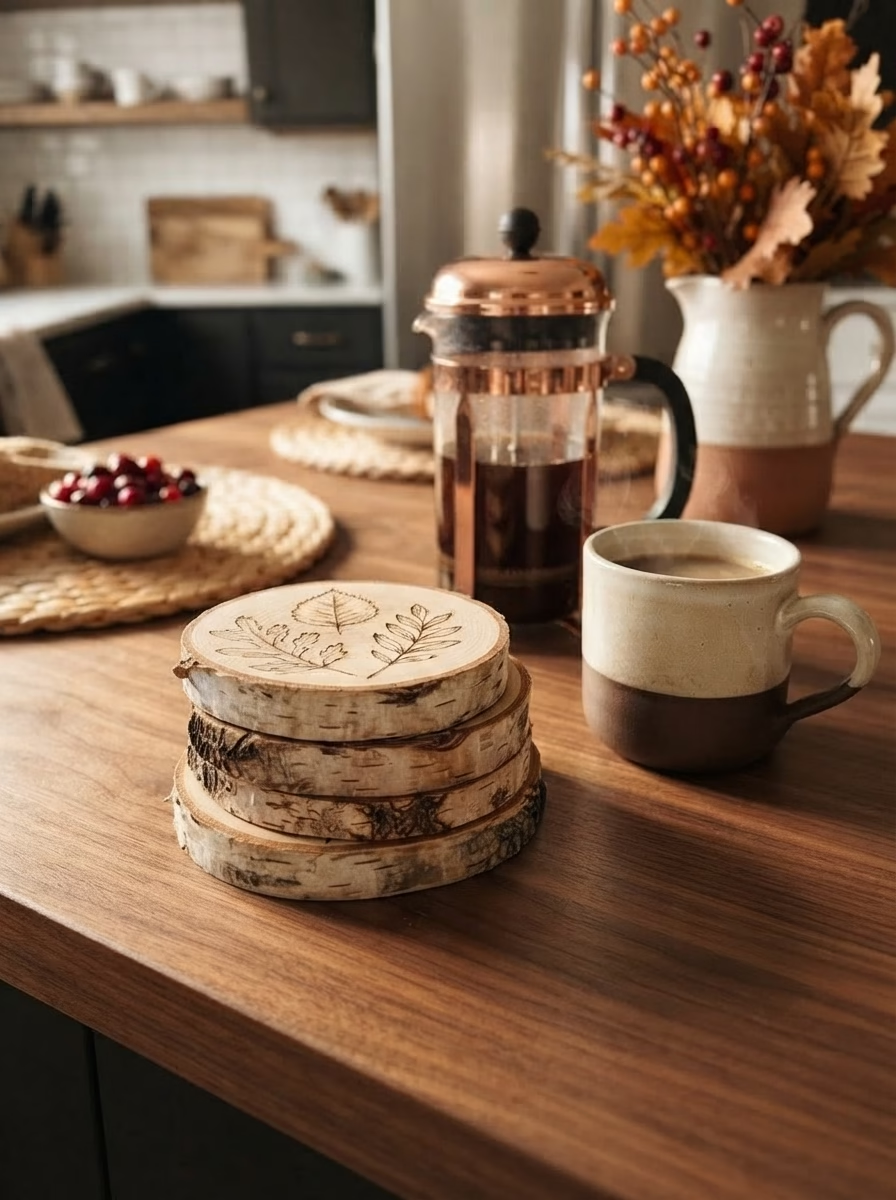
As relatives drift into the kitchen for more coffee while potatoes are being mashed, mug rings can appear across counters. Birch coasters protect surfaces and show guests where drinks belong.
Materials Needed for Wood Slice Coasters
- Four pre sanded birch slices, 3.5 to 4 inches across, with bark intact
- A wood burning tool or dark brown acrylic paint and a small stencil
- Graphite transfer paper, a pencil, and 220 grit sandpaper
- Clear waterproof matte polyurethane sealer and a foam brush
- Self adhesive felt pads
How to Burn and Seal the Coasters
Sand each slice smooth, transfer a leaf outline or word design with graphite paper, and follow the lines slowly with light, steady pressure. Heat the burning tool for five minutes first if you use it. Seal with two thin coats of polyurethane, waiting two hours between coats, and add felt pads underneath to prevent scratches.
15. Paper Pumpkin Place Cards ️
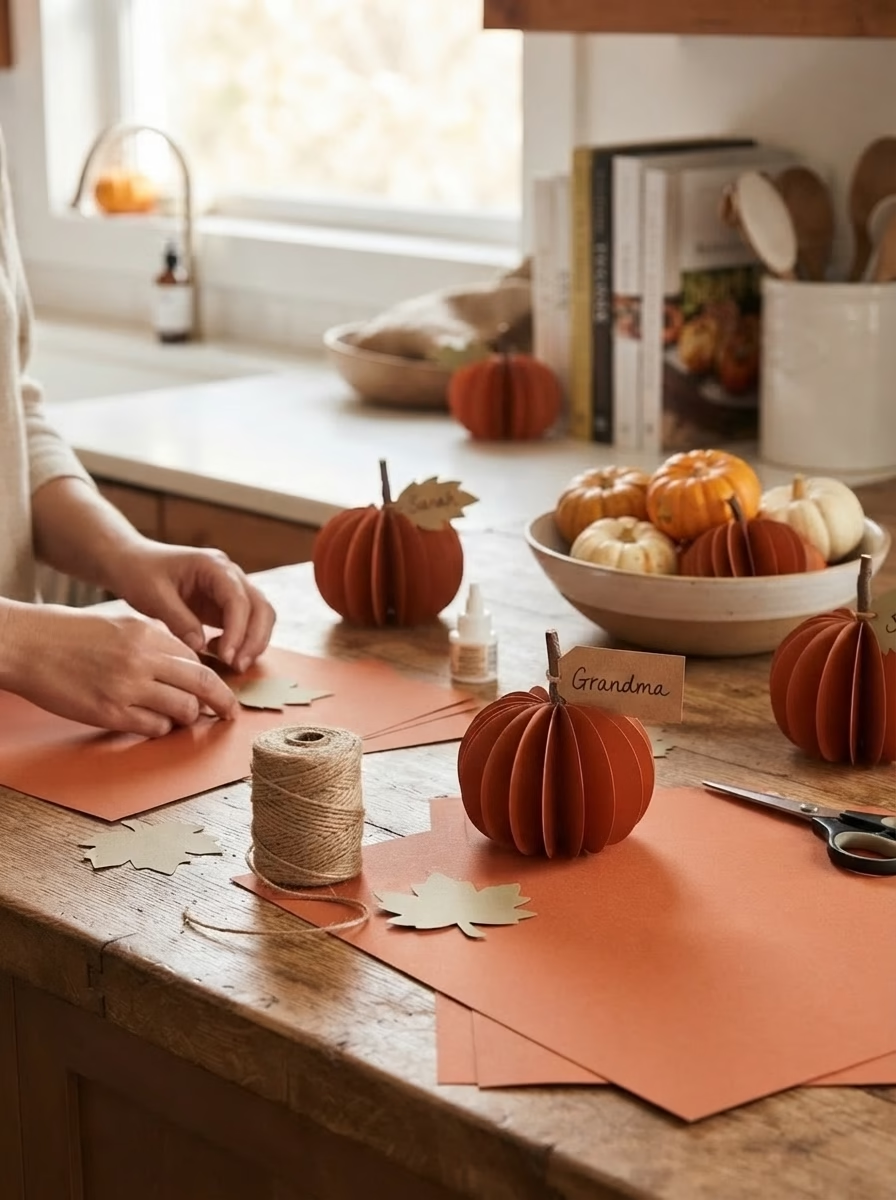
Assigned seating can avoid an awkward shuffle when a large group tries to find places. Heavyweight cardstock folded into small accordion pumpkins is a craft children can help with, and each guest can take one home as a keepsake.
Supplies for 3D Paper Pumpkins
- Six sheets of 12 inch by 12 inch heavyweight cardstock in burnt orange, rust, and terracotta
- A paper trimmer with a scoring blade, or a ruler and bone folder
- Small dried twigs cut into 1.5 inch pieces
- Olive green cardstock and a fine tip gold metallic pen
- Fast grab liquid paper glue and a hot glue gun
How to Fold and Assemble the Place Cards
Cut strips 2 inches wide by 12 inches long, using two strips per pumpkin, score each strip every 0.5 inches, and fold it back and forth like a fan.
Glue two folded strips end to end into a ruffled circle, gather the inner edges, press flat into a rosette, secure the centers with hot glue, shape it into a plump sphere, add a twig stem, and attach a green leaf bearing the guest name in gold ink.
Set up most projects on November 1, after Halloween decor is packed away, and finish natural items such as dried orange slices and roasted acorns two weeks before Thanksgiving so they stay fresh through the weekend.