

Why You’ll Love This Takoyaki
Takoyaki is a classic Japanese snack with a crisp exterior, a soft interior, and a savory finish that makes it memorable at first bite. This takoyaki recipe brings together the familiar flavors of octopus, pickled ginger, green onions, and rich sauces in a format that works well for casual meals, gatherings, and snack boards. It is especially appealing for home cooks who want a dish that feels distinctive without requiring advanced kitchen skills.
- Easy preparation: A takoyaki recipe at home takes about 30 minutes, and most of that time is spent cooking in the pan rather than managing complicated steps. Once the batter is mixed and the pan is hot, the process is active but straightforward.
- Nutritional balance: Takoyaki provides carbohydrates from the wheat flour batter, protein from octopus, and fats from takoyaki sauce and Japanese mayonnaise. That combination gives the snack more substance than many typical street foods.
- Flexible for different preferences: Although the traditional filling is octopus, homemade takoyaki can be adjusted with cheese, spicy additions, or vegetable-forward variations for families, students, and diet-conscious individuals.
- Distinctive flavor and texture: The contrast between the golden shell, tender center, briny seafood, and savory toppings is what makes Japanese takoyaki stand apart from other savory snacks.
Takoyaki is most satisfying when it is served soon after cooking, while the outside is still crisp and the sauce and bonito flakes are freshly added.
For readers who enjoy portable foods for gatherings, takoyaki can also sit well beside other shareable dishes such as loaded mashed potato casserole or BBQ shrimp, especially when building a varied snack spread for a crowd.
Jump to:
- Why You’ll Love This Takoyaki
- Essential Ingredients for Takoyaki
- Main ingredients
- Special dietary options
- How to Prepare the Perfect Takoyaki: Step-by-Step Guide
- Step 1: Prepare the batter and fillings
- Step 2: Preheat the takoyaki pan
- Step 3: Fill the molds with batter and toppings
- Step 4: Turn the takoyaki as the batter sets
- Step 5: Cook until golden brown and crisp
- Step 6: Finish with sauce and garnishes
- Dietary Substitutions to Customize Your Takoyaki
- Protein and main component alternatives
- Vegetable, sauce, and seasoning modifications
- Mastering Takoyaki: Advanced Tips and Variations
- Presentation and make-ahead ideas
- How to Store Takoyaki: Best Practices
- FAQs: Frequently Asked Questions About Takoyaki
- Takoyaki
- Ingredients
- Instructions
- Last Step:
- Notes
- Nutrition
- Did you make this recipe?
Essential Ingredients for Takoyaki
The structure of authentic takoyaki recipe results depends on a batter that can cook into a tender center while forming a browned shell in a molded pan. The traditional ingredient list is simple, but each item has a specific role in flavor, texture, or finishing. For readers seeking easy homemade takoyaki, the measurements below give a practical starting point for a standard batch.
Main ingredients
- 1 1/2 cups takoyaki flour or all-purpose wheat flour – forms the batter base and gives the balls their structure.
- 2 large eggs – add richness and help bind the batter.
- 2 1/2 cups dashi stock or water – thins the batter so it pours easily into the molds.
- 1/2 teaspoon salt – seasons the batter.
- 1 cup minced or diced octopus – the traditional filling and the main source of protein.
- 1/2 cup tenkasu, or tempura scraps – adds light texture inside the balls.
- 2 tablespoons beni shoga, or pickled ginger – adds sharp, bright flavor.
- 2 tablespoons sliced green onions, or negi – provide freshness and color.
- 2 tablespoons neutral oil – helps prevent sticking and supports even browning.
- 1/4 cup takoyaki sauce – brushed over the finished balls for savory sweetness.
- 2 tablespoons Japanese mayonnaise – adds richness and the familiar creamy topping.
- 1 tablespoon aonori, or green laver powder – adds sea-like aroma and color.
- 2 tablespoons katsuobushi, or dried bonito flakes – gives the classic finishing garnish and visible movement from the heat.
Special dietary options
- Vegan: Replace octopus with diced mushrooms or firm tofu, use plant-based mayonnaise, and choose a vegan sauce.
- Gluten-free: Use a gluten-free flour blend designed for savory batter and check that the sauce and tempura scraps are gluten-free.
- Low-calorie: Use less mayonnaise, reduce the sauce amount, and fill the balls with more scallions, cabbage, or mushrooms in place of heavier add-ins.
| Ingredient | Role in Takoyaki |
|---|---|
| Flour batter | Creates the shell and soft interior |
| Octopus | Provides traditional seafood flavor and protein |
| Tenkasu | Adds light crispness inside the balls |
| Beni shoga | Adds bright, tangy contrast |
| Negi | Brings freshness and balance |
| Sauce and mayo | Finish the dish with richness and savory depth |
How to Prepare the Perfect Takoyaki: Step-by-Step Guide
Making crispy Japanese octopus balls at home depends on timing, heat, and turning technique. A takoyaki pan, usually made of cast iron for even heating, creates the round shape by cooking the batter in semi-spherical molds. The process is active, but once the pan is properly heated, it becomes a rhythm of pouring, filling, turning, and finishing. For the best result, use a stovetop, electric home cooker, or gas-fueled commercial style pan if available.
Step 1: Prepare the batter and fillings
Whisk the flour, eggs, dashi stock or water, and salt until the mixture is smooth and thin. The batter should pour easily because a loose consistency helps it flow into the molded pan and form round shells without drying out too quickly. At the same time, cut the octopus into bite-size pieces, slice the green onions, measure the tenkasu, and prepare the beni shoga so everything is ready before the pan heats up.
If you are making an easy homemade takoyaki version, this is also the stage to prepare substitutes such as mushrooms, cheese, or finely chopped cabbage. Keeping the fillings small and evenly sized helps them stay centered inside the batter as you turn the balls later.
Step 2: Preheat the takoyaki pan
Place the takoyaki pan over medium heat and let it warm fully. Cast iron pans are favored because they distribute heat evenly, which helps each mold brown at the same rate. Brush the molds with neutral oil, covering the surface and the edges of each well so the batter can release cleanly after cooking.
Even pan heating is one of the most important parts of a reliable takoyaki recipe, because uneven heat can leave one side pale while the other side browns too quickly.
For electric pans, allow enough time for the surface to reach consistent temperature before adding batter. For stovetop models, move the pan slightly if needed so the heat is balanced across all molds.
Step 3: Fill the molds with batter and toppings
Pour the batter into each round mold until it slightly overflows the top. This is normal and helps form the proper shape when the batter is turned. Add a piece or two of octopus to each mold, then sprinkle in tenkasu, beni shoga, and green onions. Work quickly so the batter does not start to set before the fillings are in place.
The goal is to keep the fillings distributed throughout the center of each ball. If you are using cheese or spicy add-ins for a variation, place them in the center rather than near the edge so they melt or soften inside the finished sphere instead of leaking out immediately.
Step 4: Turn the takoyaki as the batter sets
After about 1 to 2 minutes, when the edges start to cook and the bottom becomes lightly golden, use a pick or skewer to loosen the batter around each mold. Turn each piece about 90 degrees so the uncooked batter flows underneath and begins forming a round shape. Continue turning in stages until the balls become more spherical.
This part requires patience and steady hands. The finished shape does not happen in one motion; it develops through repeated turning as the uncooked batter moves and fills the spaces in the molds. Keep adjusting the balls so every side has a chance to contact the hot pan.
Step 5: Cook until golden brown and crisp
Continue cooking and turning until the takoyaki are golden brown on the outside and lightly crisp all over, usually around 8 to 10 minutes total depending on heat and pan type. The center should remain tender, while the outside should have enough color to hold its shape when lifted. If needed, brush a little more oil into the molds during cooking to support browning.
For readers comparing different cooking tools, stovetop cast iron pans usually give the best traditional color, while electric units can be more convenient for indoor use and consistent batches. Gas-fueled commercial cookers are common in food stalls and restaurants, where speed and output matter more than portability.
Step 6: Finish with sauce and garnishes
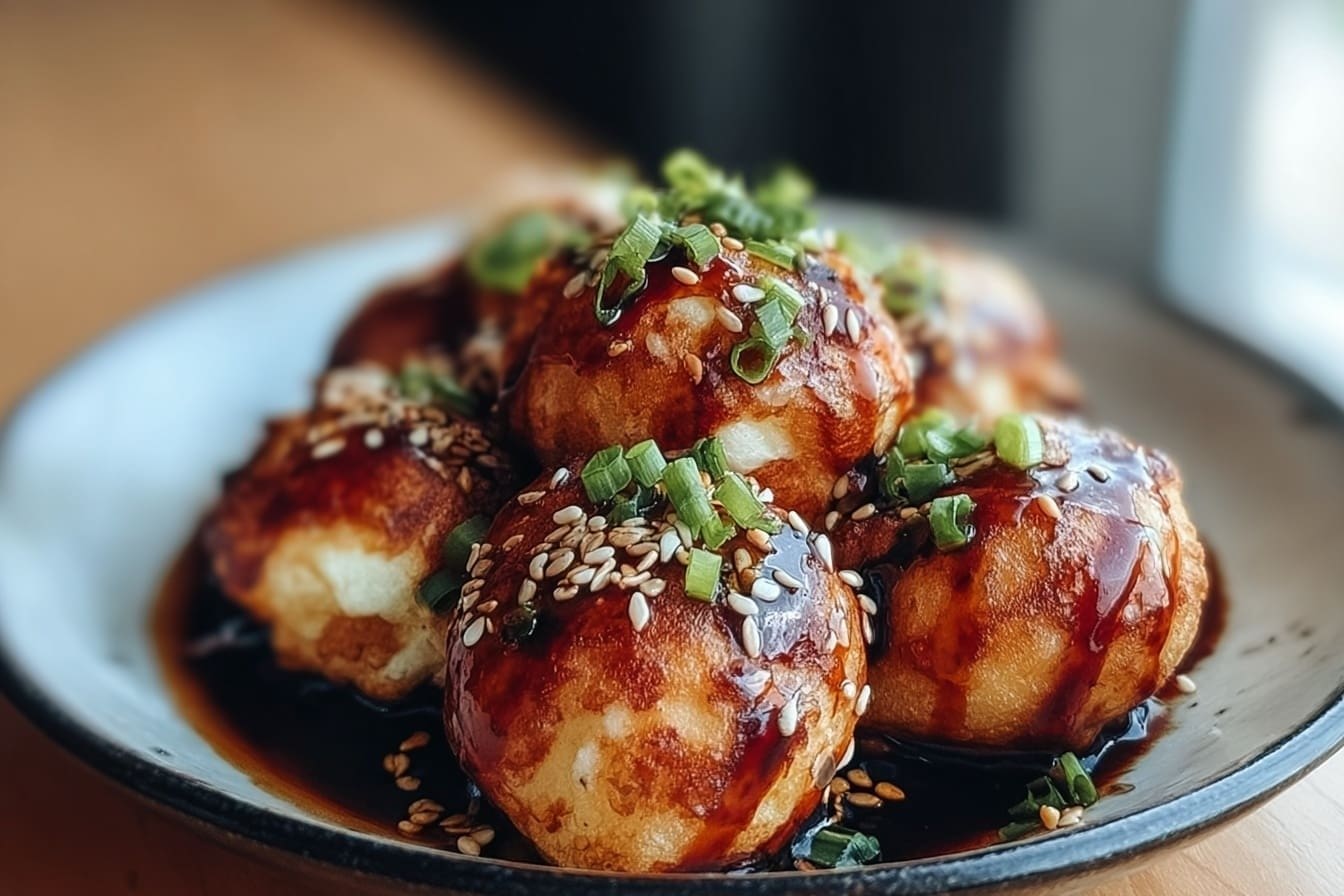
Transfer the cooked balls to a serving plate and brush them with takoyaki sauce. Drizzle Japanese mayonnaise in a thin pattern across the top, then finish with aonori and katsuobushi. The bonito flakes will often move slightly from the heat, which is part of the classic presentation. Serve immediately for the best texture.
Takoyaki is commonly enjoyed as a snack or side dish in Japan, especially in the Kansai region, where it is sold at stalls, restaurants, supermarkets, and convenience stores. Its international popularity continues to grow because the dish feels both playful and satisfying, with local variations appearing in many home kitchens.
Dietary Substitutions to Customize Your Takoyaki
Protein and main component alternatives
Although the traditional takoyaki recipe uses minced or diced octopus, there are practical substitutions for households that prefer a different protein or want to cook with what is available. Small pieces of shrimp, crab, or cooked chicken can work well, provided they are cut finely enough to fit inside the molds. For vegetarian or vegan takoyaki, diced mushrooms, tofu, or finely chopped cabbage can supply body and a pleasant texture.
If you want a more budget-friendly version, cooked surimi, tofu, or leftover seafood can also be used. The important part is keeping the filling pieces small so the batter can wrap around them and create the recognizable ball shape.
Vegetable, sauce, and seasoning modifications
Green onions and beni shoga are traditional, but shredded cabbage, corn, nori strips, or chives can be added for a different flavor profile. Those who prefer a milder result may reduce the pickled ginger, while readers who want more heat can add chili flakes or spicy sauce to the batter or topping.
For sauce changes, use a lighter drizzle of mayo, a lower-sugar savory sauce, or a plant-based mayonnaise in vegan versions. Gluten-free takoyaki can work when the batter mix, sauce, and tempura scraps are all checked carefully. These changes preserve the spirit of Japanese takoyaki while making the snack easier to match with different diets and ingredient shelves.
Mastering Takoyaki: Advanced Tips and Variations
Once the basic technique is in place, a few advanced habits can produce better shape, browning, and flavor. The first is to keep the pan hot but not scorching, because steady heat gives the batter time to set before the outside darkens too quickly. The second is to turn the balls in several small motions rather than forcing them into shape at once. This creates a more even sphere and reduces tearing.
Experimenting with fillings is a useful way to make homemade takoyaki more appealing for different age groups and tastes. Cheese creates a creamy center, while spicy fillings can add more intensity. Some cooks add extra green onions or finely chopped cabbage to stretch the batch for larger gatherings. For a fuller meal, serve takoyaki beside a fresh salad or another savory plate such as chicken and broccoli stir fry when planning a mixed menu.
Presentation and make-ahead ideas
Serve takoyaki on a wide platter so the sauce, mayonnaise, aonori, and bonito flakes remain visible. A small sprinkle of extra green onions can add color, and a separate dipping bowl of takoyaki sauce allows guests to season each bite more heavily if they prefer. For busy parents, students, and working professionals, the batter can be mixed ahead of time and the fillings prepped earlier in the day, which shortens final cooking time.
If you are making food for a group, consider preparing a double batch and cooking in rounds. Takoyaki is best fresh, but a planned workflow makes it realistic for community events, potlucks, and family snacks.
How to Store Takoyaki: Best Practices
Takoyaki keeps best when treated as a short-term food rather than a long-stored item, because the crisp shell softens as it sits. For refrigeration, let the balls cool fully, then place them in an airtight container for up to 2 days. Keep the sauce and toppings separate if possible, so the texture stays better when reheated.
For freezing, arrange the cooled balls on a tray so they do not touch, freeze until firm, then transfer them to a freezer bag or sealed container. This method helps preserve the shape and prevents the balls from sticking together. Frozen takoyaki can be kept for about 1 month for best quality.
To reheat, use an oven, toaster oven, or air fryer rather than a microwave if you want to bring back more surface crispness. Heat until warmed through and lightly browned again, then add fresh sauce, mayo, and garnishes after reheating. For meal prep, it helps to store the batter ingredients and fillings separately rather than cooking everything far ahead of time.
FAQs: Frequently Asked Questions About Takoyaki
Print
Takoyaki
🐙🥞 Crispy Takoyaki Recipe crafts golden octopus balls with savory batter and fillings – fun Japanese street snack protein boost!
🍢 Home-style Osaka delight: gooey inside, crunchy outside – easy pan magic for parties!
- Total Time: 45 minutes
- Yield: 20-24 balls
Ingredients
– 1 1/2 cups takoyaki flour or all-purpose wheat flour – forms the batter base and gives the balls their structure.
– 2 large eggs – add richness and help bind the batter.
– 2 1/2 cups dashi stock or water – thins the batter so it pours easily into the molds.
– 1/2 teaspoon salt – seasons the batter.
– 1 cup minced or diced octopus – the traditional filling and the main source of protein.
– 1/2 cup tenkasu, or tempura scraps – adds light texture inside the balls.
– 2 tablespoons beni shoga, or pickled ginger – adds sharp, bright flavor.
– 2 tablespoons sliced green onions, or negi – provide freshness and color.
– 2 tablespoons neutral oil – helps prevent sticking and supports even browning.
– 1/4 cup takoyaki sauce – brushed over the finished balls for savory sweetness.
– 2 tablespoons Japanese mayonnaise – adds richness and the familiar creamy topping.
– 1 tablespoon aonori, or green laver powder – adds sea-like aroma and color.
– 2 tablespoons katsuobushi, or dried bonito flakes – gives the classic finishing garnish and visible movement from the heat.
Instructions
1-Step 1: Prepare the batter and fillings Whisk the flour, eggs, dashi stock or water, and salt until the mixture is smooth and thin. The batter should pour easily because a loose consistency helps it flow into the molded pan and form round shells without drying out too quickly. At the same time, cut the octopus into bite-size pieces, slice the green onions, measure the tenkasu, and prepare the beni shoga so everything is ready before the pan heats up.
2-Step 2: Preheat the takoyaki pan Place the takoyaki pan over medium heat and let it warm fully. Cast iron pans are favored because they distribute heat evenly, which helps each mold brown at the same rate. Brush the molds with neutral oil, covering the surface and the edges of each well so the batter can release cleanly after cooking.
3-Step 3: Fill the molds with batter and toppings Pour the batter into each round mold until it slightly overflows the top. This is normal and helps form the proper shape when the batter is turned. Add a piece or two of octopus to each mold, then sprinkle in tenkasu, beni shoga, and green onions. Work quickly so the batter does not start to set before the fillings are in place.
4-Step 4: Turn the takoyaki as the batter sets After about 1 to 2 minutes, when the edges start to cook and the bottom becomes lightly golden, use a pick or skewer to loosen the batter around each mold. Turn each piece about 90 degrees so the uncooked batter flows underneath and begins forming a round shape. Continue turning in stages until the balls become more spherical.
5-Step 5: Cook until golden brown and crisp Continue cooking and turning until the takoyaki are golden brown on the outside and lightly crisp all over, usually around 8 to 10 minutes total depending on heat and pan type. The center should remain tender, while the outside should have enough color to hold its shape when lifted. If needed, brush a little more oil into the molds during cooking to support browning.
6-Step 6: Finish with sauce and garnishes Transfer the cooked balls to a serving plate and brush them with takoyaki sauce. Drizzle Japanese mayonnaise in a thin pattern across the top, then finish with aonori and katsuobushi. The bonito flakes will often move slightly from the heat, which is part of the classic presentation. Serve immediately for the best texture.
Last Step:
Please leave a rating and comment letting us know how you liked this recipe! This helps our business to thrive and continue providing free, high-quality recipes for you.Notes
🔥 Preheat takoyaki pan well – oil shimmers, water dances for perfect crisp!
🔄 Turn balls constantly with picks for even golden spheres.
🐙 Use pre-boiled octopus; cut small to fit molds without bursting.
- Prep Time: 15 minutes
- Batter Rest: 15 minutes
- Cook Time: 15 minutes
- Category: Snack
- Method: Stovetop
- Cuisine: Japanese
Nutrition
- Serving Size: 5-6 balls
- Calories: 250 kcal
- Sugar: 2g
- Sodium: 800mg
- Fat: 10g
- Saturated Fat: 2g
- Unsaturated Fat: 8g
- Trans Fat: 0g
- Carbohydrates: 30g
- Fiber: 1g
- Protein: 12g
- Cholesterol: 100mg


