

Roasted Yellow Squash
If you have ever pulled a tray of squash out of the oven and watched it slump into a puddle, you already know the problem. Yellow squash carries a lot of water, and a straight roast usually leaves it soft and pale instead of golden.
This recipe takes a different route, and it borrows its logic from Chef Thomas Keller’s method for roasted zucchini. You salt the squash first to pull out moisture, give it a quick sear in a hot skillet, and then finish it in a 450°F oven.
Yes, that is three moves instead of one. I resisted the extra work for a while too. But the payoff is squash with real caramelized edges, a tender center that still holds its shape, and enough flavor to stand on its own next to anything else on the plate.
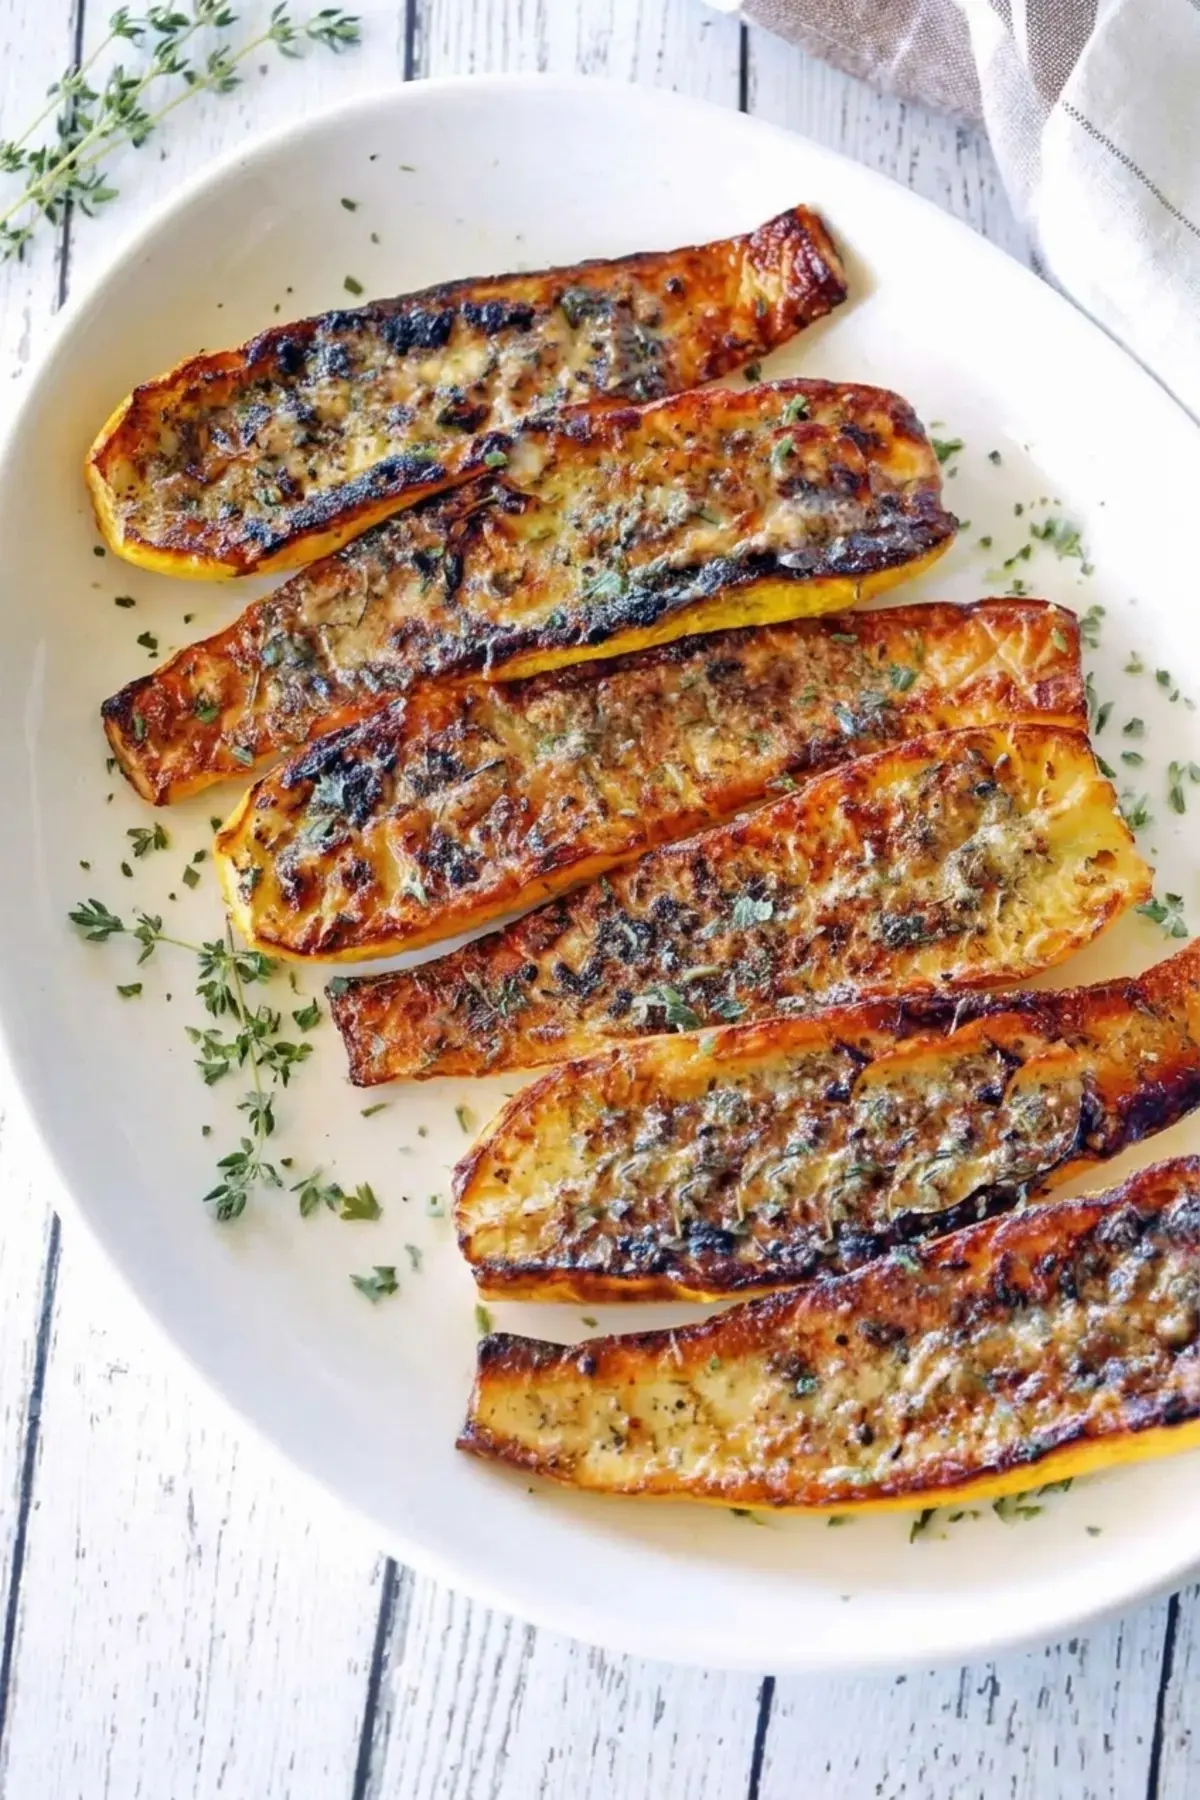
It tastes just as good straight from the skillet as it does cold from the refrigerator the next day, which quietly makes it a hero of any potluck table.
The same approach works beautifully on eggplant, and I keep meaning to push it further into the rest of my vegetable drawer as the season rolls on.
Jump to:
- Roasted Yellow Squash
- Ingredients and Variations
- Instructions
- An Alternative (Lazy) Method
- Serving Suggestions
- Storing the Leftovers
- Ingredients
- Instructions
- Notes
- Recipe details
- FAQs
- Why salt yellow squash before roasting?
- What is the best temperature and time to roast yellow squash?
- Should I peel yellow squash before roasting?
- Can you substitute butter for ghee when roasting yellow squash?
- Roasted Yellow Squash
- Ingredients
- Instructions
- Last Step:
- Nutrition
- Did you make this recipe?
Ingredients and Variations
You need very little here, which is part of the appeal. Exact measurements live in the recipe card further down, but here is what each piece is doing for you.
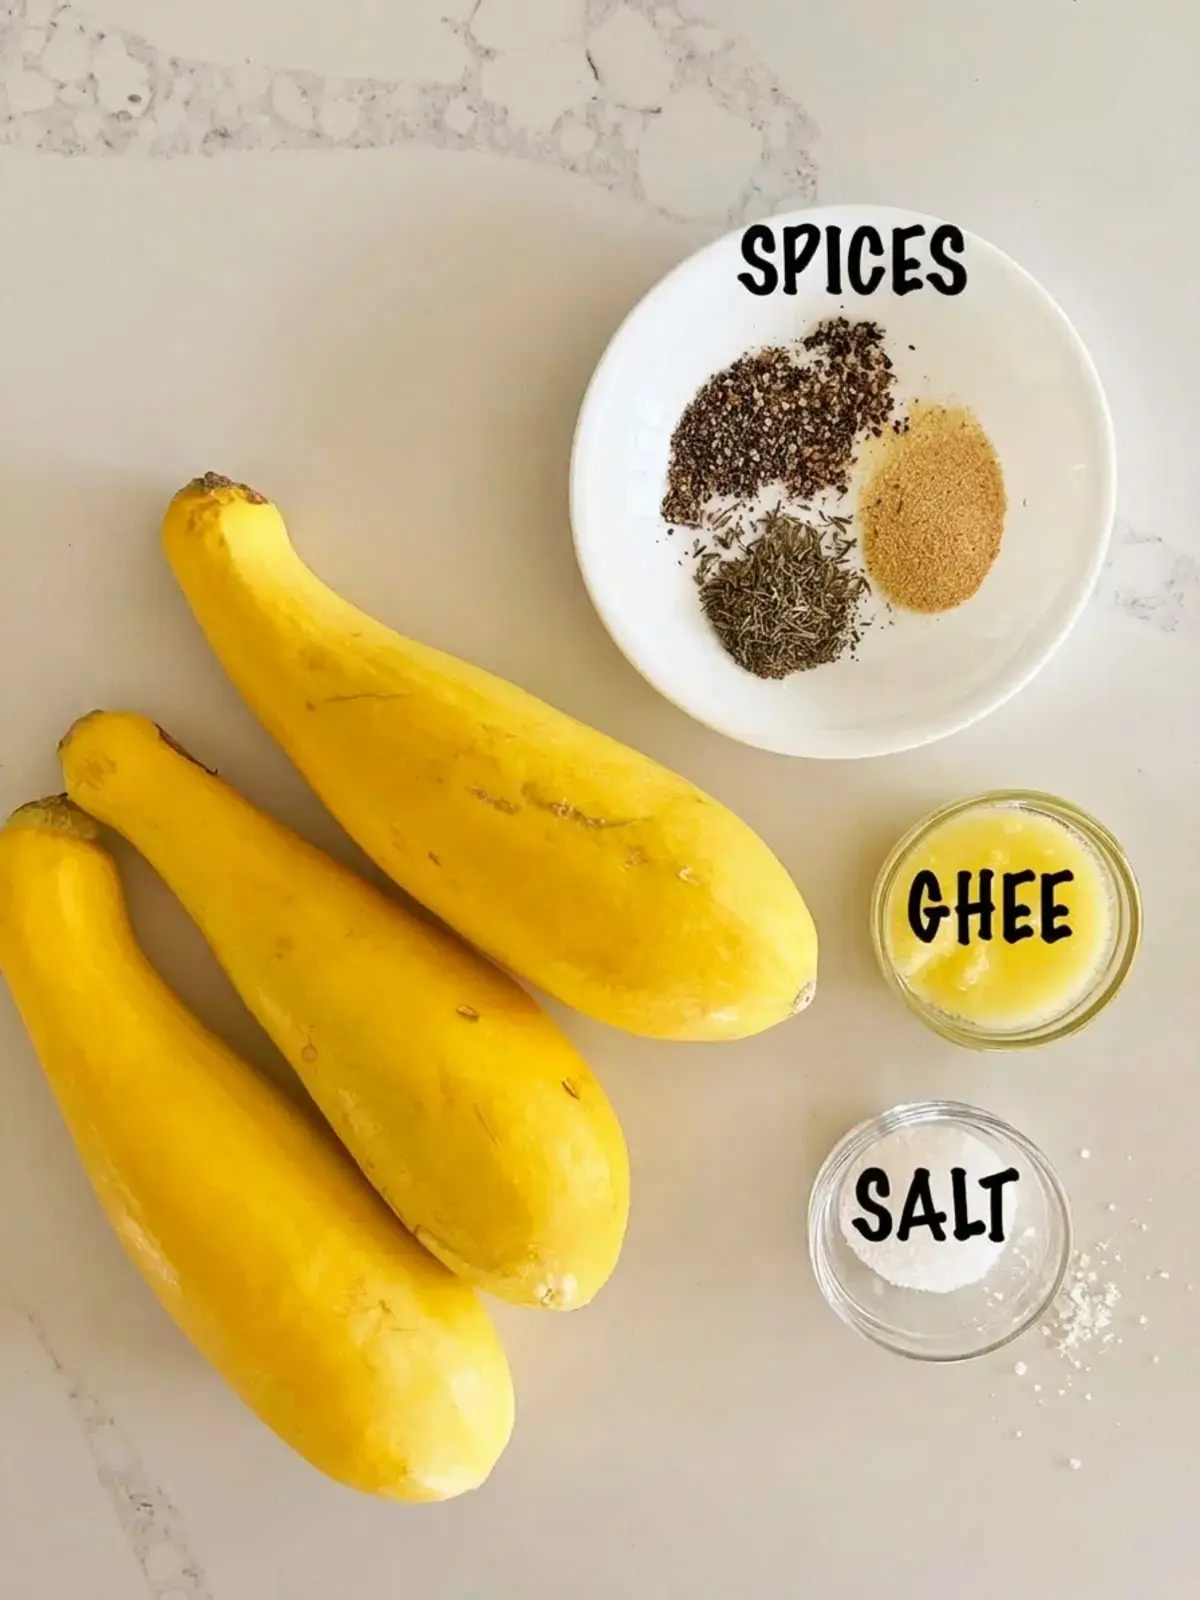
- 3 medium yellow squash. Trim the ends and leave the peel on. Summer squash skin is thin, tender, and completely edible, so peeling only removes flavor and structure.
- 1 teaspoon Diamond Crystal kosher salt. This is the workhorse of the recipe. If you use another salt, including Morton kosher salt, use 1/2 teaspoon, because those crystals are denser. The salt pulls water out of the flesh so the squash can brown instead of steam.
- 1 tablespoon ghee. Ghee handles high heat without burning and gives the squash a rounded, buttery note. Avocado oil or refined coconut oil work as substitutes if you prefer.
- 1/4 teaspoon black pepper, 1/2 teaspoon garlic powder, 1/2 teaspoon dried thyme. A simple trio that lets the squash stay the star of the dish.
A variation worth trying: sprinkle grated Parmesan cheese over the squash right before it goes into the oven. It melts into a savory crust, and I have happily eaten the leftovers straight off the pan.
Instructions
The full step by step version with photos sits in the recipe card below. Here is the overview so you know exactly what you are getting into.
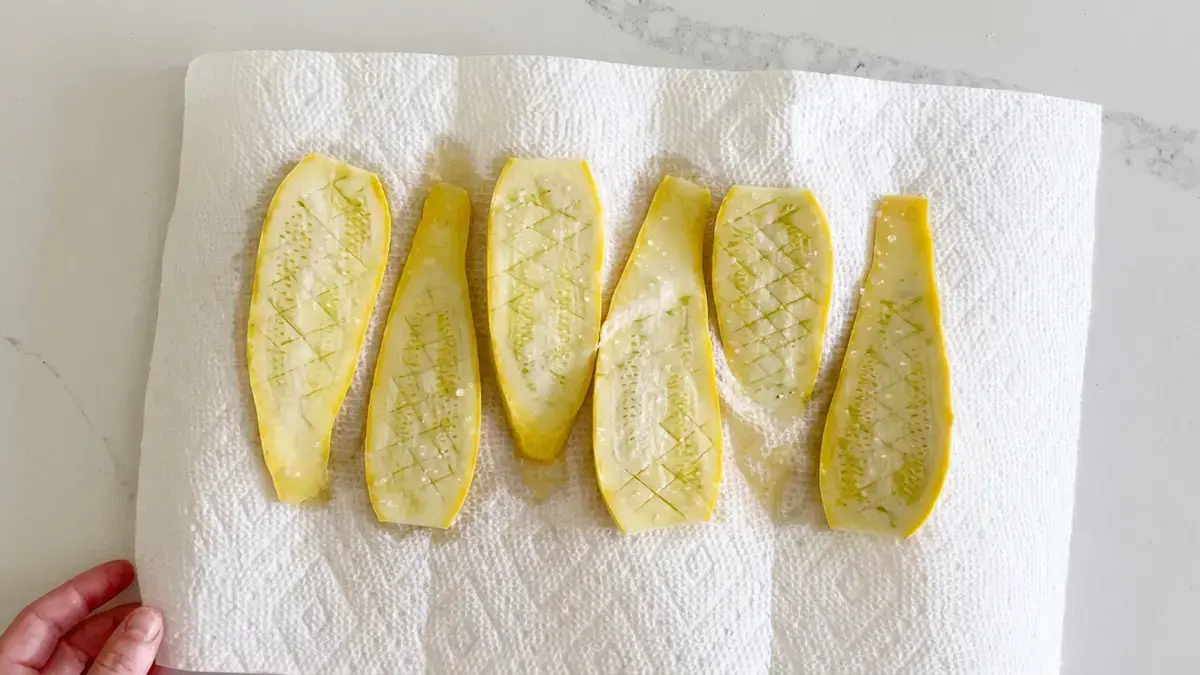

- Cut each squash in half lengthwise, then score shallow crosshatch cuts into the flesh. Those little cuts give the salt a place to work.
- Sprinkle the kosher salt over the flesh and let the squash sit for 15 minutes. You will see droplets of water bead up on the surface.
- Pat the squash dry with paper towels. Really dry. This is the step people skip and then wonder why their squash came out steamed.
- Preheat the oven to 450°F and heat the ghee in a large 12 inch oven safe skillet over medium high heat. Cast iron is my go to here, because it moves from stovetop to oven without a second thought.
- Lay the squash in the skillet in a single layer, flesh side down, and cook for about 5 minutes until the bottoms are browned. If the pan starts running too hot, drop the heat to medium.
- Turn off the heat, flip the squash, and season it with the black pepper, garlic powder, and dried thyme.
- Slide the skillet into the oven and roast for about 20 minutes, until the squash is tender. Serve it right away.
Total time is around 40 minutes, and most of that is hands off while the oven does the work.

An Alternative (Lazy) Method
Some nights I do not want three steps, and I will not pretend otherwise. So I tested the shortcut version to see exactly what you give up when you skip the salting and the searing.
Here is the lazy method: cut the squash in half lengthwise, spray both sides generously with olive oil, season with salt, black pepper, and garlic powder, and roast in a 425°F oven for 20 minutes per side. No salting, no resting, no skillet.
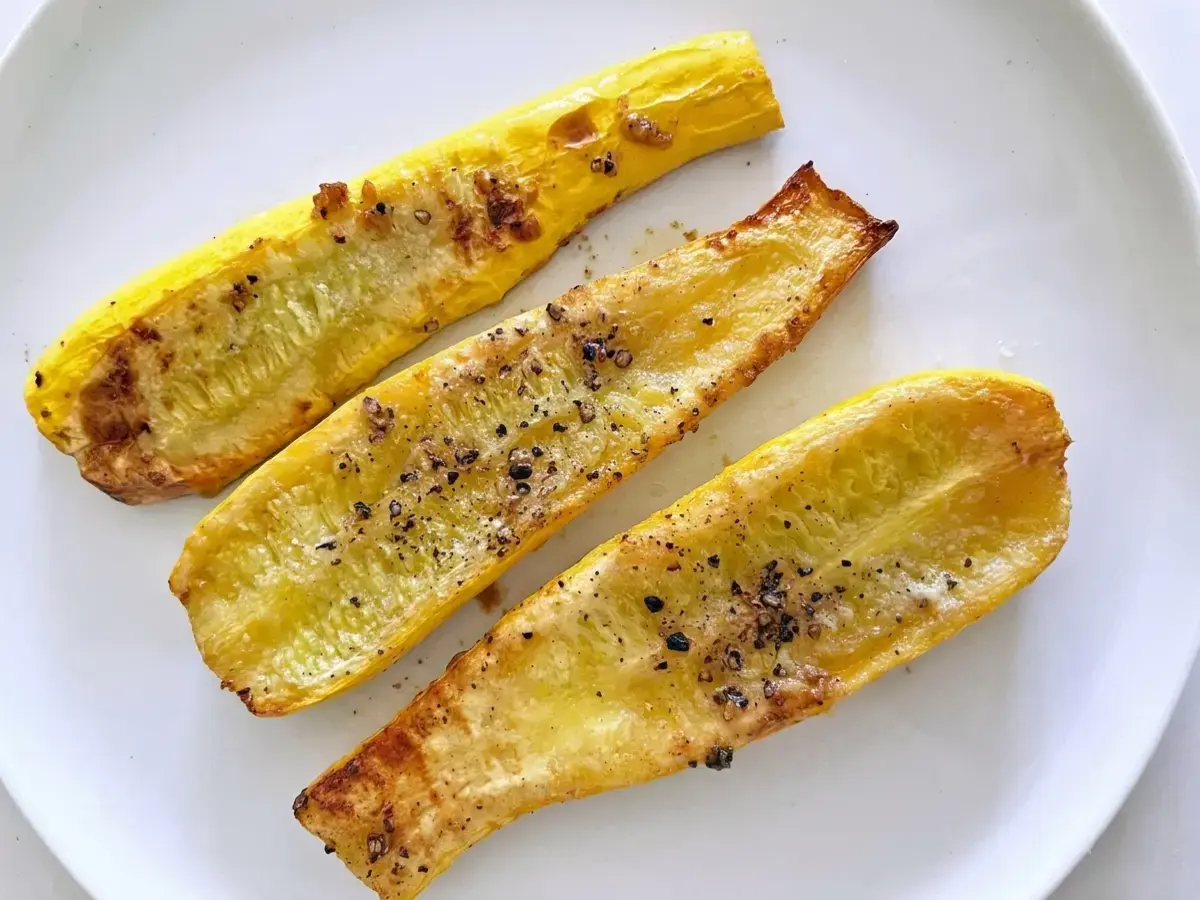
How did it turn out? The flavor was genuinely good. Olive oil, salt, and a hot oven will always taste like summer. The texture was the trade off. The squash came out soggy rather than caramelized, and it lacked the browned edges that make the full method worth the trouble.
My honest advice: use the lazy version on a busy weeknight when you simply need vegetables on the table. Use the full method when the squash is the point of the meal, or when you are bringing a dish somewhere and want people to ask what you did to it. Both are legitimate. One is just better.
Serving Suggestions
Because this squash roasts at 450°F, the easiest plan is to pair it with a main dish that cooks at the same temperature. That way one oven does all the work and everything lands on the table at the same time.
Mains that fit the bill: shrimp parmesan, bacon wrapped chicken breast, roasted turkey breast, oven chicken kabobs, roasted pork tenderloin, and blackened chicken. Any of these plus a skillet of caramelized squash makes a plate that looks carefully planned, even when it was not.
Timing tip: start the squash after your main dish is already in the oven, since it only needs about 20 minutes of roasting.
Storing the Leftovers
This is one of those rare vegetable dishes that improves its reputation the next day. Leftovers keep in an airtight container in the refrigerator for up to 4 days.
My favorite way to eat them is cold, straight from the container or arranged on a plate with olives and cheese, the way you would serve marinated vegetables as antipasti. The chilled version tastes almost like a different dish, and it is the reason I now make extra on purpose.
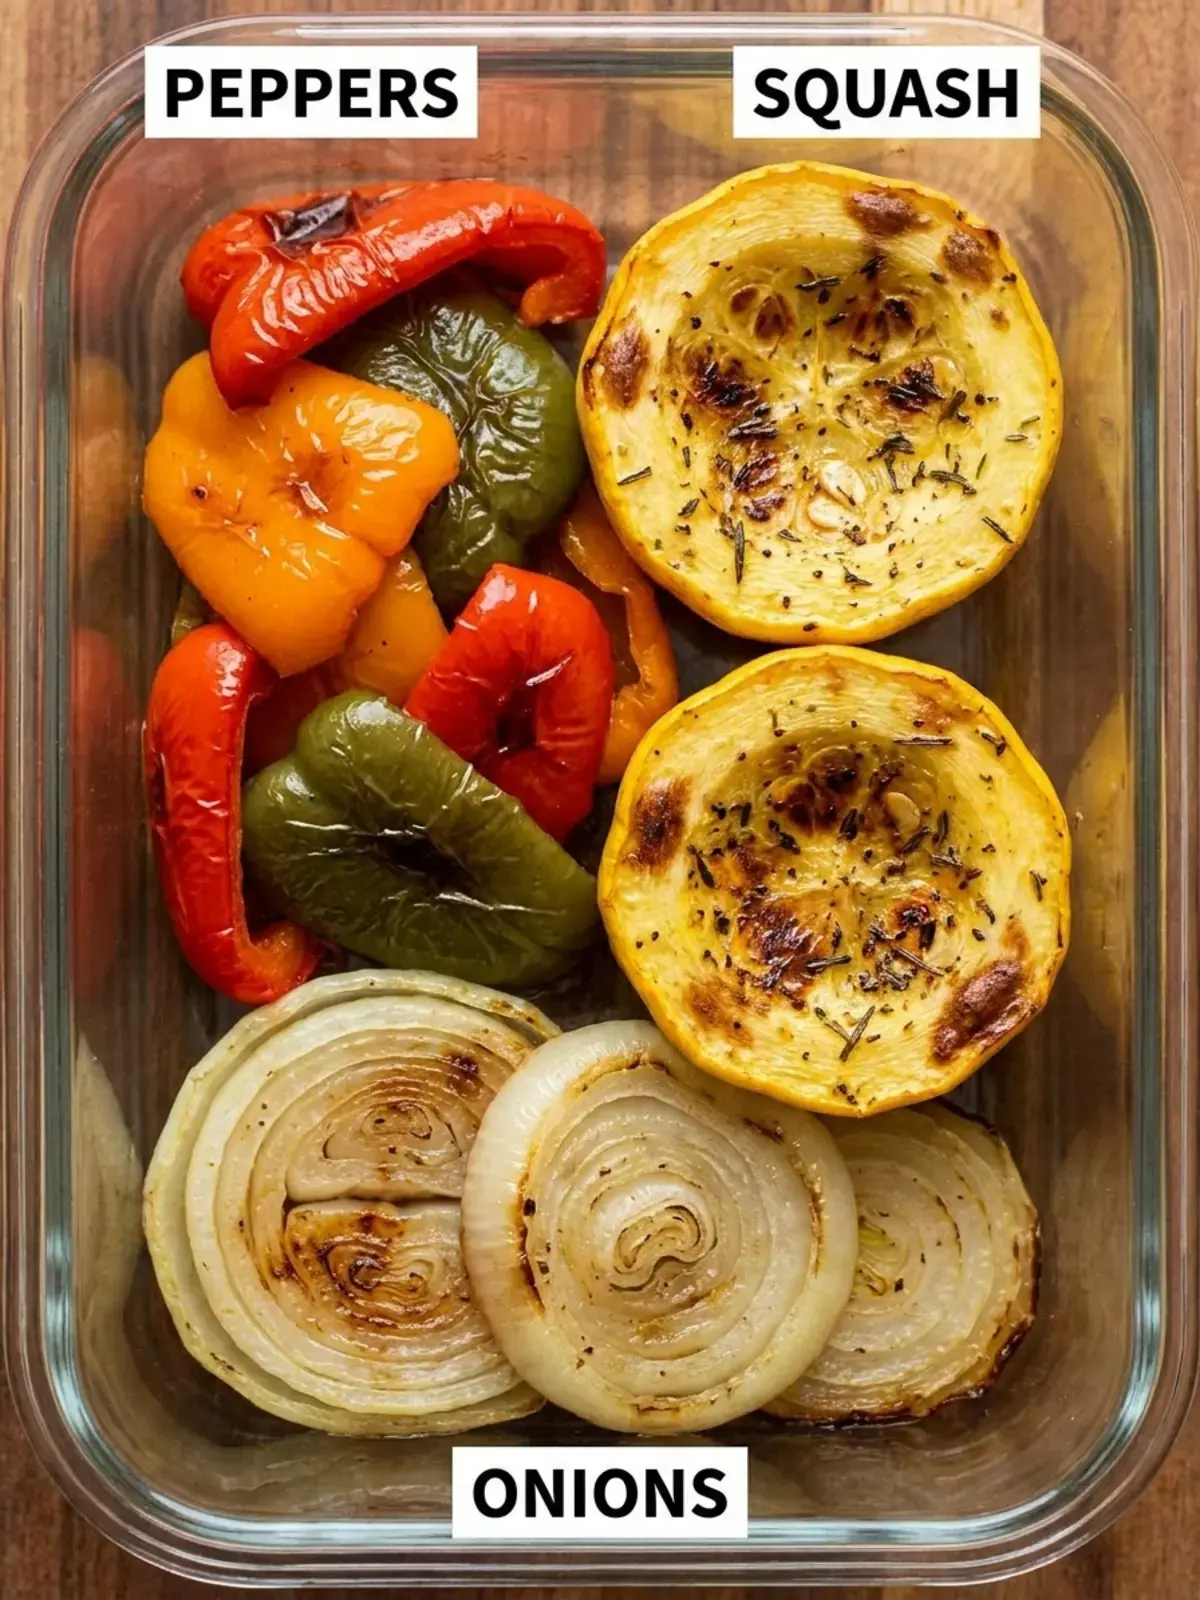
To reheat, cover the squash and warm it in the microwave at 50% power. Gentle heat keeps it from turning to mush. Freezing is not recommended, because the texture does not survive the thaw. I usually store mine in a glass container, sometimes with roasted peppers and onions tucked in alongside, and it holds up beautifully for lunches.
Ingredients
- 3 medium yellow squash, unpeeled, ends trimmed
- 1 teaspoon Diamond Crystal kosher salt, or 1/2 teaspoon of any other salt, including Morton kosher salt
- 1 tablespoon ghee
- 1/4 teaspoon black pepper
- 1/2 teaspoon garlic powder
- 1/2 teaspoon dried thyme
Optional: grated Parmesan cheese for sprinkling before the squash goes into the oven.
Instructions
- Cut each squash in half lengthwise. Make shallow cuts in a crosshatch pattern on the flesh side. Sprinkle 1 teaspoon of kosher salt over the flesh and let it rest for 15 minutes. The salt draws water out, and the crosshatch pattern helps the salt penetrate the squash.
- After 15 minutes, the squash will have visible water droplets on its surface. Pat it dry using paper towels.
- Preheat the oven to 450°F.
- In a large 12 inch oven safe skillet, heat the ghee over medium high heat. I use a cast iron skillet.
- Place the squash in the skillet in a single layer, flesh side down. Cook the squash for about 5 minutes, until the bottom is browned. If the pan becomes too hot, reduce the heat to medium.
- Turn the heat off. Flip the squash. Sprinkle it with the black pepper, garlic powder, and dried thyme.
- Transfer the skillet to the preheated oven.
- Roast the squash for about 20 minutes, until tender. Serve immediately.
From start to finish this is a 40 minute project, with 20 minutes of prep and 20 minutes of cooking.
Notes
Treat the seasoning amounts as a starting point rather than a rule. Salt especially is personal, and you can adjust everything to taste once you have made this once or twice.
Here is why the scoring and salting matter so much: the crosshatch cuts open up the flesh, the salt pulls excess liquid to the surface, and patting the squash dry removes that liquid before it can steam.
The result is squash that browns instead of stews. Because enough salt works its way into the flesh through the scoring, you do not need to add more salt after blotting.
Squash and ovens both vary, so use the times as a guide and check that the squash is cooked through, tender, and browned before you serve it.
If your squash turns out pale and soft, the usual culprit is moisture. Score it, salt it, wait the full 15 minutes, and dry it well before it ever hits the skillet.
Leftovers keep in an airtight container in the refrigerator for up to 4 days and taste great cold, antipasti style. Reheat covered in the microwave at 50% power, and skip the freezer, since freezing is not recommended for this dish. The nutrition figures assume roughly half of the salt stays in the dish after blotting.
Recipe details
Here is the short version of the numbers, in case you are planning your timing around the rest of the meal.
| Detail | Value |
|---|---|
| Prep time | 20 minutes |
| Cook time | 20 minutes |
| Total time | 40 minutes |
| Servings | 3 |
| Serving size | 1 squash |
Per serving nutrition: 78 calories, 7 g carbohydrates, 3 g protein, 5 g fat, 3 g saturated fat, 2 g fiber, 4 g sugar, and 191 mg sodium.
FAQs
Why salt yellow squash before roasting?
Salting yellow squash before roasting draws out excess moisture through a process called degorging. This step concentrates the squash flavor and prevents sogginess during cooking. To do this, cut the squash in half lengthwise, score the flesh in a crosshatch pattern, sprinkle with kosher salt, and let it rest for 15 minutes before patting it dry.
What is the best temperature and time to roast yellow squash?
For the best caramelized results, roast yellow squash in a 450°F oven. Following a pan-searing step, the squash roasts for about 20 minutes until tender. If using a simpler method without pre-salting, roast at 425°F, cooking for 20 minutes per side.
Should I peel yellow squash before roasting?
No, you should not peel yellow squash before roasting. The skin is thin, edible, and contains beneficial nutrients like beta-carotene. Simply trim the ends and roast the squash with the skin on.
Can you substitute butter for ghee when roasting yellow squash?
Butter is not ideal for the pan-searing step because its milk solids burn at high temperatures. Ghee, or clarified butter, is recommended for its high smoke point and nutty flavor. Avocado oil, refined coconut oil, or light olive oil are suitable substitutes.

Roasted Yellow Squash
Roasted Yellow Squash If you have ever pulled a tray of squash out of the oven and watched it slump into a puddle, you already know the problem. Yellow squash carries a lot of water, and a straight roast usually leaves it soft and pale instead of golden.
- Total Time: 40 min
- Yield: 3 1x
Ingredients
3 yellow squash, medium-sized, unpeeled, ends trimmed
1 teaspoon Diamond Crystal kosher salt, or ½ teaspoon of any other salt, including Morton kosher salt
1 tablespoon ghee
¼ teaspoon black pepper
½ teaspoon garlic powder
½ teaspoon dried thyme
Instructions
1-Cut each squash in half lengthwise: Cut each squash in half lengthwise. Make shallow cuts in a crosshatch pattern on the flesh side. Sprinkle 1 teaspoon of kosher salt over the flesh and let it rest for 15 minutes. The salt will draw water out. The crosshatch pattern helps the salt penetrate the squash.
2-After 15 minutes, the squash will have: After 15 minutes, the squash will have visible water droplets on its surface. Pat it dry using paper towels.
3-Preheat the oven to 450°F: Preheat the oven to 450°F.
4-In a large, 12-inch, oven-safe skillet, heat: In a large, 12-inch, oven-safe skillet, heat the ghee over medium-high heat. I use a cast-iron skillet.
5-Place the squash in the skillet in: Place the squash in the skillet in a single layer, flesh side down. Cook the squash for about 5 minutes, until the bottom is browned. If the pan becomes too hot, reduce the heat to medium.
6-Turn the heat off: Turn the heat off. Flip the squash. Sprinkle it with black pepper, garlic powder, and dried thyme.
7-Transfer the skillet to the preheated oven: Transfer the skillet to the preheated oven.
8-Roast the squash for about 20 minutes,: Roast the squash for about 20 minutes, until tender. Serve immediately.
Last Step:
Please leave a rating and comment letting us know how you liked this recipe! This helps our business to thrive and continue providing free, high-quality recipes for you.- Prep Time: 20 min
- Cook Time: 20 min
- Method: bake
Nutrition
- Serving Size: 1 squash
- Calories: 78
- Sugar: 4
- Sodium: 191
- Fat: 5
- Saturated Fat: 3
- Carbohydrates: 7
- Fiber: 2
- Protein: 3