
15 Easy Thanksgiving Mantel Decor Ideas You Can Actually DIY Without Making a Mess
Store bought fireplace setups can cost too much and look identical, while handmade projects can create a warm inviting home for less money. This collection gathers simple ideas you can match to your own ledge and style without stress.
For broader inspiration, see Thanksgiving mantel decor ideas. Each project below uses easy materials and clear steps, so you can build a display that feels personal, seasonal and calm.
Cream & Earthy Pumpkin Tier
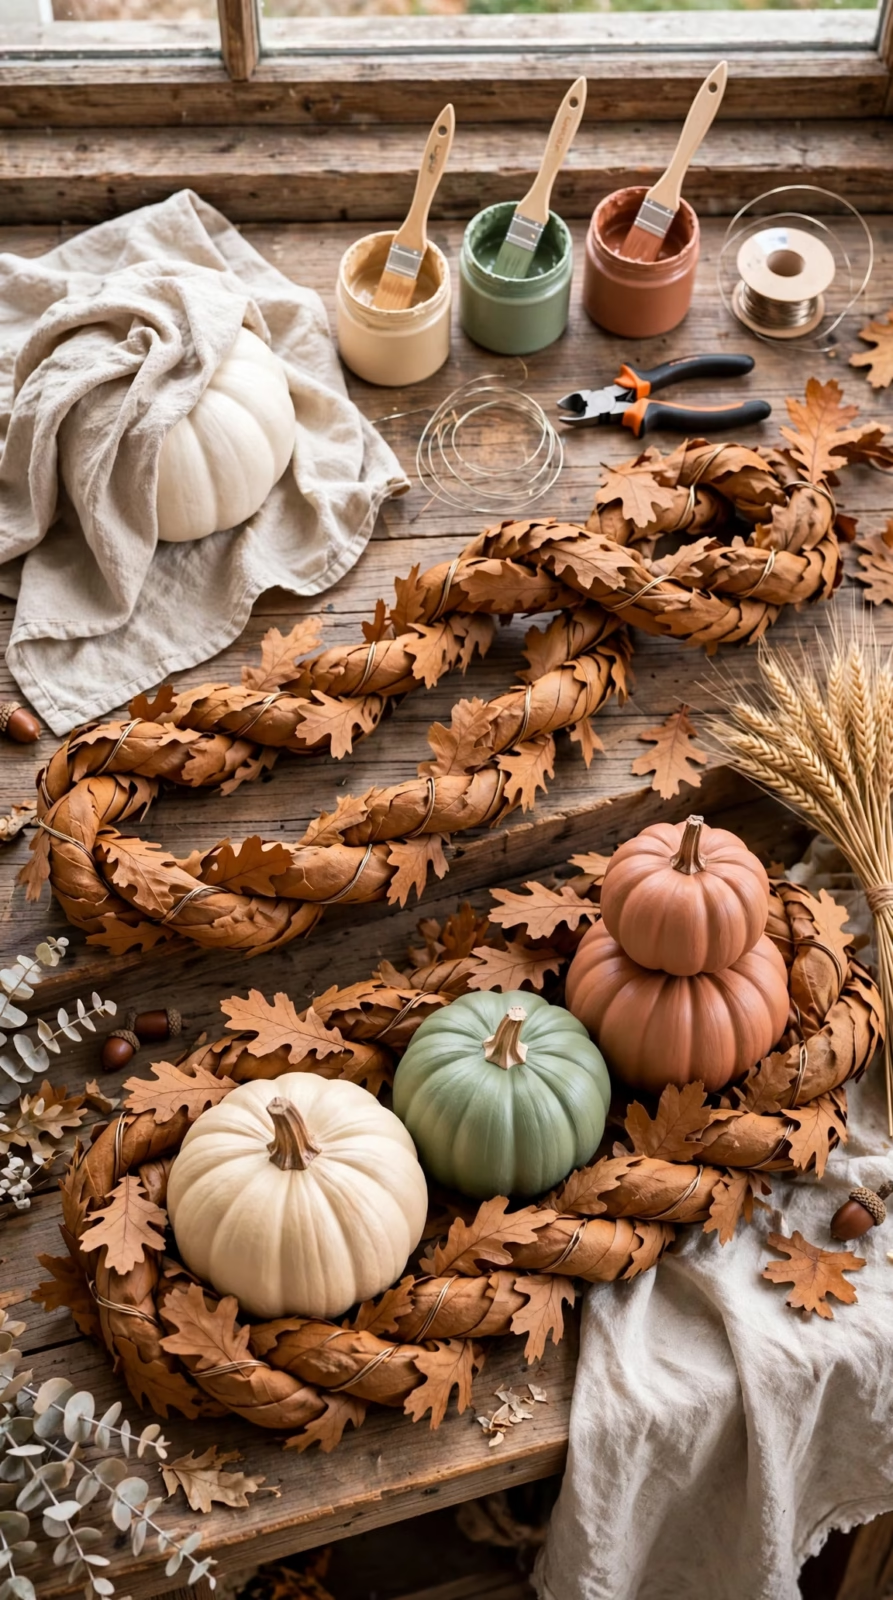
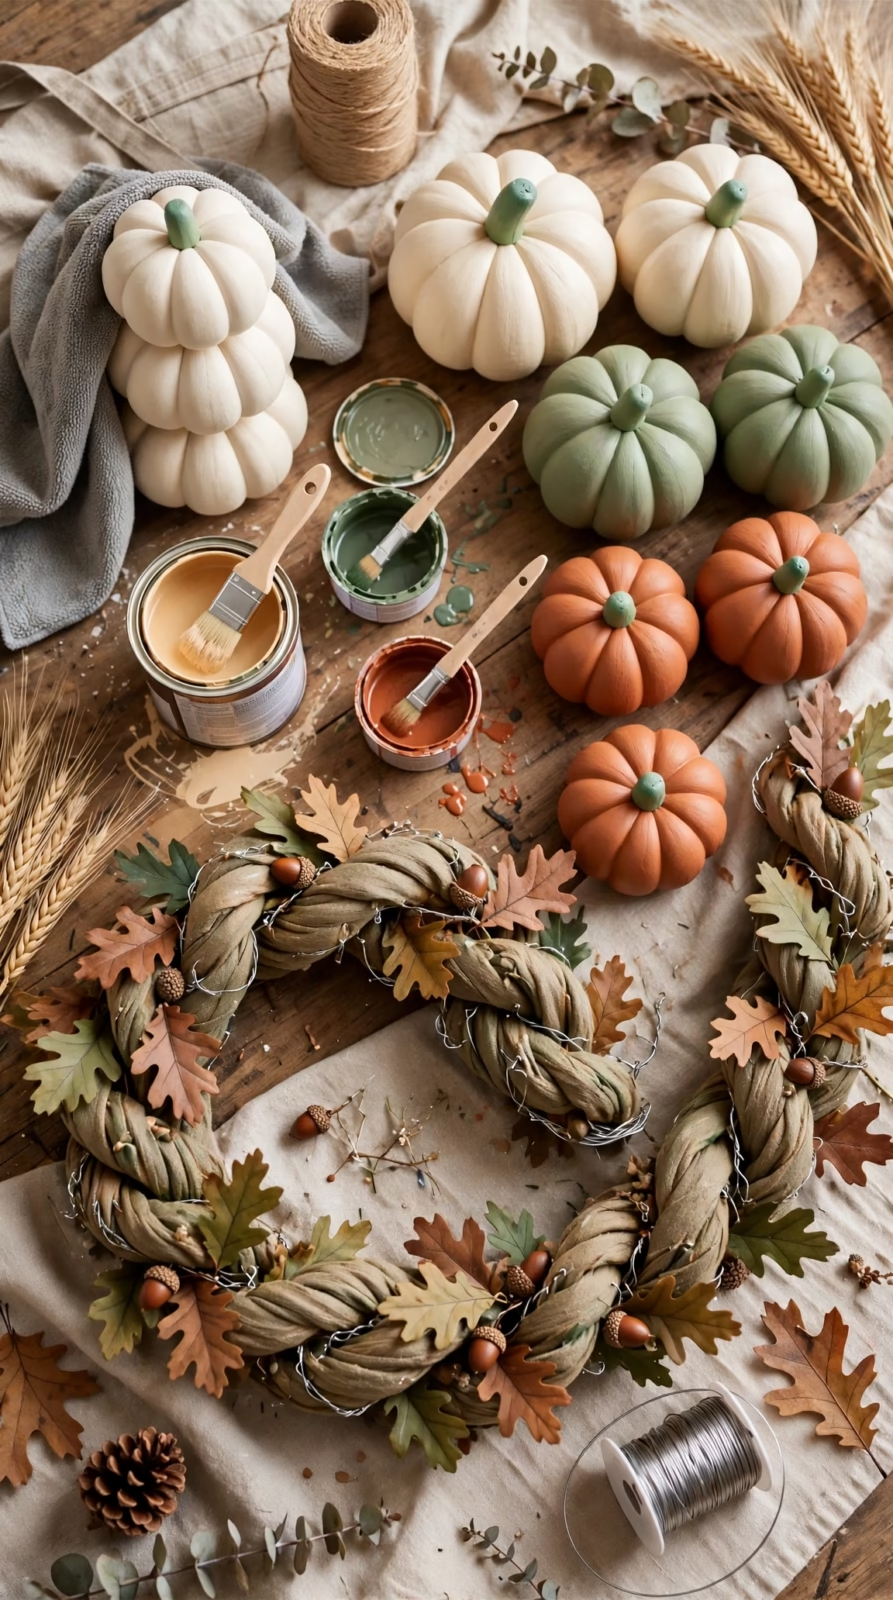
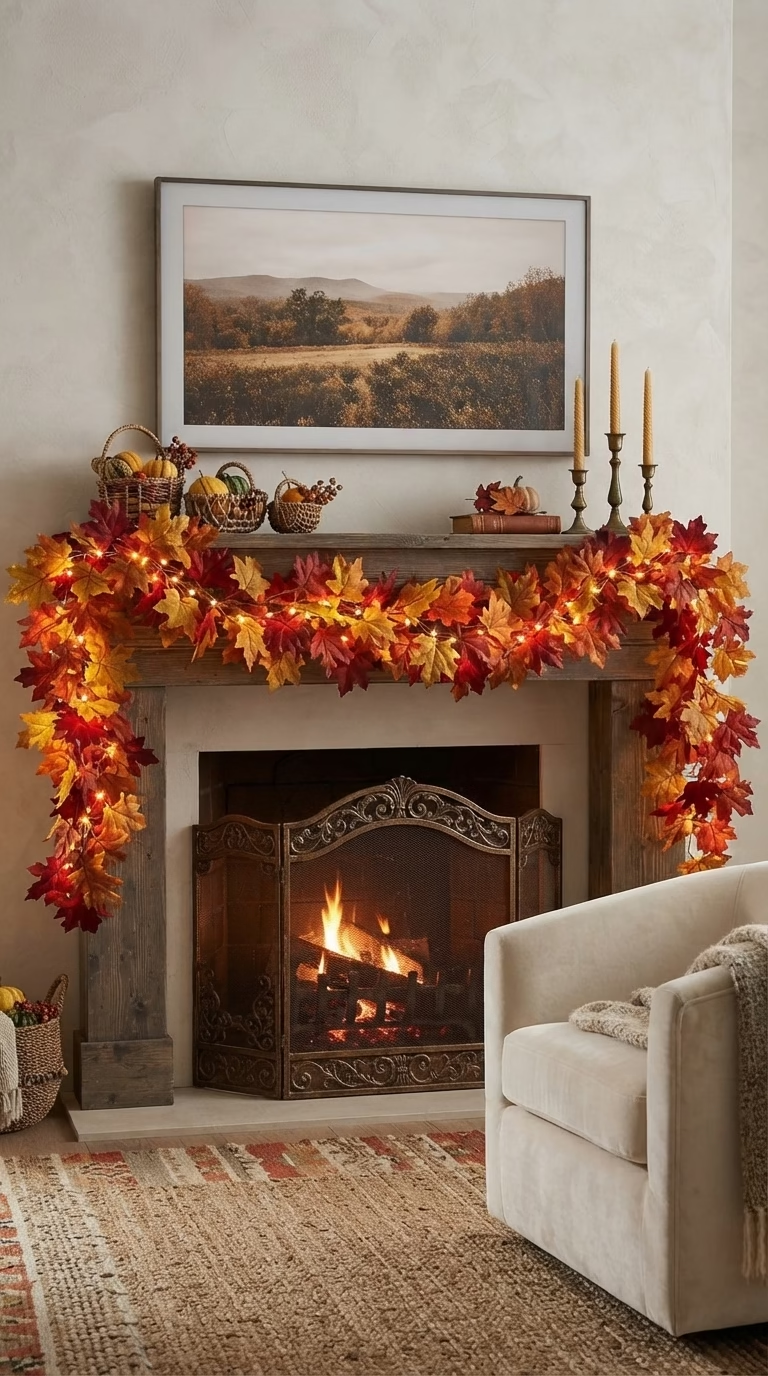
Shiny plastic gourds look artificial, but painting inexpensive foam pumpkins in soft muted colors transforms a shelf. Match colors to furniture and vary heights for an elegant designer look on a small budget.
Supplies You Need to Grab
- Assorted foam pumpkins, matte paint in cream, sage green and terracotta orange, soft brushes and a foam dabber.
- Two faux oak garlands in warm brown tones, floral wire and a low temp glue gun.
Step by Step Crafting Instructions
Wipe pumpkins with a dry cloth and paint large gourds with two coats of warm cream, drying for twenty minutes between coats. Paint smaller pumpkins sage green and muted terracotta, leaving stems unpainted. Twist garlands together with floral wire, lay them on the shelf and nestle pumpkins inside, stacking smaller ones on top.
Jump to:
- 15 Easy Thanksgiving Mantel Decor Ideas You Can Actually DIY Without Making a Mess
- Cream & Earthy Pumpkin Tier
- Supplies You Need to Grab
- Step by Step Crafting Instructions
- Vibrant Autumn Leaf Garland Swag
- What You Need for This Craft
- How to Assemble the Swag
- Rustic Eucalyptus & Fresh Pumpkin Hearth
- Materials List
- Crafting Steps
- “Grateful, Thankful, Blessed” Calligraphy Sign
- Craft Supplies Required
- How to Make the Sign
- Warm Amber Candle & Pinecone Glass Hurricanes
- Items You Will Need
- Step by Step Assembly
- Handmade Fabric Plaid Pumpkins
- Sewing & Crafting Supplies
- How to Sew the Pumpkins
- Modern Dried Wheat Sheaves
- Materials Needed
- Instructions to Build the Sheaves
- Distressed Candlestick Holders
- Upcycling Supplies
- Distressing Steps
- Mini Indian Corn Garland
- Craft Materials
- How to String the Corn Garland
- Mason Jar Leaf Lanterns
- Supplies You Need
- Step by Step Decoupage Guide
- Burlap “GIVE THANKS” Pennant Banner
- Banner Supplies
- How to Craft the Banner
- Faux Metallic Gilded Acorns
- What You Need to Gather
- Gilding & Assembly Steps
- Wood Slice Thanksgiving Countdown
- Supplies for This Project
- How to Make the Countdown Sign
- Copper Wire Leaf Fairy Lights
- Wire Crafting Supplies
- Step by Step Wire Shaping
- Preserved Fall Leaf Shadow Boxes
- Supplies You Need
- Preserving & Framing Steps
Vibrant Autumn Leaf Garland Swag
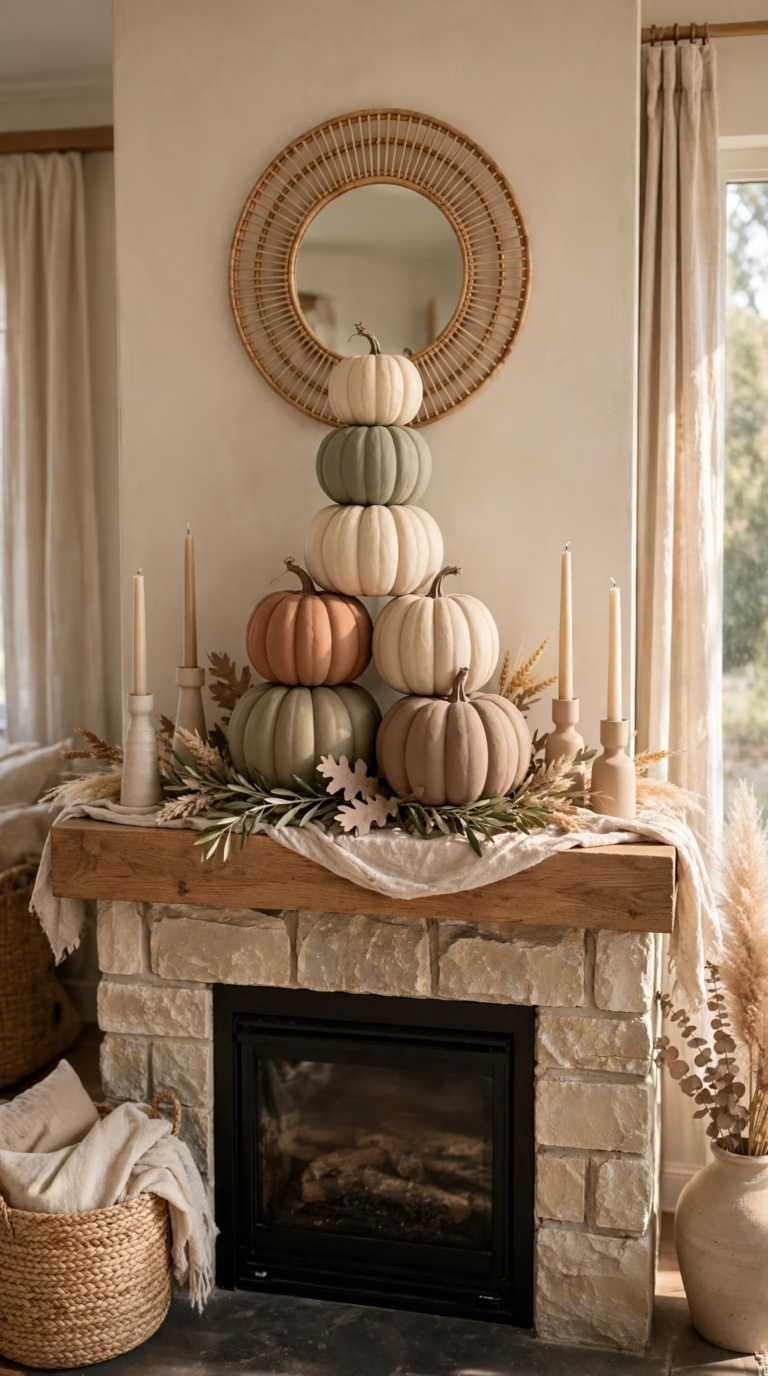
A single flat garland can look lost from across the room, so doubling realistic maple leaves and threading fairy lights through them builds a fuller swag that frames the hearth. Its low profile suits a mantel below a wall mounted TV, keeping the screen clear while draped sides draw attention toward the fire.
What You Need for This Craft
- Three faux maple garlands in autumn colors and two sets of battery operated fairy lights.
- Fasteners for joining stems, removable hooks for mounting and small cutters.
How to Assemble the Swag
Bind two garlands together on the floor, then halve the third garland and add pieces to the ends for fuller hanging sides. Weave fairy lights through the center and conceal battery packs. Attach removable hooks to the surround and drape the swag over the top ledge, letting lit ends fall down both sides.
Rustic Eucalyptus & Fresh Pumpkin Hearth
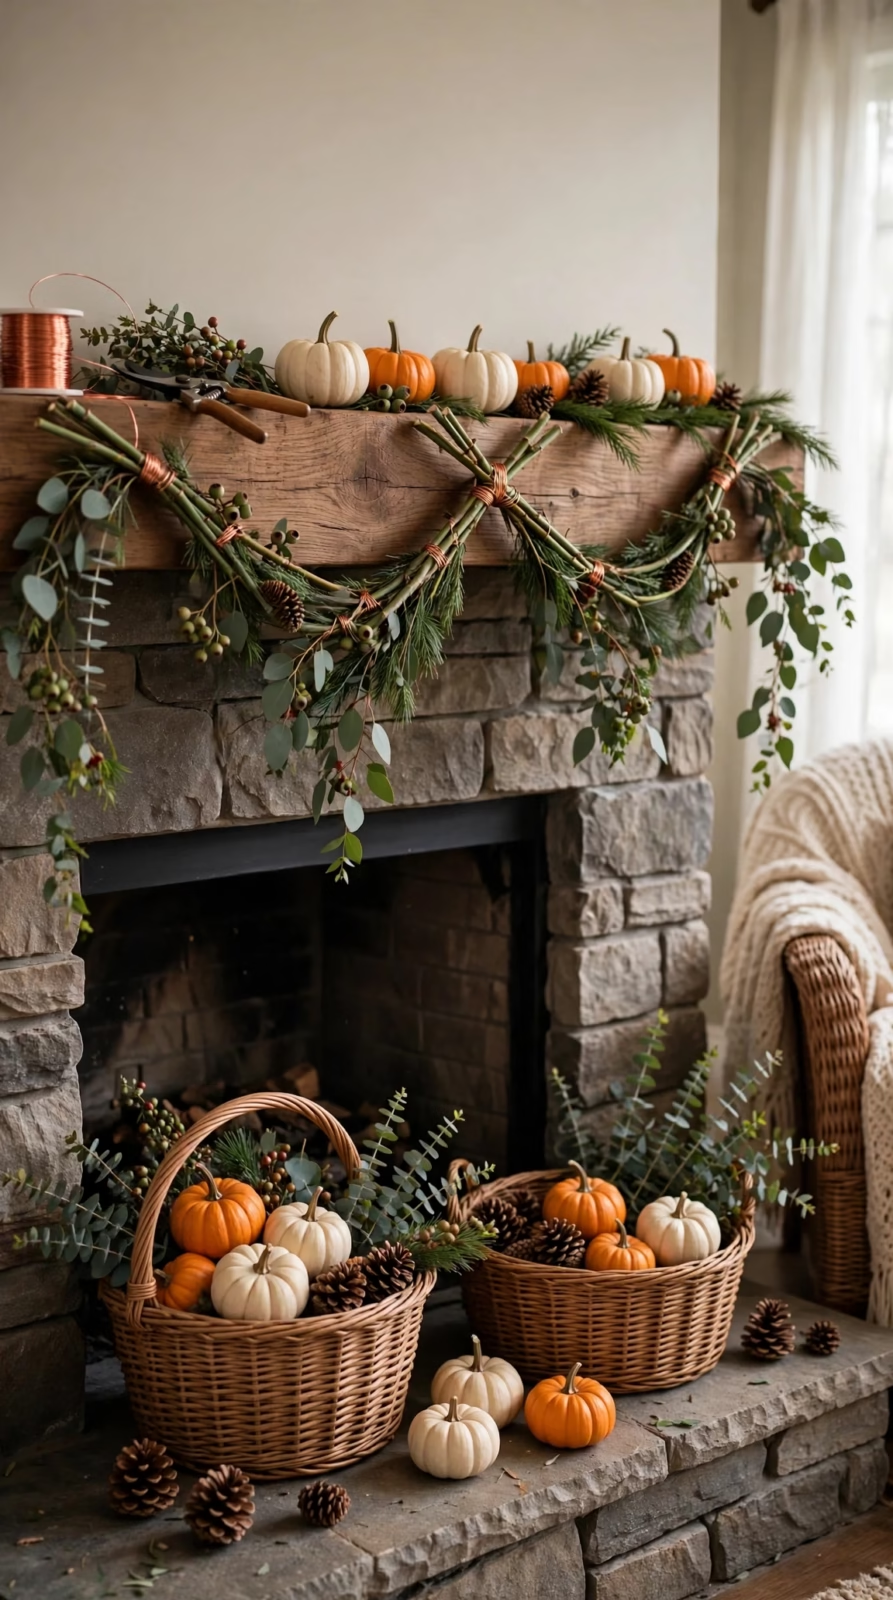
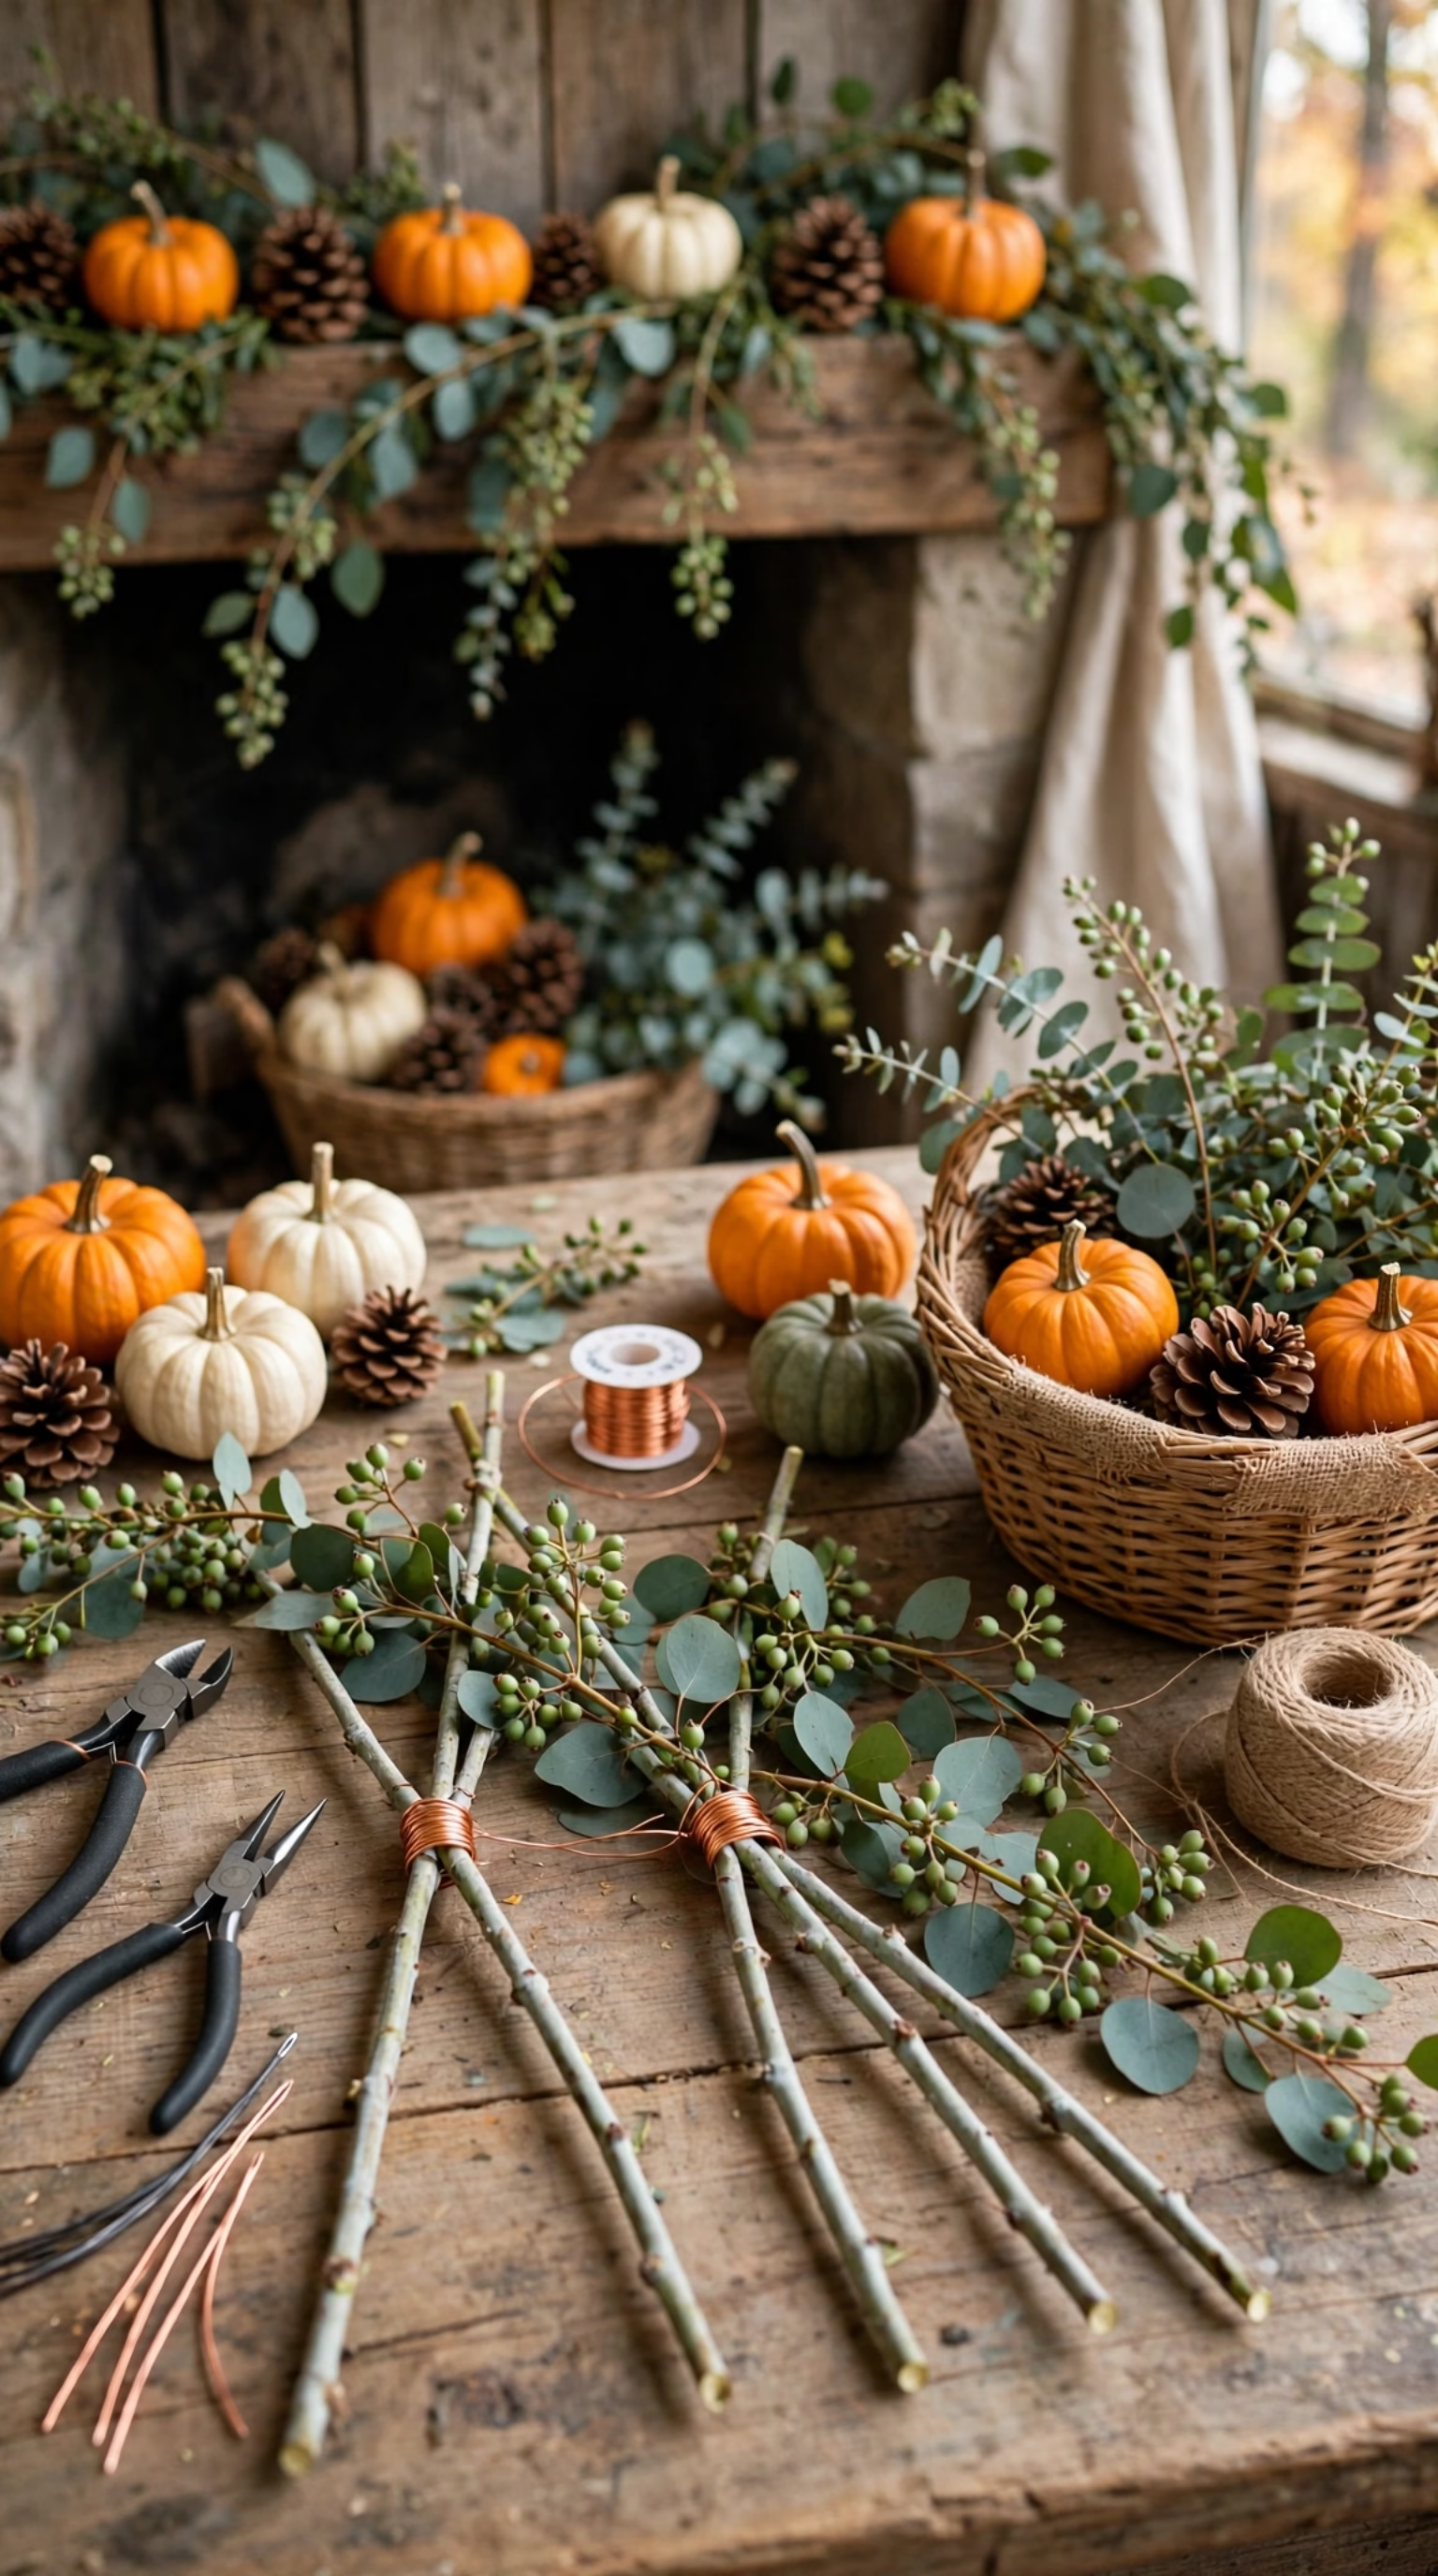
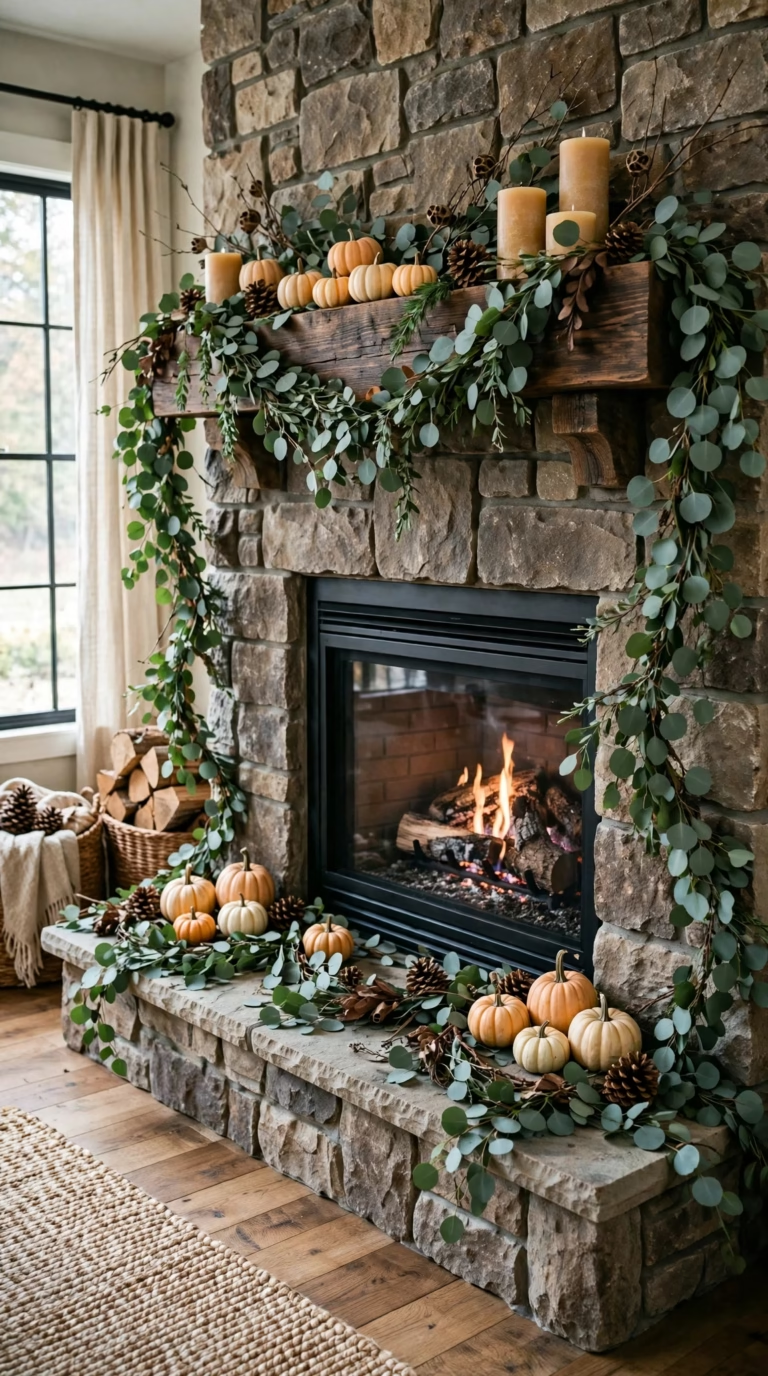
Bright orange decor can clash with dark wood beams or heavy stone, while dusty green silver dollar eucalyptus paired with miniature sugar pumpkins offers a fresher balanced and organic contrast. Wired greenery chains can extend across both the upper beam and the stone floor below.
Materials List
- Faux silver dollar eucalyptus stems, seeded eucalyptus picks and green paddle wire.
- Mini orange sugar pumpkins, large pinecones and woven wicker baskets for the hearth.
Crafting Steps
Place four eucalyptus stems end to end with ends overlapping, then bind joints tightly with paddle wire to make one vine. Insert seeded picks so they drape over the front, mount the garland across the beam and arrange pumpkins and pinecones along it, with extras in hearth baskets.
“Grateful, Thankful, Blessed” Calligraphy Sign
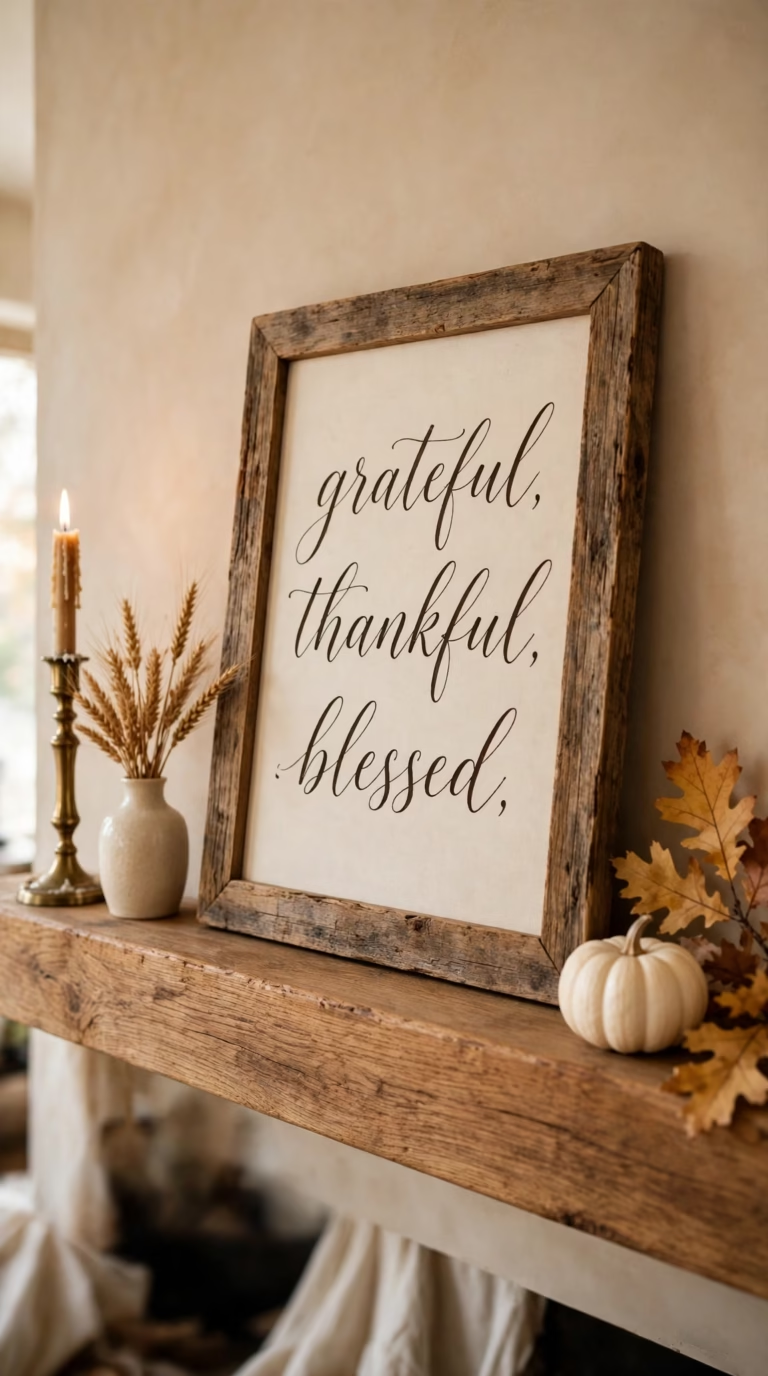
Finding ready made wall art with the desired wording and wood stain can be difficult, so a DIY wooden sign gives a custom centerpiece for a fraction of retail prices. Neat handwriting is not required, because graphite transfer paper lets a printed font be traced onto canvas or wood in ten minutes.
Craft Supplies Required
- A blank wood framed canvas or sanded pine board, dark walnut stain with a cotton rag and matte off white acrylic paint with a foam brush.
- Graphite transfer materials with a printed template and pen, plus an oil based paint marker.
How to Make the Sign
Stain the frame with a cotton rag and let it dry. Paint raw pine with two coats of matte off white paint. Tape the template over graphite paper, trace firmly with a ballpoint pen, then fill letters with a dark brown marker and let them cure for one hour.
Warm Amber Candle & Pinecone Glass Hurricanes
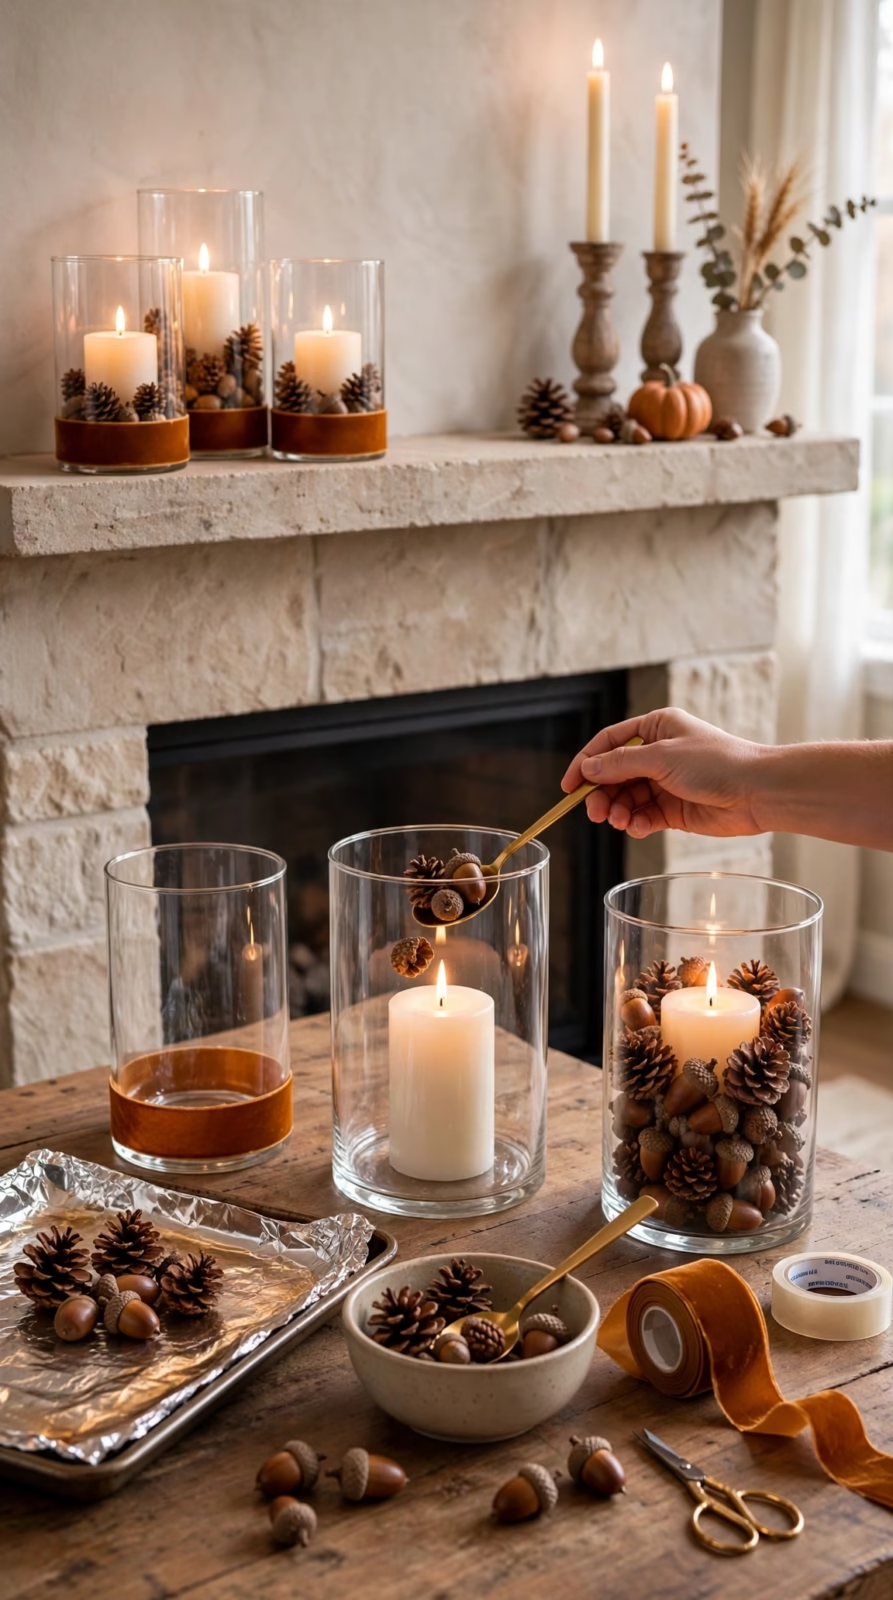
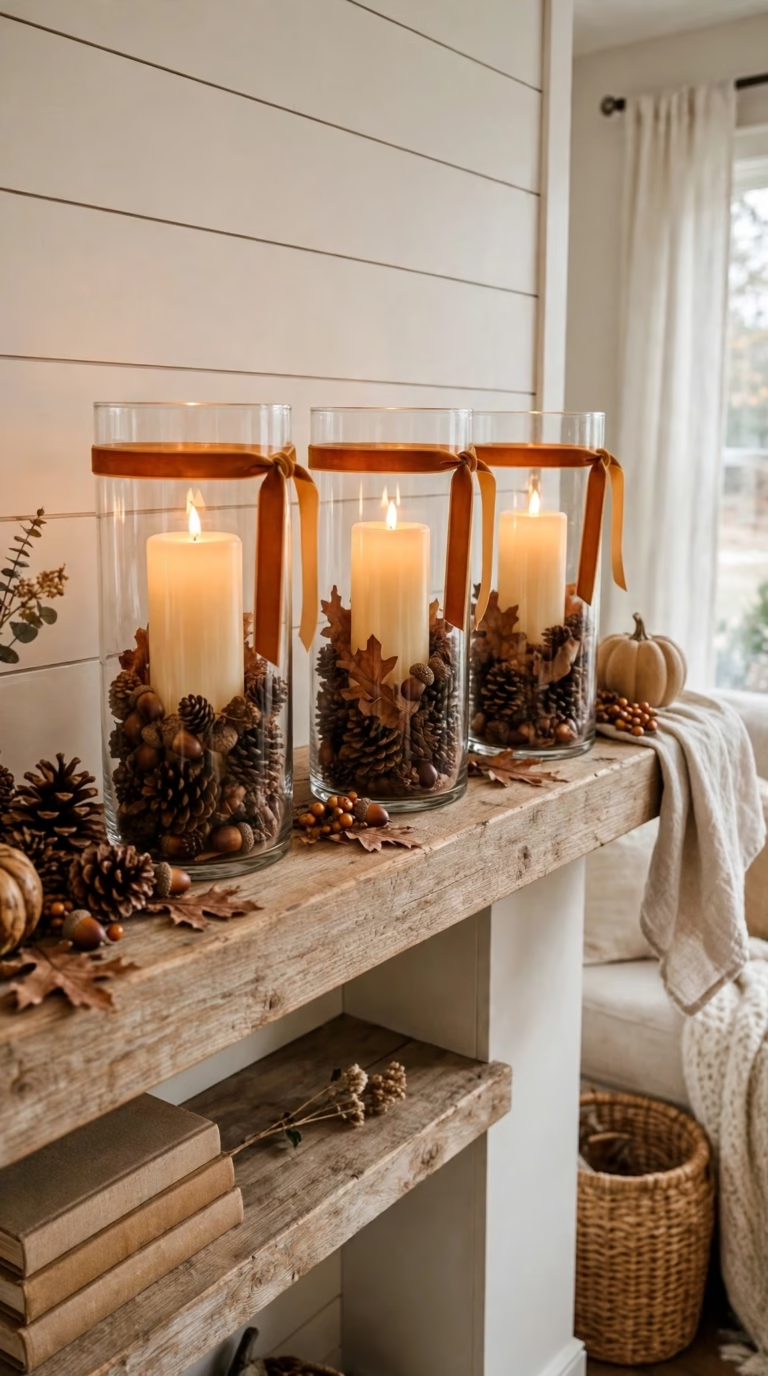
Tall glass hurricanes fill empty vertical space at the ends of a shelf, while pinecones layered around candles give a warm flicker. Flameless candles are used instead of open flames near dry autumn garlands. The author also bakes backyard pinecones first so small bugs are not brought indoors.
Flameless candles give a warm flicker more safely near dry garlands, especially with children or pets nearby.
Items You Will Need
- Three tall clear glass cylinders in staggered heights and three warm glow flameless LED pillar candles with a remote timer.
- Small pinecones and acorns, amber velvet ribbon, craft scissors and double sided fabric tape.
Step by Step Assembly
Bake collected pinecones and acorns on a foil lined sheet at 200 degrees for thirty minutes, then let them cool. Wrap amber ribbon around the bottom edge of each cylinder and secure it with tape. Center one candle in each vase, fill the gap with cooled pinecones and acorns, and group the three hurricanes on one mantel corner.
Handmade Fabric Plaid Pumpkins
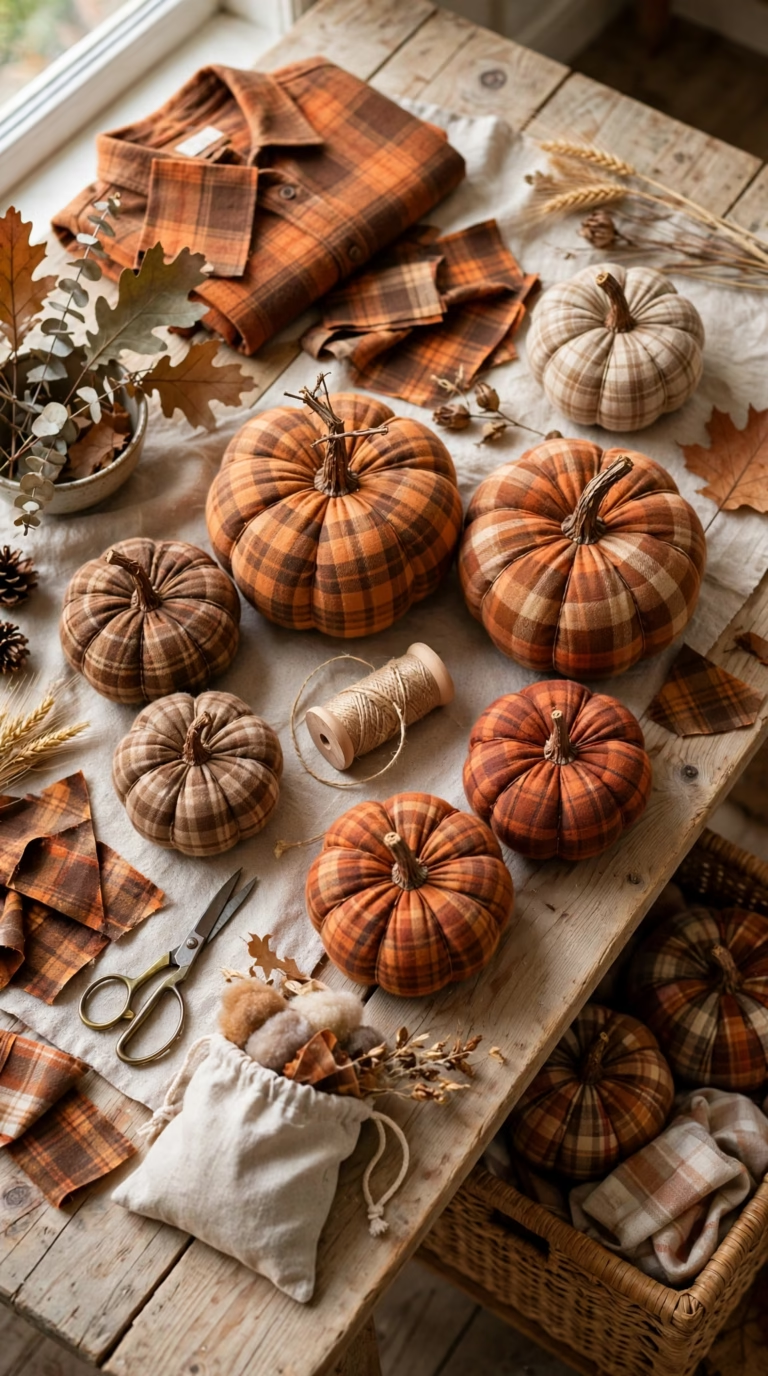
Hard materials such as wood, ceramic and stone can leave a shelf feeling cold, while soft flannel plaid pumpkins add cozy texture and autumn feel. A batch can be made in one afternoon from an old thrifted flannel shirt. They are lightweight, will not break and store easily in a bin after November.
Sewing & Crafting Supplies
- Plaid flannel, stuffing and rice for weight, sewing tools, stems or twigs, twine and hot glue.
- For more pattern inspiration, explore Trendiest plaid decor ideas.
How to Sew the Pumpkins
Cut flannel into rectangles in three sizes, fold each piece inside out and sew short edges to form a tube, then cinch one end shut. Turn it right side out, add rice to the base and pack it tightly with fiberfill.
Close the top with a running stitch, wrap twine around the outside to form ribs and glue a twig or dried stem into the center.
Modern Dried Wheat Sheaves
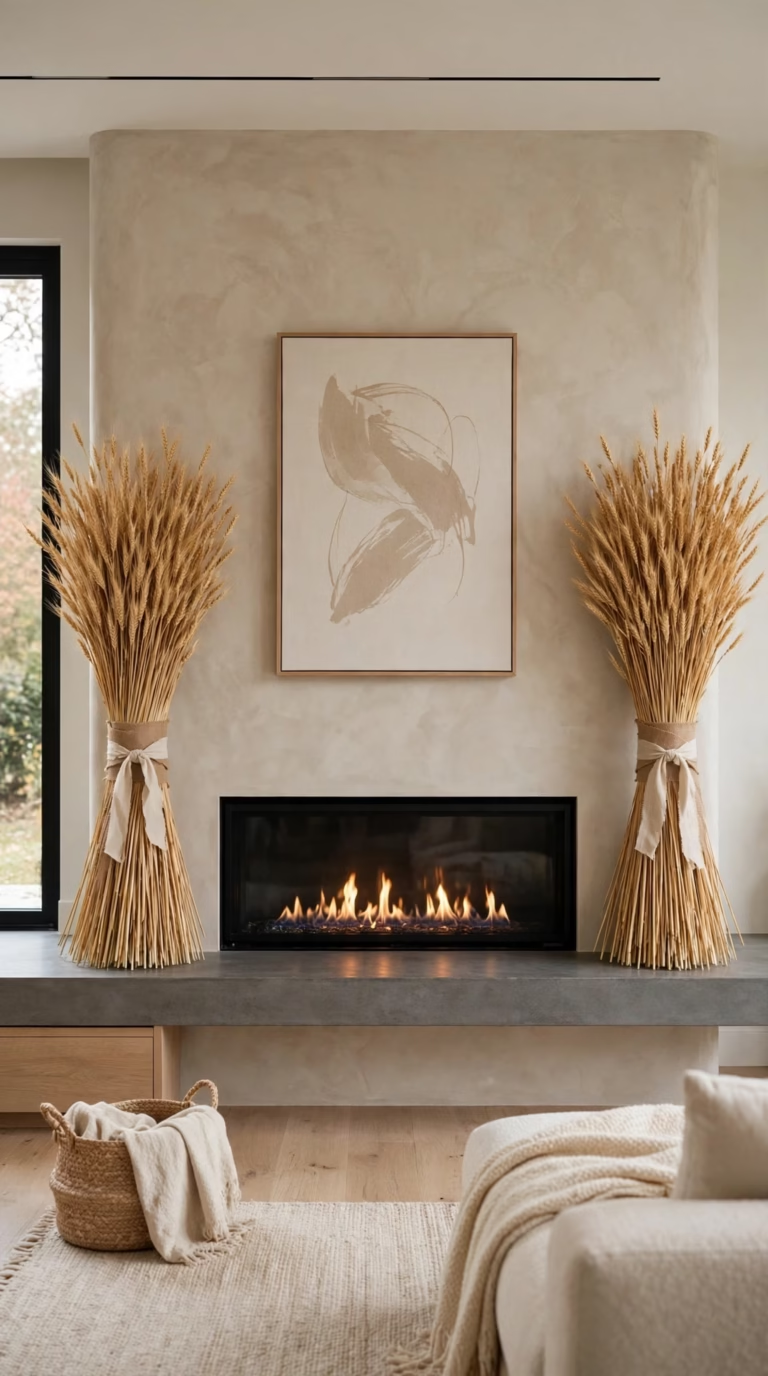
For a modern look without many small objects cluttering the ledge, standing bundles of golden dried wheat provide vertical height, clean lines and natural harvest texture. Place two matching sheaves on either side of the fireplace to frame central artwork. To carry the look beyond the fireplace, see Fall coffee table decor ideas.
Materials Needed
- Four large bundles of dried golden beardless wheat, about 400 stems in total, and thick tan rubber bands.
- Burlap ribbon, thin cream satin ribbon, sharp pruning shears and clear matte floral sealing spray.
Instructions to Build the Sheaves
Join two bundles and tap cut ends against a tabletop to align them. Secure stalks with a tight rubber band about six inches below the heads and another near the base, then twist lower stalks slightly into a spiral so the bundle fans into a freestanding cone.
Trim uneven stems until it stands alone, hide bands with burlap ribbon and mist heads with sealer.
Distressed Candlestick Holders
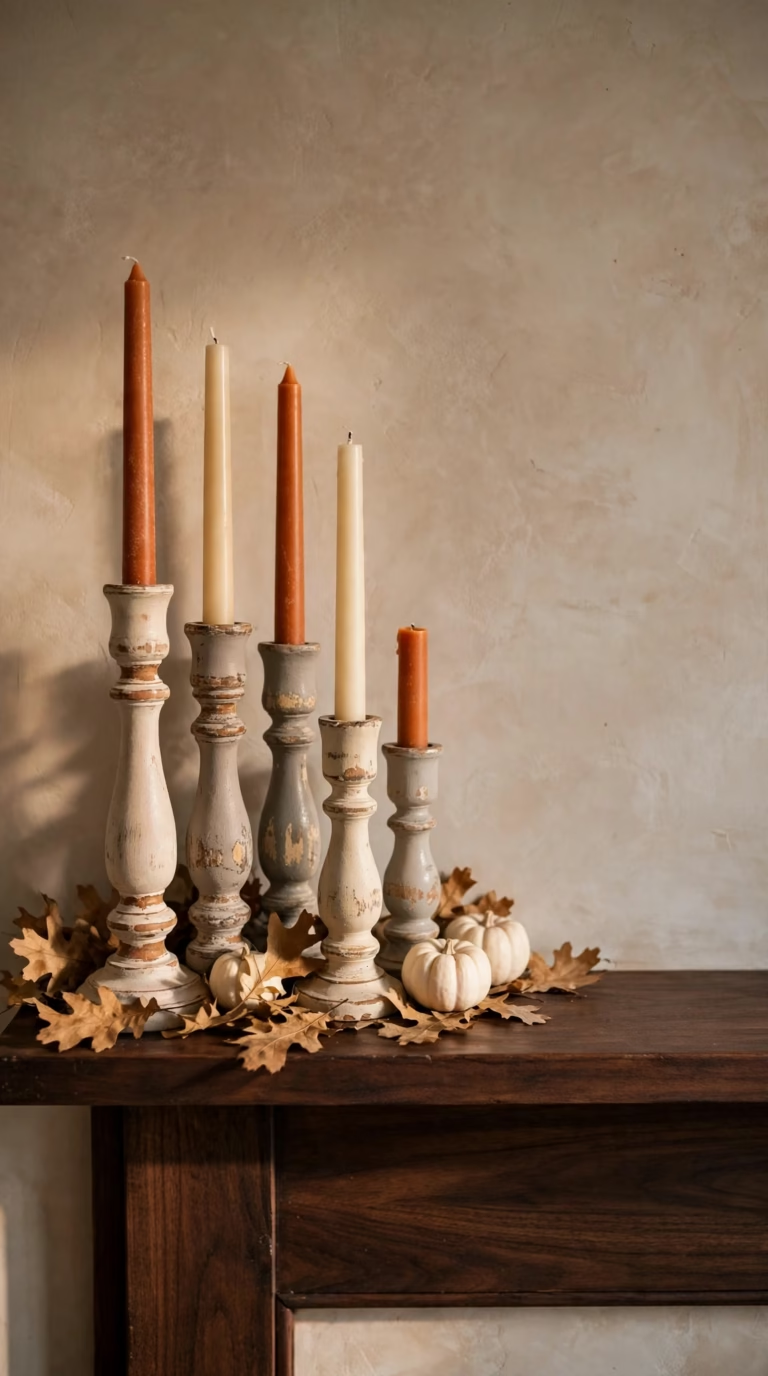
Shiny brass or glossy black holders can look too harsh with soft autumn colors, so mismatched wooden thrift store candlesticks upcycled with chalk paint give inexpensive vintage style. Light sanding reveals carved wooden rings beneath the paint, and grouping three or five holders of uneven heights on one side creates a collected over time look.
Upcycling Supplies
- Five mismatched wooden candlestick holders, matte white and warm gray chalk paint and a 1 inch chip brush.
- A medium grit sandpaper sponge, clear matte furniture wax with a lint free cloth and rust colored taper candles.
Distressing Steps
Clean holders with warm soapy water and let them dry. Apply a thick layer of warm gray chalk paint, focusing on carved grooves and base edges. After drying, dry brush matte white paint over gray so darker color shows through. Rub raised ridges lightly with sandpaper, buff on clear wax and add rust colored taper candles.
Mini Indian Corn Garland
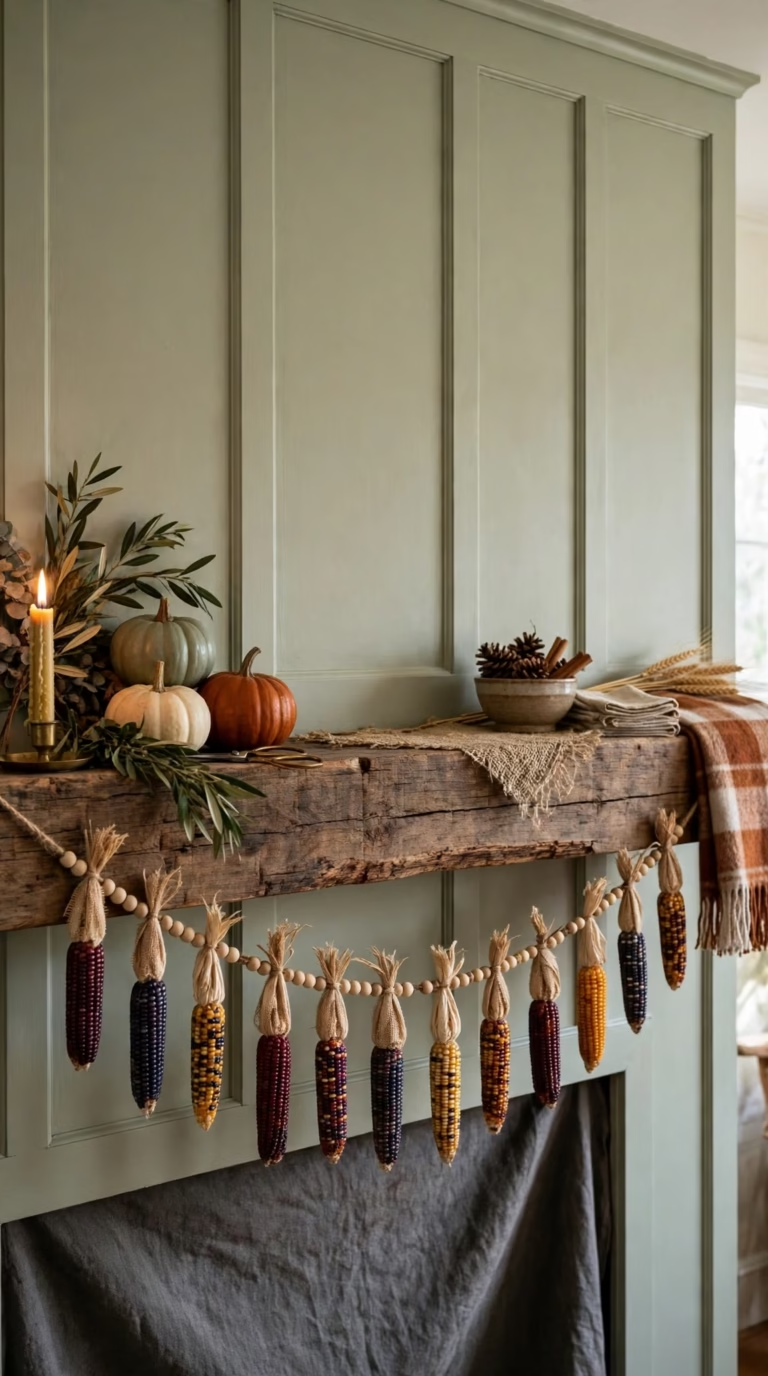
A mantel beam can look bare on its flat front even if the top is full. A handmade garland of miniature Indian corn hung along the bottom edge adds deep jewel tones and harvest character.
Although drilling dried cobs may seem difficult, their woody center core is fairly soft. Stored in a sealed plastic tub with a silica packet, the garland can last for years.
Craft Materials
- Dried miniature ornamental Indian corn cobs with husks and a cordless drill with a small wood bit.
- Thick jute twine with a large eye darning needle, dark walnut stained wooden spacer beads and clear acrylic gloss spray sealer.
How to String the Corn Garland
Pull dry husks back without breaking them off and tie them at the top tip with thin twine. Coat kernels with clear sealer to intensify reds, blues and yellows.
Drill through the woody stem base of each ear, string corn alternately with three dark beads, tie loops at both ends and hang the garland in a gentle curve across the fireplace front.
Mason Jar Leaf Lanterns
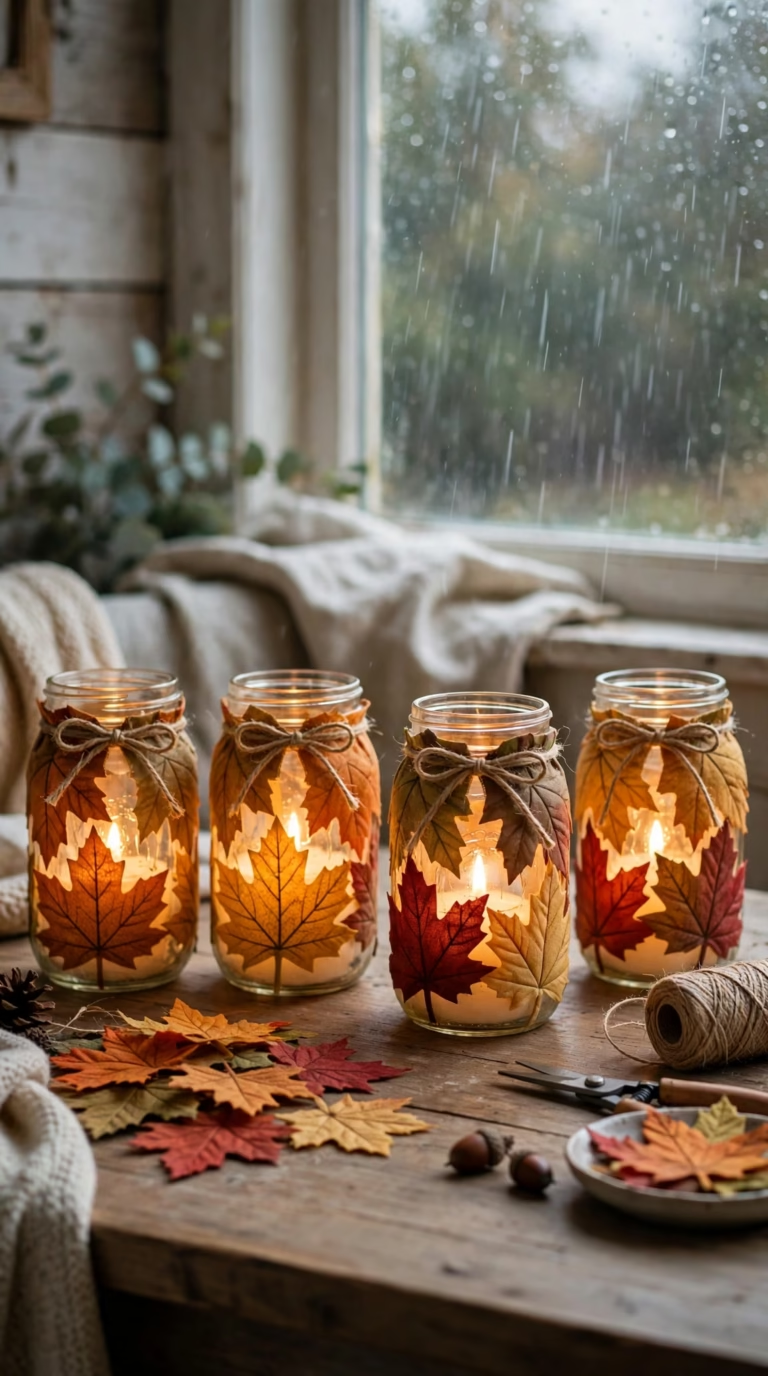
Mason jar leaf lanterns are a simple project suitable for making with children on a rainy Saturday. Pressing backyard leaves onto glass jars produces a stained glass like autumn glow when jars are lit from inside.
Flexible faux fabric leaves are suggested if real leaves are too crisp and brittle, because they bend around curved jar shoulders without cracking or peeling.
Supplies You Need
- Four clean quart sized wide mouth mason jars with labels removed and twenty flat flexible faux autumn maple leaves or pressed glycerin treated real leaves.
- Matte Mod Podge with a wide foam brush, raffia ribbon or braided twine, four battery operated flickering tea lights and dried yellow split peas.
Step by Step Decoupage Guide
Clean jar exteriors with rubbing alcohol. Brush Mod Podge onto part of the glass and press leaves flat, overlapping four to five leaves around the sides while leaving small gaps for light.
Cover the exterior and leaf tops with another smooth coat and let it dry clear for two hours. Add split peas, set a tea light inside and tie raffia bows around rims.
Burlap “GIVE THANKS” Pennant Banner
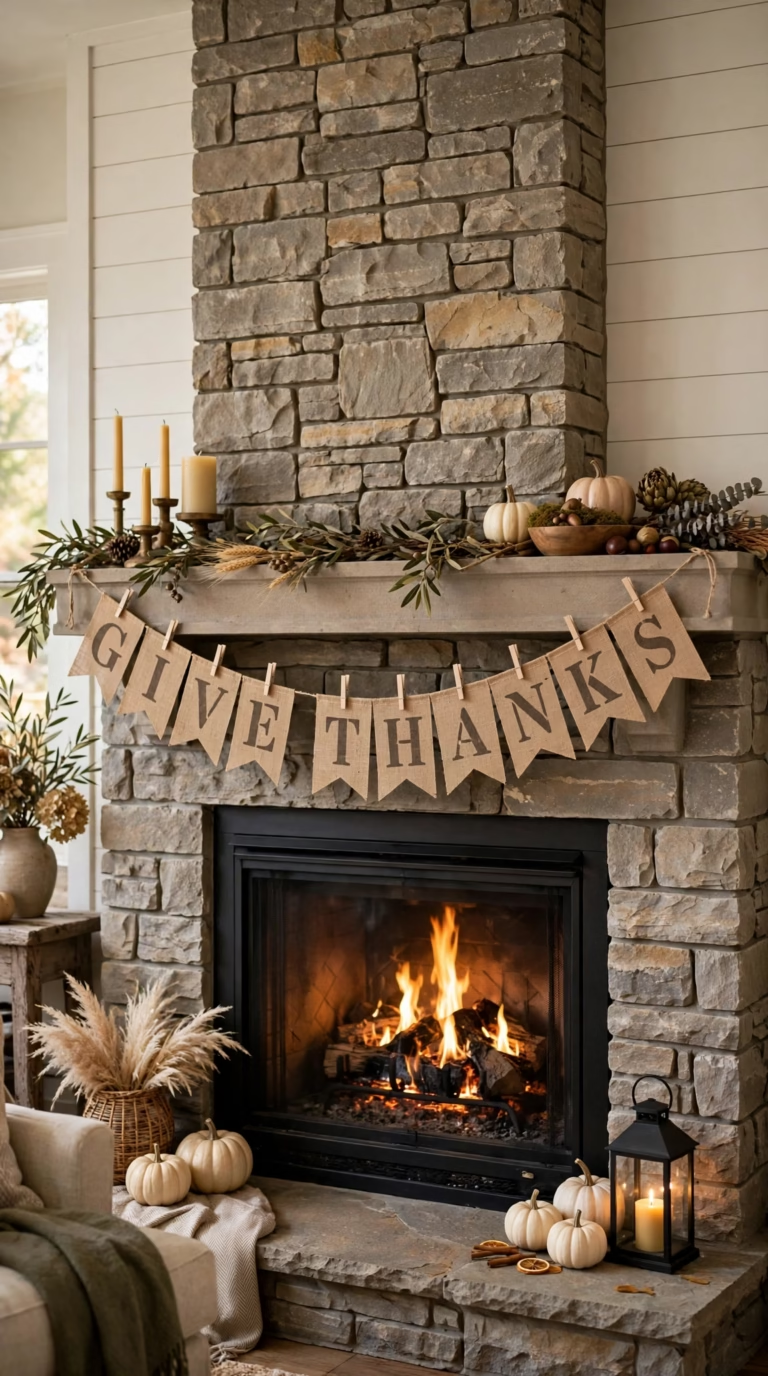
A stenciled burlap pennant banner suits a tall fireplace breast that can look bare when all decor sits flat on the shelf. Draping the banner across the front ties the display together and makes its message readable from across the room.
Because paint can bleed through open weave burlap, place wax paper under each flag while stenciling to protect the surface and prevent sticking.
Banner Supplies
- A roll of stiffened burlap ribbon, letter and leaf stencils and brown and orange paint.
- Basic stenciling tools, cord and small clothespins for hanging.
How to Craft the Banner
Cut burlap into flags with notched bottoms, stencil each letter over wax paper using very little dark brown paint dabbed vertically to prevent bleeding, add an orange leaf on the spacer flag between the words, then after drying clip flags to hemp cord and hang them across the mantel.
Faux Metallic Gilded Acorns
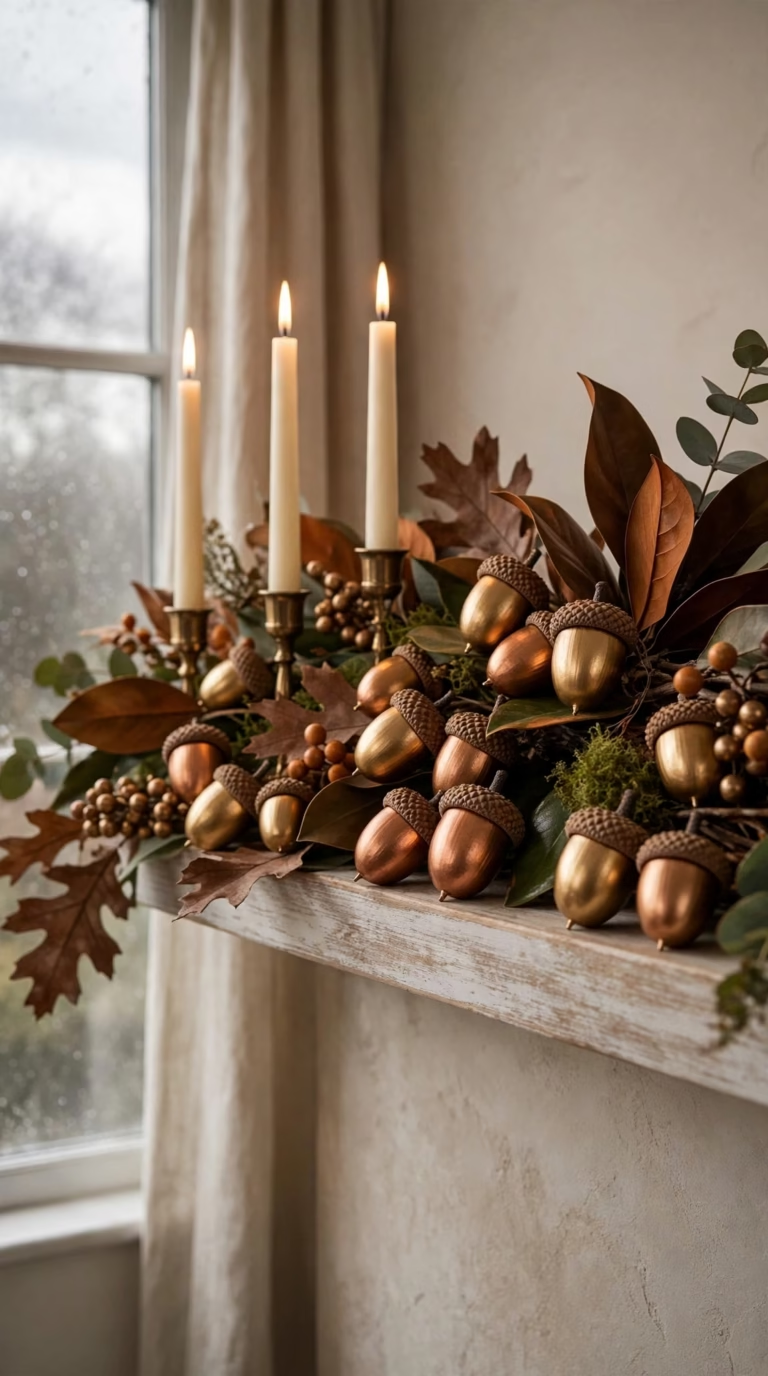
Brown and orange foliage can appear dull on overcast November afternoons, so scattered metallic gold and copper acorns in greenery catch firelight and add elegance. Instead of painting brittle real nuts that could rot, attach real dried acorn caps to painted wooden beads. From a few feet away they look authentic and keep metallic shine for years.
What You Need to Gather
- Thirty natural acorn caps, thirty unfinished oval wooden beads and metallic gold, copper and bronze acrylic paints.
- Toothpicks and floral foam for drying, plus a precision hot glue gun or strong craft adhesive.
Gilding & Assembly Steps
Clean caps with an old toothbrush, then bake them to dry. Mount each bead on a toothpick tip so it can be painted on all sides without touching the finish.
Paint beads in three finishes, dry them in floral foam, then glue each bead firmly into a cap with hot glue. Arrange finished acorns in clusters of three along a runner, around candle bases and in bowls.
Wood Slice Thanksgiving Countdown
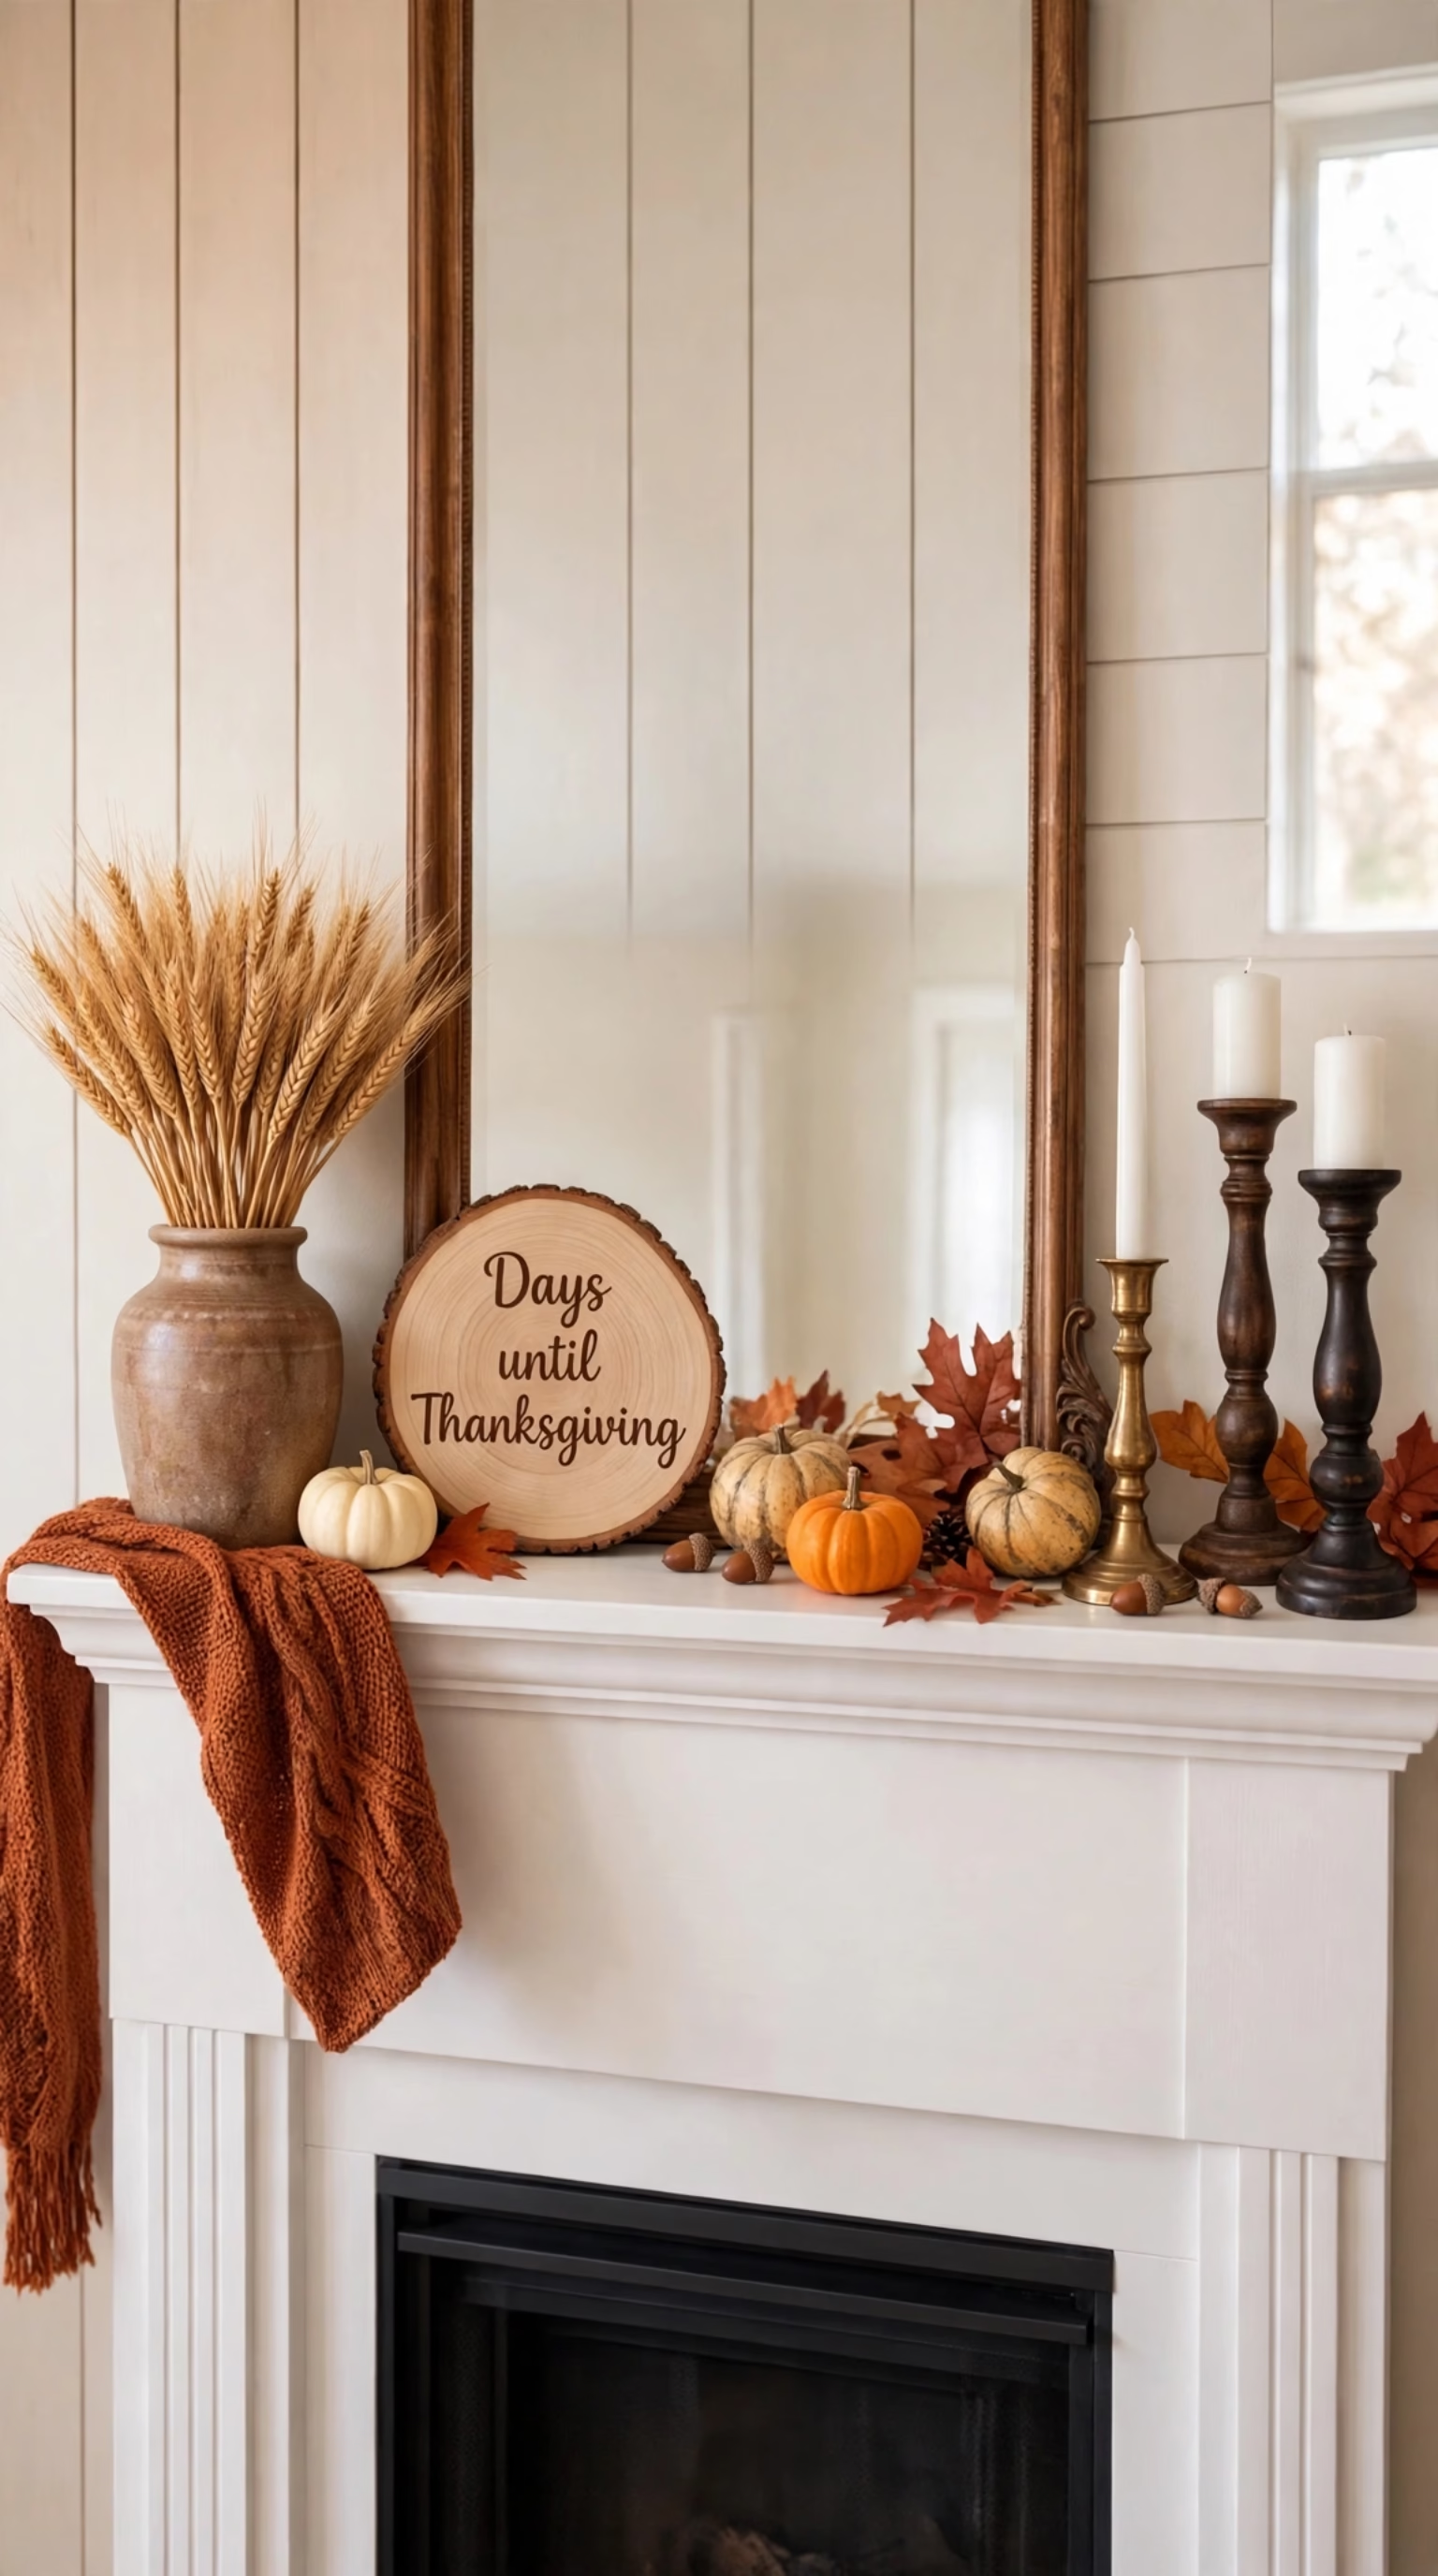
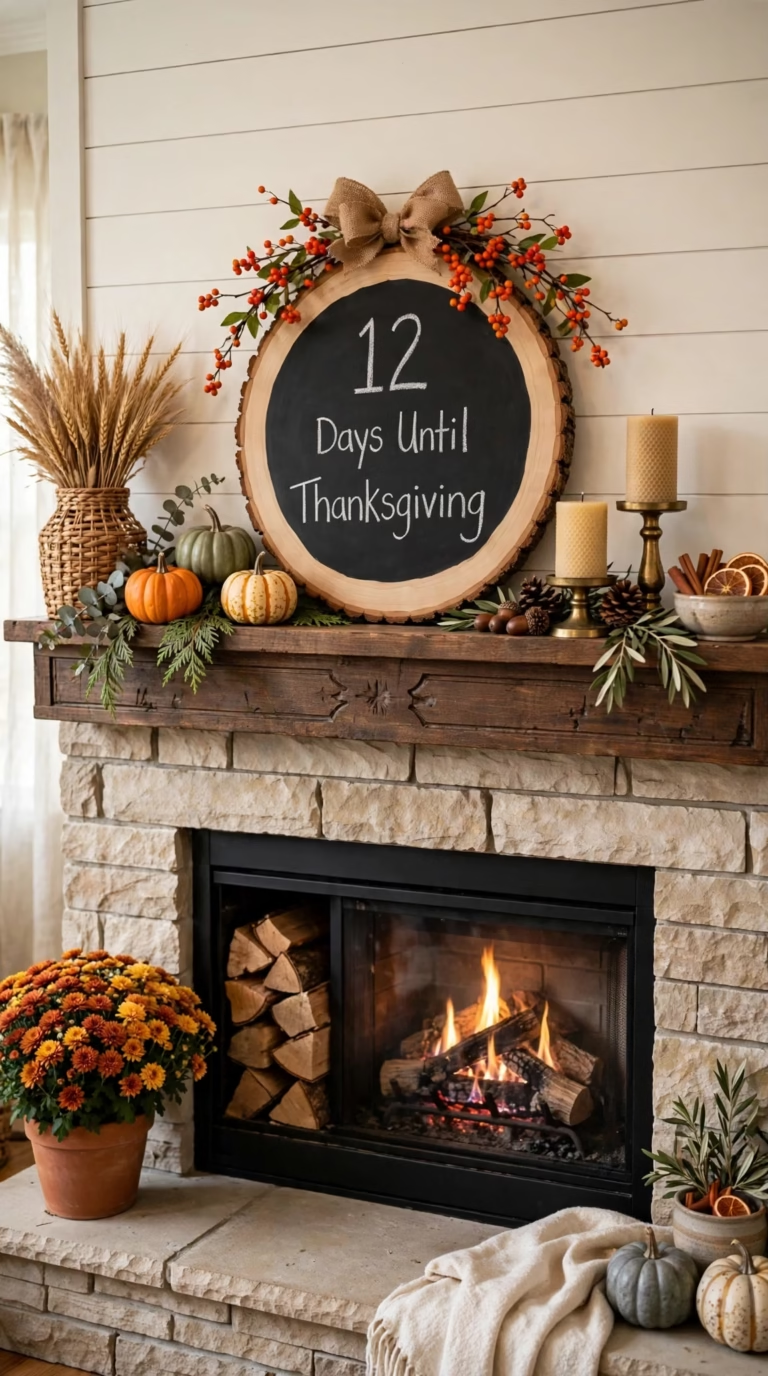
A chalkboard wood slice countdown on the shelf creates a daily interactive tradition while building anticipation for the family feast in early November. Choose a bark edged basswood plaque from a craft store instead of cutting green firewood, which can crack as it dries indoors.
A little bittersweet berry vine around the top helps connect the dark chalkboard circle with surrounding greenery.
Supplies for This Project
- A round natural basswood slice with intact bark, painters tape, a round dinner plate and pencil for marking.
- Matte black chalkboard paint with a smooth foam roller, a white liquid chalk marker and regular stick chalk, faux orange bittersweet berry vine and a hot glue gun.
How to Make the Countdown Sign
Center the dinner plate on the slice, trace its outline and mask the outer ring with tape. Roll two thin coats of black chalkboard paint inside the circle, allowing time between coats, and remove tape while paint is still wet.
After curing overnight, season the surface by rubbing it with white chalk and wiping it off. Write the countdown title along the bottom curve, glue vine along the top rim and lean the sign on a small iron easel.
Copper Wire Leaf Fairy Lights
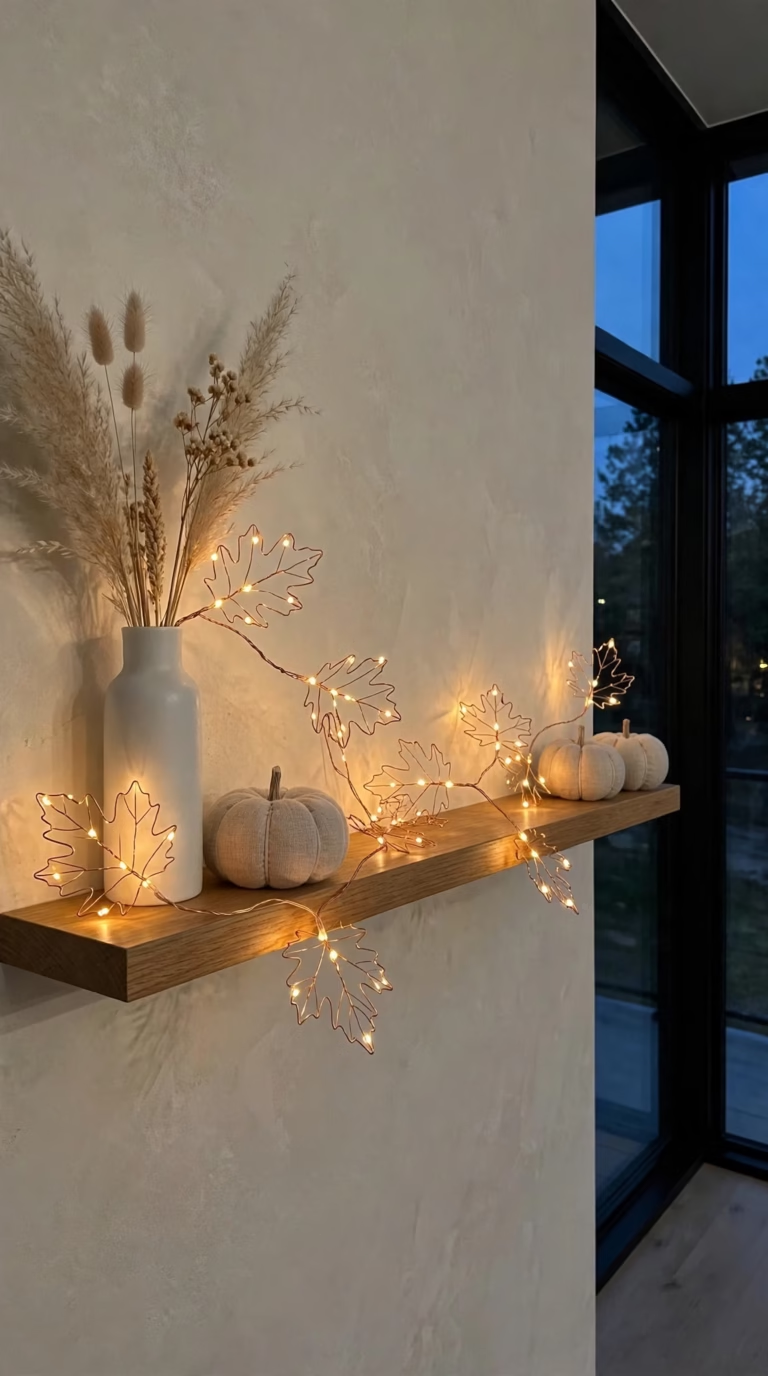
For narrow floating ledges or minimalist fireplaces where a heavy traditional leaf garland would feel overwhelming, open leaf shapes formed from thin copper craft wire and attached to an LED light string offer a lighter sculpted alternative.
Copper wire is easy to shape by hand around a cardboard cutout or a real leaf. At dusk, lit reflective outlines amplify warm glow against the wall. For more seasonal fireplace styling, see Easy DIY fall fireplace decor ideas.
Wire Crafting Supplies
- Bare copper craft wire and thinner binding wire, pliers and a copper wire fairy light string.
- A cardstock leaf template in oak and maple shapes.
Step by Step Wire Shaping
Cut one piece of thicker wire for each leaf and shape it around the template, starting at the bottom stem and following outer lobes with fingers and pliers. Twist ends together at the base to make a small loop stem and press the leaf flat.
Attach each outline to the main cord with thin wire, spacing them along the cord, then arrange the strand loosely across the ledge around small ceramic vases or candlesticks.
Preserved Fall Leaf Shadow Boxes
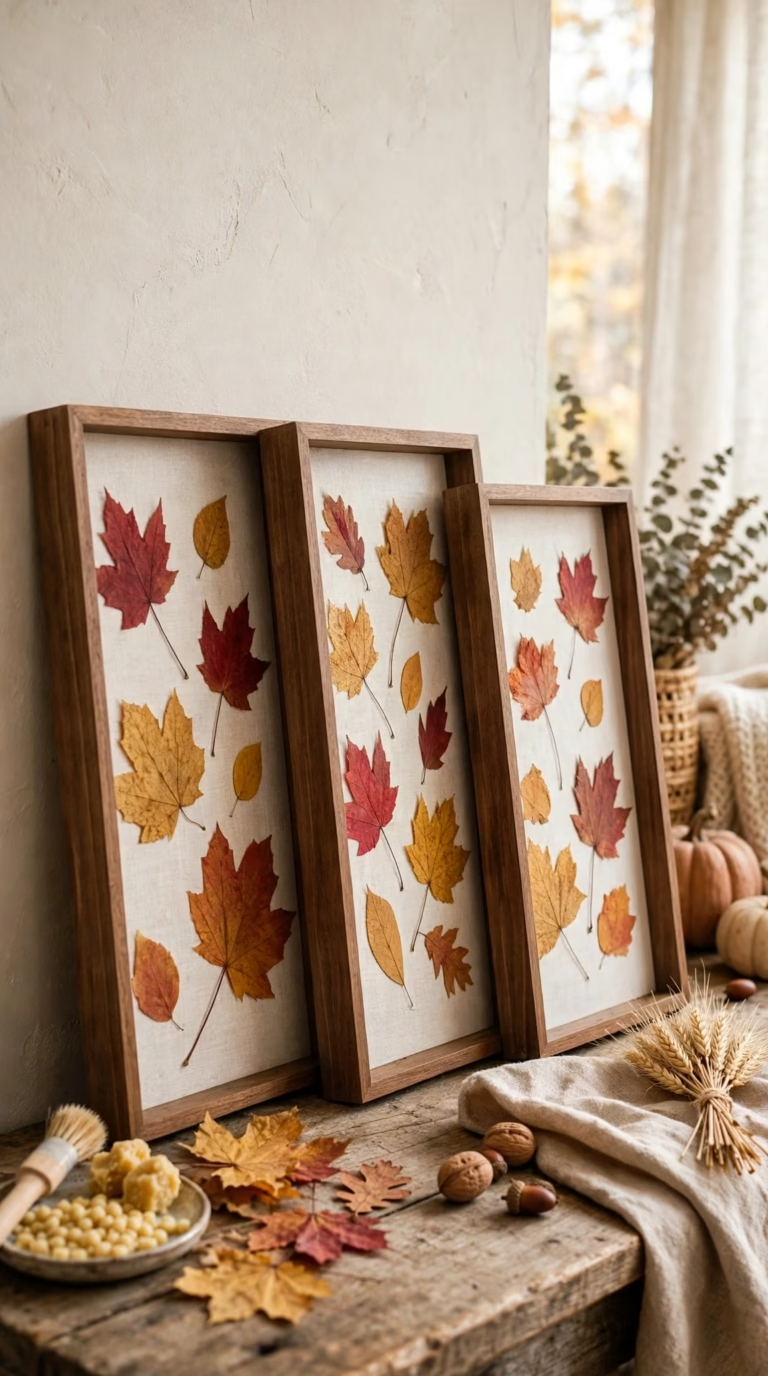
Real autumn leaves offer color variation that plastic store foliage cannot match. Pressing attractive leaves gathered from the yard and mounting them in wooden shadow boxes turns free clippings into gallery style Thanksgiving mantel decor.
Leaning boxes against the wall, rather than stacking everything horizontally on the shelf, adds layered depth, and a quick wax bath helps keep scarlet and gold leaves from browning.
Supplies You Need
- Six to nine flat freshly fallen autumn leaves in bright red, orange and yellow, heavy books and parchment paper for pressing and one block of paraffin wax.
- Three deep wooden shadow box frames with linen or white backings, small brass sewing pins or foam mounting squares and an old electric skillet or double boiler for melting wax safely.
Preserving & Framing Steps
Press fresh leaves flat for three days between parchment paper inside heavy books to prevent edges curling. Melt paraffin wax over low heat, dip each pressed leaf briefly into warm wax, then hang leaves by stems for ten minutes to dry.
Place two or three preserved leaves in the center of each backing board, attach a foam mounting square to the back center of each leaf, reassemble frames and arrange them leaning against the wall at overlapping angles.