

Mini Cheesecake Bites Recipe
These mini cheesecake bites are the easy, dependable way to get creamy, bakery style cheesecake without a water bath. Instead of wrestling with a springform pan, you bake individual cheesecakes in a regular muffin pan, and the whole process of baking and chilling takes roughly one third of the time a full size cheesecake demands.
The method has been tested to keep the tops smooth and crack free, and the finished bites are ready for whatever you want to pile on top, from fresh fruit to chocolate to a swirl of whipped cream.

Plan on about 20 minutes of prep and 22 minutes of oven time, which the recipe lists as 42 minutes total, plus at least 4 hours of chilling before anyone takes a bite.
Jump to:
- Mini Cheesecake Bites Recipe
- This is the Best Mini Cheesecake Recipe
- Why You’ll Love This Easy Mini Cheesecake Recipe
- Ingredients For Mini Cheesecake Cups
- For the Crust
- For the Cheesecake
- For the Topping
- Can I Substitute the Graham Crackers?
- Recommended Tools For Mini Cheesecakes
- How to Make Mini Cheesecake Cups
- To make the crust
- To make the cheesecakes
- Easy Mini Cheesecake Recipe Tips for Success
- How do you keep Mini Cheesecakes from sinking in the middle?
- Serving Mini Cheesecakes
- How to Store Mini Cheesecakes
- How to Freeze Easy Mini Cheesecakes
- FAQs
- What is the best way to prevent mini cheesecake bites from cracking?
- Can I use whipped or tub cream cheese for mini cheesecake bites?
- How do I know when mini cheesecake bites are done baking?
- How long should I chill mini cheesecake bites before serving?
- Mini Cheesecake Bites
- Ingredients
- Instructions
- Last Step:
- Nutrition
- Did you make this recipe?
This is the Best Mini Cheesecake Recipe
Mini cheesecakes are the friendliest possible introduction to cheesecake baking. You get the same creamy texture, rich flavor, and topping freedom of a classic cheesecake, but they bake faster and chill quickly, so they can be ready in about one third of the time of a full size cheesecake.
No water bath, no long stretch of waiting, no guessing whether the center has set.
This recipe folds years of cheesecake testing into one streamlined method. Two things matter more than anything else. The first is the cream cheese: use full fat blocks, not the spreadable tub kind, and let them soften fully to room temperature so they whip into a smooth, lump free filling.
The second is the crust to filling ratio. In a standard muffin cup, 1 to 2 tablespoons of buttery graham cracker crumbs give you enough crust to hold each bite together without stealing the show from the filling.
Multiple mixing methods and bake times were tested to help the minis turn out smooth and crack free. The results are a blank canvas you can finish with fruit, chocolate, caramel, or whipped cream, and they hold up beautifully on a party table.
Why You’ll Love This Easy Mini Cheesecake Recipe
Here is what keeps this recipe in regular rotation:

- They feed a crowd from a single pan of 12.
- They can be made ahead and frozen.
- They are endlessly customizable with toppings.
- They are faster and easier than a large cheesecake.
Ingredients For Mini Cheesecake Cups
Ingredient quantities and the full instructions are in the recipe card below this post. Before you start, here is what each component does.
For the Crust
You need graham cracker crumbs and unsalted butter. Make the crumbs by pulsing whole graham crackers in a food processor, or buy a box of crumbs and skip that step. Melt the butter in the microwave or in a small saucepan on the stove, then let it cool slightly so it coats the crumbs evenly.
For the Cheesecake
The filling is built from full fat cream cheese, granulated sugar, vanilla extract, and eggs. Use bars of cream cheese rather than tub cream cheese, because the tub kind is softer and holds more water, which changes how the filling sets.
Let the cream cheese come to room temperature so it beats into a smooth filling, and bring the eggs to room temperature as well so they blend in evenly.
For the Topping
Whipped cream and fresh fruit are the classic finish. The whipped cream can be homemade, the refrigerated canned type, or frozen whipped topping. If you plan to assemble the cheesecakes ahead of time, frozen whipped topping holds up longer in the fridge.
For the fruit, fresh berries are a reliable choice, though any seasonal fruit that looks good at the grocery store or farmers market works just as well.
Can I Substitute the Graham Crackers?
Yes. Oreos or chocolate wafers turn the crust chocolate, while vanilla wafers or ginger snaps give it a completely different flavor. You can also skip the crust entirely, though the cheesecakes become harder to eat by hand that way, so keep a fork nearby.
Recommended Tools For Mini Cheesecakes
You need very little.

A standard size muffin pan and paper muffin or cupcake liners are the whole kit. Mini cheesecakes need no water bath and no special tools, and they bake faster than a regular cheesecake, which is exactly why they work so well for busy days.
How to Make Mini Cheesecake Cups
This dessert is an effortless option when you are feeding a crowd. Follow these steps and you will have a tray of creamy bites ready for the fridge.
To make the crust
Preheat the oven to 350°F and line a standard size muffin pan with paper liners. In a mixing bowl, stir the graham cracker crumbs and melted butter together until the mixture looks like coarse sand.

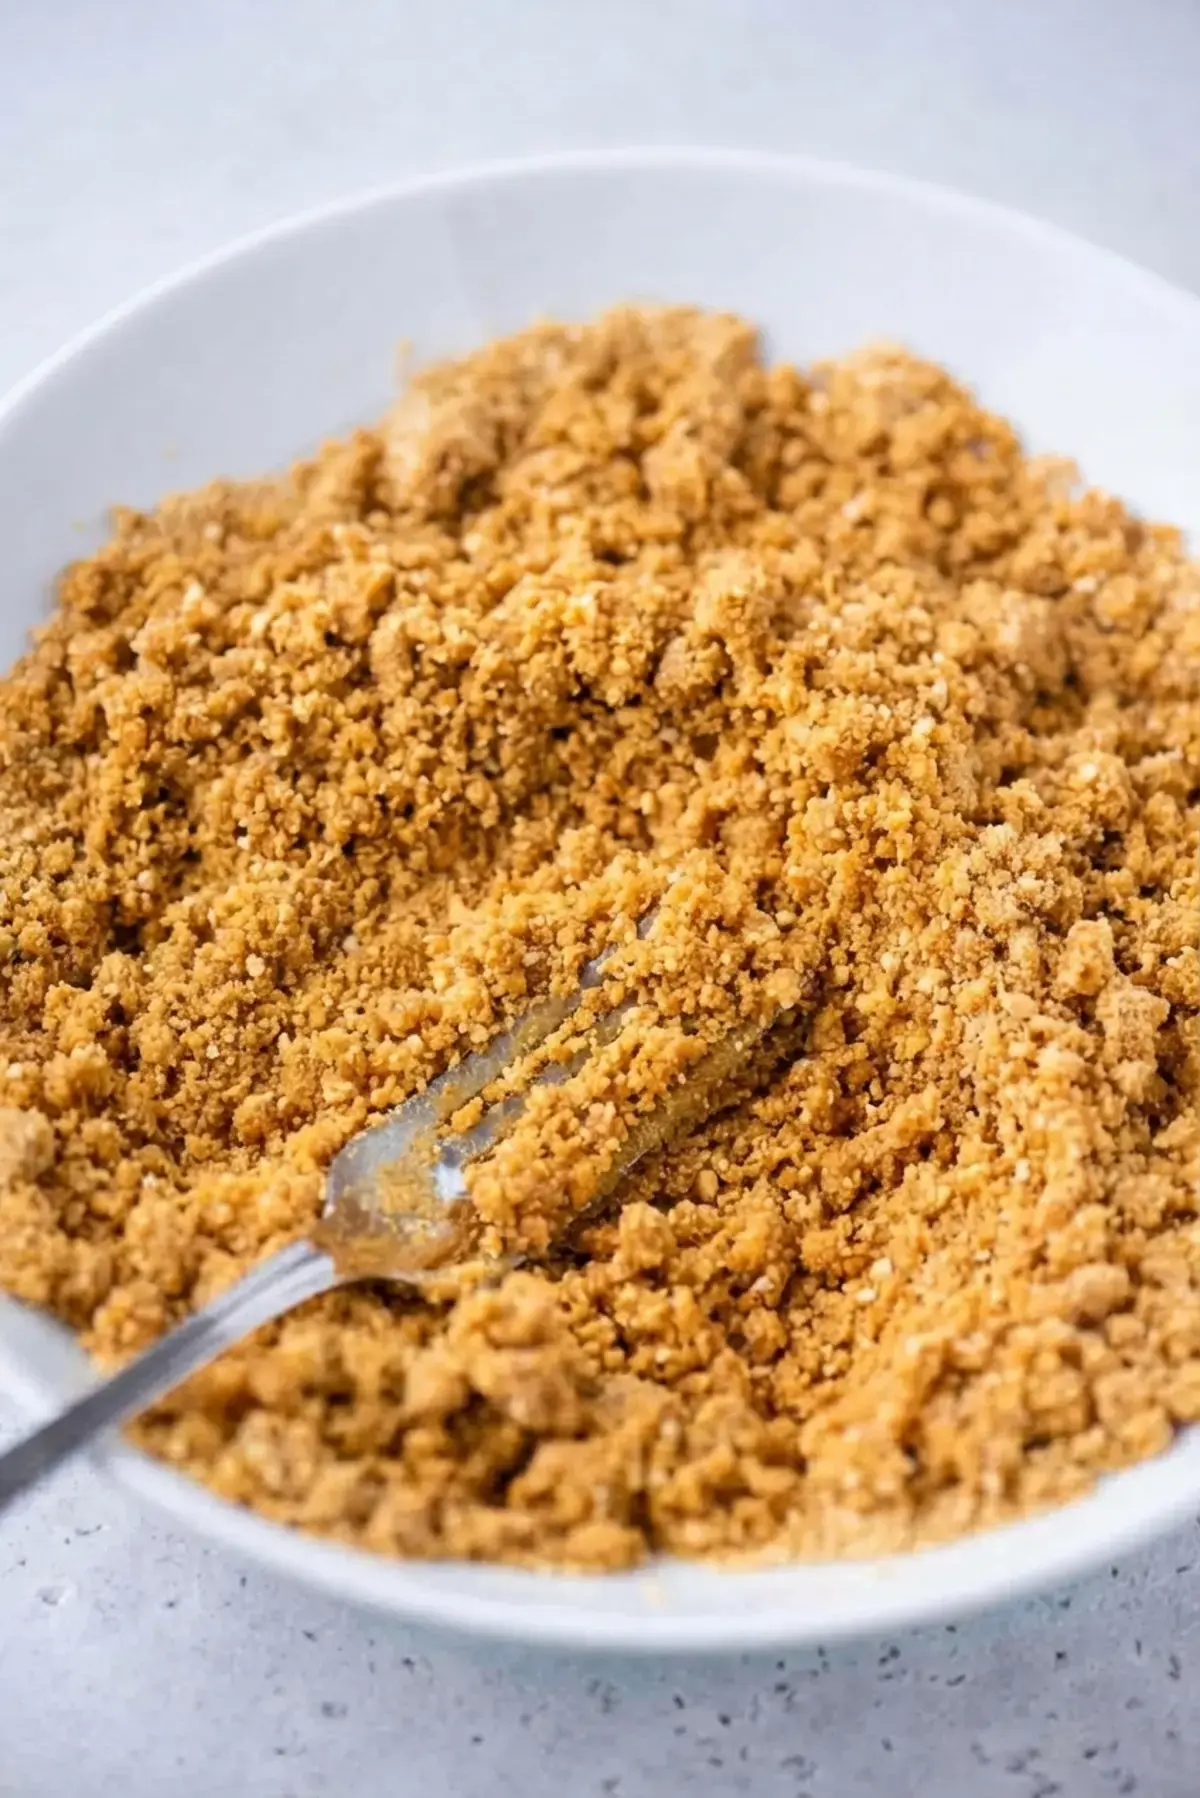
Press 1 to 2 tablespoons of the crumb mixture into each muffin cup, using the bottom of a 1/3 cup measure or something similar to press it into a flat, even layer.


Bake the crusts for 5 minutes, then pull the pan out and let the crusts cool while you make the filling.
To make the cheesecakes
Beat the cream cheese and sugar with an electric mixer until smooth, about 1 to 2 minutes. Beat in the vanilla extract, then the eggs, mixing just until the yolk breaks.


Over beating the eggs is the number one cause of air bubbles and cracking, so stop as soon as everything comes together. Divide the batter evenly among the muffin cups, filling the liners full.

Bake for 15 to 17 minutes, until the centers are only slightly jiggly.


Let the cheesecakes cool to room temperature, then refrigerate them for at least 4 hours before serving. If you are chilling them overnight, cover the pan loosely with plastic wrap. Add whipped cream, fresh fruit, or chocolate ganache just before serving.
Easy Mini Cheesecake Recipe Tips for Success
Mini cheesecakes are far less fussy than a full size cheesecake, which makes them a great first cheesecake project. A few habits keep them looking and tasting their best.
- Do not over mix the batter. After the eggs go in, beat only until the yolk breaks.
- Do not over bake. Shake the pan gently: slightly jiggly centers are done, while centers that move like liquid need more time.
- Plan for the chill. Warm cheesecake is not appetizing, so give yourself at least 4 hours.
- Hide the evidence. If the tops crack or bubble, a topping covers it completely.
How do you keep Mini Cheesecakes from sinking in the middle?
Sinking centers usually come from over mixing the batter, especially after the eggs are added. All that extra air expands in the oven and then collapses as the cheesecakes cool. A sudden temperature drop can do the same thing, such as moving the pan straight from a hot oven into a cool kitchen.

The fix is gradual cooling. Turn off the oven, crack the door, and let the cheesecakes sit for 15 to 20 minutes before moving them to the counter. Then let them cool completely at room temperature before they go into the fridge.
Serving Mini Cheesecakes
Topping ideas go well beyond whipped cream and berries. Mini chocolate chips or chopped dark chocolate can be sprinkled on top or stirred right into the batter. Pie filling, chopped candy bars, salted caramel, crushed Oreos, and candied citrus peels all work.
For fresh seasonal fruit, think berries in spring, sliced peaches or nectarines in summer, and pomegranate arils in fall. Flavored whipped creams such as Neapolitan, coffee, or chocolate turn the same base into three different desserts.
If you are watching carbs, a keto cheesecake version is a good option.

Based on the source nutrition, each serving comes in around 107 calories, 14 grams of carbohydrates, and 5 grams of fat.
I bring these to potlucks in a lined container and they tend to disappear before the main dish reaches the table, which is exactly the kind of dessert I want in my rotation.
How to Store Mini Cheesecakes
Store mini cheesecakes in the refrigerator in an airtight container for up to a week. Leftovers really can last that long, but for a party, make them no more than 3 to 4 days in advance for maximum freshness. Keep the toppings off until serving time so nothing turns soggy.
How to Freeze Easy Mini Cheesecakes
Mini cheesecakes freeze well for up to 3 months.

Wrap each one individually, or store them in an airtight container or freezer bag with parchment paper between the layers so they do not stick together. Thaw them in the refrigerator before serving, then add your toppings.
FAQs
What is the best way to prevent mini cheesecake bites from cracking?
The most important step is to avoid over-mixing the batter after adding the eggs. Beat the eggs in just until the yolk breaks, as over-beating incorporates air that causes bubbles and cracking as the cheesecakes cool. Baking the mini cheesecakes only until the centers are slightly jiggly, about 15 to 17 minutes, and cooling them gradually also helps prevent cracks.
Can I use whipped or tub cream cheese for mini cheesecake bites?
No, you should use full-fat cream cheese that comes in blocks, not the spreadable cream cheese sold in tubs. Tub cream cheese contains more water and air, which can make the batter runny and cause the cheesecakes to sink or crack during baking. For best results, use 16 ounces of block-style cream cheese softened to room temperature.
How do I know when mini cheesecake bites are done baking?
The mini cheesecakes are done when the centers are only slightly jiggly, which usually takes 15 to 17 minutes in a 350°F oven. They should not look wet or liquid, but a small area in the middle should wobble gently when you shake the pan. The residual heat will finish cooking the centers as they cool, so it is important not to over-bake them.
How long should I chill mini cheesecake bites before serving?
Mini cheesecakes need to chill in the refrigerator for at least 4 hours before serving. This time allows the cream cheese filling to fully set and develop the proper creamy texture. For the best results, you can chill them overnight, loosely covered with plastic wrap. They can be stored in an airtight container in the fridge for up to a week.

Mini Cheesecake Bites
Mini Cheesecake Bites Recipe These mini cheesecake bites are the easy, dependable way to get creamy, bakery style cheesecake without a water bath. Instead of wrestling with a springform pan, you bake individual cheesecakes in a regular muffin pan, and the whole process of baking and chilling takes roughly one third of the time a full size cheesecake demands.
- Total Time: 42 min
- Yield: 12 1x
Ingredients
Crust
1 cup graham cracker crumbs
4 Tbsp unsalted butter, melted
Cheesecake
16 oz full fat cream cheese, softened to room temperature
½ cup granulated sugar
1 tsp vanilla extract
2 large eggs
Topping
whipped cream
fresh fruit
Instructions
Crust
1-Preheat the oven to 350º F: Preheat the oven to 350º F. Line a regular sized muffin pan with paper muffin liners.
2-In a mixing bowl, combine the graham: In a mixing bowl, combine the graham cracker crumbs and melted butter until it resembles coarse sand.
3-Put 1-2 tbsp of crumbs in each: Put 1-2 tbsp of crumbs in each muffin cup. Use a 1/3 cup (or similar) to press the crumbs down firmly into the pan.
4-Bake the crust for 5 minutes: Bake the crust for 5 minutes.
5-Remove the pan from the oven and: Remove the pan from the oven and allow it to cool while prepping the cheesecake.
Cheesecake
6-In a mixing bowl, beat the cream: In a mixing bowl, beat the cream cheese and sugar with an electric mixer until smooth, 1-2 minutes.
7-Beat in vanilla extract and eggs, until: Beat in vanilla extract and eggs, until smooth. The eggs are the last ingredient that get mixed into the cheesecake batter. Be sure to mix them in just until the yolk breaks. Over beating the eggs is the number one cause of air bubbles and cracking.
8-Evenly divide the cheesecake batter among the: Evenly divide the cheesecake batter among the muffin cups, filling the liners full. Bake for 15-17 minutes or until the center of the cheesecake is only slightly jiggly.
9-Allow the cheesecakes to cool to room: Allow the cheesecakes to cool to room temperature then place them in the fridge for at least 4 hours to chill before serving. If refrigerating overnight, loosely cover the cheesecakes in plastic wrap.
10-Top with whipped cream, fresh fruit or: Top with whipped cream, fresh fruit or chocolate ganache before serving.
Last Step:
Please leave a rating and comment letting us know how you liked this recipe! This helps our business to thrive and continue providing free, high-quality recipes for you.- Prep Time: 20 min
- Cook Time: 22 min
- Method: bake
Nutrition
- Calories: 107kcal
- Sugar: 10g
- Sodium: 58mg
- Fat: 5g
- Saturated Fat: 3g
- Carbohydrates: 14g
- Fiber: 1g
- Protein: 1g
- Cholesterol: 37mg


