Ingredients
– 1 pound fresh farmed salmon
– 1 teaspoon salt
– Optional yuzu aioli
– Sushi rice
– Wasabi
– Soy sauce
– Lemon
– Cucumbers
– Avocado
– Oil for frying the skin
Instructions
1-First step: dry and salt the salmon Start with 1 pound fresh farmed salmon. Pat it dry with a paper towel, then sprinkle on 1 teaspoon salt. Let the fish sit for about 20 minutes. During this time, the salt draws water out of the salmon, which helps the texture later.
You will likely see moisture on the surface after the resting time. That is exactly what you want. The fish should look a bit firmer and less slippery before you move to the next step.
2-Second step: rinse and dry again Rinse the salmon under running water to remove the salt. Then pat it dry again with clean paper towels. This step keeps the finished sashimi from tasting too salty and helps the fish freeze and slice more cleanly.
Take a moment to inspect the fish. Look for a clean smell, firm texture, and bright color. If anything seems off, do not use it for raw serving.
3-Third step: pack it for freezing Place the salmon in a freezer bag. If possible, use a vacuum-sealed bag or double-bag the fish to help prevent freezer burn. Push out as much air as you can before sealing. This small step matters because freezer burn can dry out the fish and hurt the texture of your Homemade Salmon Sashimi.
Label the bag with the date so you can keep track of the freeze time. This is especially useful for meal planners, students, and busy families who like to prep ahead.
4-Fourth step: freeze at the right temperature Freeze the salmon at -4°F (-20°C) for at least 7 days. This step is important because it helps kill parasites. The full freeze time may go up to 1 month if that fits your schedule, but do not shorten the minimum seven-day time.
5-Fifth step: thaw slowly in the refrigerator When you are ready to serve, move the frozen salmon to the refrigerator and let it defrost overnight. Slow thawing keeps the texture more even and helps reduce the chance of spoilage. Do not thaw it on the counter.
Once thawed, open the bag and pat the salmon dry again. A dry surface makes slicing easier and gives you a better final look.
6-Sixth step: slice thinly and neatly Use a sharp knife and slice the salmon thinly. Keep your cuts smooth and steady so the pieces stay clean instead of ragged. If you want classic sashimi style slices, aim for thin, even pieces that are easy to pick up with chopsticks or a fork.
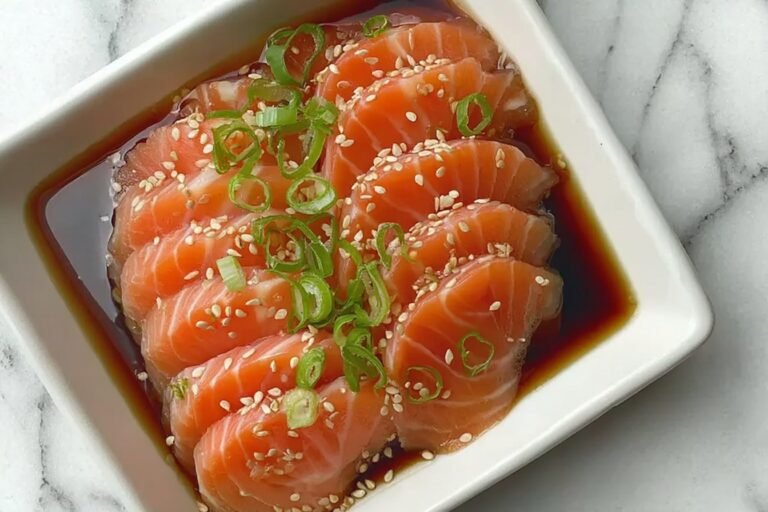
7-Seventh step: serve with simple sides Arrange the salmon on a chilled plate and serve it with sushi rice, wasabi, and soy sauce. You can also add lemon, cucumbers, or avocado if you want a brighter plate. If you made the optional yuzu aioli, serve it on the side so people can dip as they like.
8-Eighth step: crisp the skin if it remains If the salmon skin is still attached, do not waste it. Fry it in oil for 5 to 7 minutes until crispy. It turns into a salty, crunchy snack that many people love. This is a smart way to use the whole fish and get more value from your purchase.
Last Step:
Please leave a rating and comment letting us know how you liked this recipe! This helps our business to thrive and continue providing free, high-quality recipes for you.Notes
🐟 Source farmed salmon from reputable fish markets and always freeze for 7+ days to safely eliminate parasites.
❄️ Use vacuum-sealed bags and freeze at -20°C to prevent freezer burn and maintain freshness.
⚠️ Consume at your own risk; consult a doctor if pregnant, and pair with traditional accompaniments for authentic flavor.
- Prep Time: 10 minutes
- Freezing + Defrosting: 7 days
- Category: Seafood
- Method: No Cook
- Cuisine: Japanese
- Diet: Gluten-Free, Pescatarian, Keto, Low-Carb
Nutrition
- Serving Size: 4 oz (113g)
- Calories: 161 kcal
- Sugar: 0 g
- Sodium: 631 mg
- Fat: 7 g
- Saturated Fat: 1 g
- Unsaturated Fat: 5 g
- Trans Fat: 0 g
- Carbohydrates: 0 g
- Fiber: 0 g
- Protein: 22 g
- Cholesterol: 62 mg