

Clever 20 Book Mark Ideas That Everyone Will Ask About
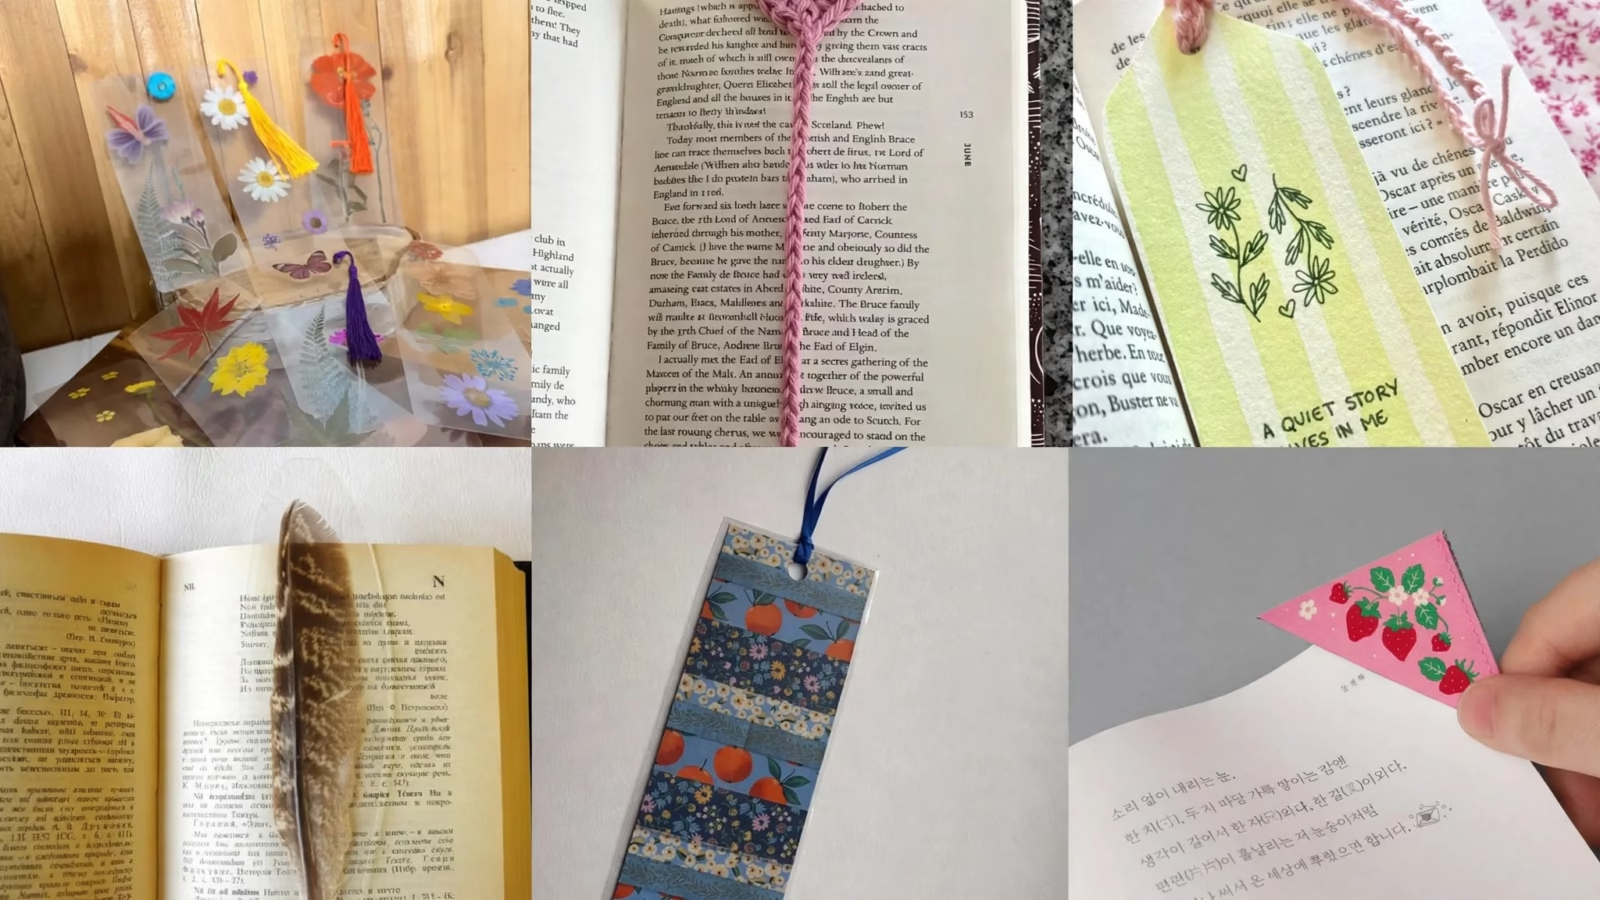

Losing your place is a small annoyance that adds up, especially with four unfinished paperbacks waiting on the nightstand. A folded receipt works in a pinch, but it has never felt satisfying for long.
These clever ideas fix that with scraps already on hand and about ten minutes for many projects. Start with creative DIY bookmark ideas made from paper, ribbon, flowers and felt, then pick a style that suits the book and the reader.
A craft night every few weeks is one fun way to try them together, with everyone bringing their own supplies, voting on the prettiest project while pizza cools, and the winner receiving a gift card usually around fifteen dollars. For more inspiration, see 20 best DIY bookmark ideas.
- Choose flat finishes that will not mark pages.
- Use a standard base of 2 by 6 inches for most paper styles.
- Keep loose beads and small magnets away from young children.
Ten minutes and a scrap can turn a lost page into a small gift.
Jump to:
- Clever 20 Book Mark Ideas That Everyone Will Ask About
- BOOK MARK IDEAS
- 1. Pressed Flower Laminate Bookmark
- 2. Watercolor Swatch Bookmark
- 3. Tassel Corner Bookmark
- 4. Photo Strip Bookmark
- 5. Crochet Heart Bookmark
- 6. Magnetic Fold Bookmark
- 7. Origami Corner Bookmark
- 8. Button And Ribbon Bookmark
- 9. Sprayed Ink Bookmark
- 10. Quote Calligraphy Bookmark
- 11. Beaded Charm Bookmark
- 12. Feather Laminate Bookmark
- 13. Paint Chip Bookmark
- 14. Embroidered Felt Bookmark
- 15. Comic Panel Bookmark
- 16. Washi Tape Layer Bookmark
- 17. Dried Leaf Bookmark
- 18. Paperclip Bow Bookmark
- 19. Sticker Collage Bookmark
- 20. Woven Paper Bookmark
BOOK MARK IDEAS
Here are 20 ideas to copy over a weekend, in a simple numbered order so you can scan by material, skill and gift use. Each one puts materials first, follows with clear steps, and ends with a practical finish note.
1. Pressed Flower Laminate Bookmark
Start with small flowers such as violets and two sheets of laminate cut a little larger than a 2 by 6 inch base. Let the petals dry for two solid weeks before they go near the machine.
Arrange the dry petals on one sheet, cover with the second, and seal slowly and evenly. Trim the edges smooth and store flat. Sealing the flowers properly is worth the effort.
2. Watercolor Swatch Bookmark
Use heavy cold press paper cut to about 2 by 6 inches so paint does not warp the base. Lay down pale stripes and let each color fade into the next without a single hard line.
The key tip, repeated in a community center painting class that produced a folder full of these ideas, is to stop overworking the paint. Let the swatch dry fully flat, then back it with plain card.
3. Tassel Corner Bookmark
Begin with a sturdy card corner and waxed linen left over from a kit. To make the tassel, wrap the thread around three fingers about forty times, then tie the top off tightly before cutting the loops.
Attach the tassel through a small hole at the corner so it hangs outside the book. In the source example, the tassel runs nearly as long as the card it hangs from.
4. Photo Strip Bookmark
A photo strip needs almost no making, which is part of its charm. Take a strip from a set of four photo strips collected at a wedding in June, check that it is flat, and slip it between the pages.
Write a date along the white edge at the bottom as a finishing touch. Keep it in whatever novel is being read. Back a thin strip with card if it feels flimsy.

5. Crochet Heart Bookmark
Use crochet cotton thread and a borrowed pattern to make tiny hearts that look like pieces snipped from the edge of a doily. Keep the stitches flat so the bookmark sits comfortably in a book.
One crafter keeps a basket of yarn beside her chair, makes about six per month for her library book club, and learned the technique in about a week. It makes a small, thoughtful gift for a reader.
6. Magnetic Fold Bookmark
Fold a strip of sturdy card so it wraps over the top of a page, then glue a small magnet inside each end so the flap snaps shut on the page. Supplies can come from an office supply drawer.
This design stays in place even when a bag is thrown around a car, and it survives a commute better than anything else on the list. Keep magnets away from young children.
7. Origami Corner Bookmark
Any square scrap works here, even junk mail, and striped paper makes the corner look fancier than it is. Start with a square of about 4 to 6 inches, fold it into a triangle, then tuck both flaps into themselves to form a pocket.
The whole fold takes roughly ninety seconds. Slide the pocket over the corner of the page. It leaves no mark and can be remade in minutes.
8. Button And Ribbon Bookmark
Choose a length of ribbon and one spare button that has sat unused for years. In the source example, buttons are kept in an old cookie tin sorted by color and borrowed from about twice a year.
Sew or glue a single vintage button at the end of the ribbon to finish the look. Leave the button outside the closed book. This project costs less than anything else on the list.
9. Sprayed Ink Bookmark
Protect the counter first, because this technique can make a mess of the kitchen. Cut a plain card base, load an old toothbrush with ink, and flick the bristles across the paper so fine speckles scatter over the surface.
Navy speckles across the top can resemble a night sky, and no two bookmarks come out the same. Let the ink dry completely before use.
10. Quote Calligraphy Bookmark
Pick a favorite line and write it on a smooth card base of about 2 by 6 inches. The source author underlines paperbacks in pencil, so a line is always close at hand, and one chosen quote came from a novel read on a long train ride to Chicago.
Rule two faint pencil lines first so the letters stay level, then erase the guides when the ink is dry. The result looks like something from a stationery shop shelf.
11. Beaded Charm Bookmark
Thread beads onto a cord so they spell out an entire word down the string, then add a small charm at the end. Clear beads are common in acrylic bookmark ideas, and a bag ordered from Amazon for about six dollars goes a long way.
Three unmatched earrings that had lost their pairs can also be reused as charms. Let the charm hang outside the book. A bookmark with a charm tends not to be left in a drawer.
12. Feather Laminate Bookmark
Choose a clean, flat feather with natural stripes that can look as though they were hand painted. One example used a blue jay feather found on a hiking trail in October and carried home in the side pocket of a water bottle sleeve.
Seal the feather flat between laminate sheets before its edges begin to curl. Trim with smooth edges and store flat. That bookmark has since been kept in a poetry collection.
13. Paint Chip Bookmark
A free paint chip card makes an instant base with ready made color blocks. Three greens stacked in a row can resemble the gradient on a paint shop card, and trimming the card to about 2 by 6 inches keeps it book sized.
One account describes leaving a hardware store with about forty free paint chips purely for inspiration, with half going into a folder for a reading corner that remains unpainted. Free supplies are described as the best kind.
14. Embroidered Felt Bookmark
Cut a felt strip that will lie flat, then stitch the outline in a single color before filling anything in. The simple stitches also appear in quiet book ideas found on Pinterest, and felt is forgiving if a line wanders.
Keep knots small and trim loose threads so nothing catches on a page. The project takes about half an evening while watching a film. Back the felt with a second layer for extra body.
15. Comic Panel Bookmark
Start with a page you are willing to lose and cut a single panel from it. One example shows a dog stealing a sandwich from a picnic table, a panel described as one that never gets old.
Mount the panel on card to give it strength, then back it so the edges stay smooth and flat. Trim it to a tidy rectangle. Viewers are said to respond to it as soon as they notice it.
16. Washi Tape Layer Bookmark
This idea suits anyone with extra tape rolls on hand. Cover a plain card base with washi tape, layering three different widths on top of one another so the overlaps conceal any uneven edges.
Press each strip down firmly and fold the ends neatly to the back. Keep leftover tape pieces in a tin rather than discarding them. Back the card if the tape edges lift.
17. Dried Leaf Bookmark
Pick a leaf with a clear shape and press it flat inside a dictionary until it is fully dry. Coat both sides with a thin layer of glue to prevent crumbling, then let that coat dry before use.
Based on the source results, maple leaves hold up much better than oak, so choose maple when you can. Mount the leaf on card if it feels fragile. Store it flat and away from damp.
18. Paperclip Bow Bookmark
Take a large paperclip and a ribbon scrap, such as one saved from a birthday gift. Wrap the ribbon around the paperclip and tie a single knot at the top, then shape the loops into a small bow and trim the ends.
The finished clip slides onto a page corner without leaving a mark, which makes it handy for borrowed books. Keep the bow small so it sits neatly outside the page edge.
19. Sticker Collage Bookmark
Arrange stickers into a collage on a plain card base, overlapping them heavily so the card underneath does not show through. The pastel stickers layered along the bottom edge are the source favorites, and they give the design a soft band of color.
Press every sticker down at the edges so nothing peels or catches on a page. Add a clear backing layer if the surface feels uneven.
20. Woven Paper Bookmark
End the list with a classic woven design that uses the same over and under rhythm remembered from second grade art class placemats.
Cut a sturdy paper base and cut the slits against a ruler so the strips stay even, then weave contrasting strips through those slits in an over and under pattern, pushing each row snug before adding the next.
Glue the strip ends at the back, press the bookmark flat until it dries, and finish by threading a ribbon through the top. Vary the strip colors for a checked effect and trim any uneven ends before use.
This version costs very little and works well with scraps left from other projects on this list.


