Ingredients
– 2 and 1/4 cups all-purpose flour, plus more as needed for rolling and work surface
– 1/2 teaspoon baking powder
– 1/4 teaspoon salt
– 3/4 cup unsalted butter, softened
– 3/4 cup granulated sugar
– 1 large egg, at room temperature
– 2 teaspoons pure vanilla extract
– 2 tablespoons butter, melted and slightly cooled
– 1/4 cup granulated sugar
– 1 tablespoon ground cinnamon
– 1 cup confectioners’ sugar
– 3 tablespoons milk
– 1/2 teaspoon pure vanilla extract
Instructions
1-Step 1: Prepare Your Dry Ingredients Start by whisking together the flour, baking powder, and salt in a medium bowl. This step ensures that the leavening agent and salt are evenly distributed throughout the flour, which prevents any uneven spots in your finished cookies. Set this bowl aside while you work on the wet ingredients. Having everything prepped and ready makes the mixing process smoother and more enjoyable.
2-Step 2: Cream the Butter and Sugar In a large mixing bowl, beat the softened butter and granulated sugar together until the mixture becomes smooth and creamy. This typically takes about 2-3 minutes with an electric mixer on medium speed. You want the mixture to look pale and fluffy, which indicates that air has been incorporated into the dough. This step contributes to a lighter, more tender cookie texture. Take your time here because properly creamed butter and sugar make a noticeable difference in the final result.
3-Step 3: Add Egg and Vanilla Add the room-temperature egg and the vanilla extract to your butter-sugar mixture. Mix on medium speed until everything is fully combined and the mixture looks smooth. The egg should be completely incorporated with no visible streaks. Using a room-temperature egg helps it blend more easily with the creamed butter mixture. If your egg was stored in the refrigerator, simply let it sit in a bowl of warm water for about 5 minutes before cracking it.
4-Step 4: Combine Wet and Dry Ingredients Gradually add the dry ingredient mixture to your wet ingredients, mixing on low speed. Adding the flour mixture in three or four additions prevents it from flying out of the bowl and ensures even mixing. The dough will be soft and slightly sticky, which is normal. If it seems too sticky to handle, you can add extra flour by the tablespoon until it reaches a workable consistency. Be careful not to overmix at this stage, as too much mixing can make your cookies tough rather than tender.
5-Step 5: Divide and Roll the Dough Divide your dough into two equal pieces. Working on a floured surface or silicone baking mat, roll each piece into a rectangle measuring approximately 9 by 7 inches, with a thickness of about 1/4 inch. Using a silicone baking mat for rolling makes cleanup much easier and prevents the dough from sticking. If you don’t have one, lightly flour your counter and rolling pin. Keep the thickness consistent across the rectangle so your cookies bake evenly.
6-Step 6: Add the Cinnamon Filling Brush each rectangle evenly with the melted butter, making sure to reach all the edges. Then mix the granulated sugar and ground cinnamon together and sprinkle this mixture evenly over the buttered dough. The butter acts as an adhesive, keeping the cinnamon-sugar layer in place as you roll. Be generous but even with your sprinkling to ensure every cookie has that perfect cinnamon swirl throughout.
7-Step 7: Roll Into Logs Starting from one of the longer sides, roll each rectangle tightly into a 9-inch log. Take your time and roll slowly to create tight, even spirals. If you notice any cracks forming on the surface of the dough, simply smooth them with your fingers as you go. Minor cracks are fine and won’t affect the final appearance significantly. Tight rolling helps create those beautiful defined swirls that make these cookies so visually appealing.
8-Step 8: Chill the Dough Logs Wrap each log in plastic wrap or parchment paper and place them in the refrigerator for at least 2 hours. This chilling time is important because it firms up the butter in the dough, which prevents the cookies from spreading too much during baking. Cold dough also slices more cleanly, giving you cookies with well-defined swirls. If you’re short on time, you can place the logs in the freezer for about 30 minutes, but the refrigerator method yields better results. You can even chill the logs overnight and bake them the next day.
9-Step 9: Preheat and Prepare for Baking When you’re ready to bake, preheat your oven to 350 degrees Fahrenheit. Line your baking sheets with parchment paper or silicone baking mats. These liners prevent sticking and make transferring the cookies to a cooling rack much easier. If you only have one baking sheet, you can reuse it between batches, but let it cool slightly between batches to prevent the dough slices from spreading too quickly.
10-Step 10: Slice and Arrange Remove one log from the refrigerator at a time and slice it into half-inch thick rounds using a sharp knife. A serrated knife often works well for this task. Place the slices about 2 inches apart on your prepared baking sheets to allow room for slight spreading. If the dough feels too firm after extended chilling, let it sit at room temperature for about 5 minutes before slicing. Uniform slice thickness ensures all your cookies bake at the same rate.
11-Step 11: Bake to Golden Perfection Bake the cookies for 10-11 minutes, or until the edges are lightly browned. The centers may still look slightly underdone when you remove them from the oven, but they will continue to firm up as they cool. Keep a close eye on your first batch, as oven temperatures can vary. You want the bottoms to be golden and the edges just starting to brown for that perfect chewy texture with slightly crisp edges.
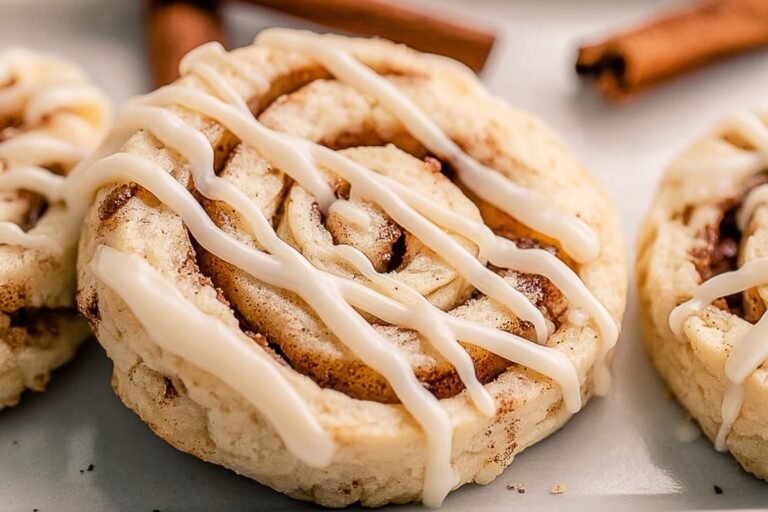
12-Step 12: Cool and Drizzle Allow the cookies to cool on the baking sheet for 5 minutes before transferring them to a wire rack to cool completely. While they cool, whisk together the confectioners’ sugar, milk, and vanilla extract until smooth. The icing should be thin enough to drizzle but thick enough to sit on top of the cookies without running completely off. Once the cookies are completely cool, use a spoon or fork to drizzle the icing back and forth across each cookie in a decorative pattern.
Last Step:
Please leave a rating and comment letting us know how you liked this recipe! This helps our business to thrive and continue providing free, high-quality recipes for you.Notes
🧊 2+ hour chill keeps swirls sharp, stops spreading.
🛖 Silicone mat rolls buttery dough mess-free.
❄️ Freeze logs unbaked up to 3 months; slice-thaw-bake.
- Prep Time: 20 minutes
- Chill Time: 2 hours
- Cook Time: 10 minutes
- Category: Dessert
- Method: Oven
- Cuisine: American
- Diet: Vegetarian
Nutrition
- Serving Size: 1 cookie
- Calories: 120 kcal
- Sugar: 11g
- Sodium: 50mg
- Fat: 5g
- Saturated Fat: 3g
- Unsaturated Fat: 2g
- Trans Fat: 0g
- Carbohydrates: 18g
- Fiber: 0g
- Protein: 1g
- Cholesterol: 15mg