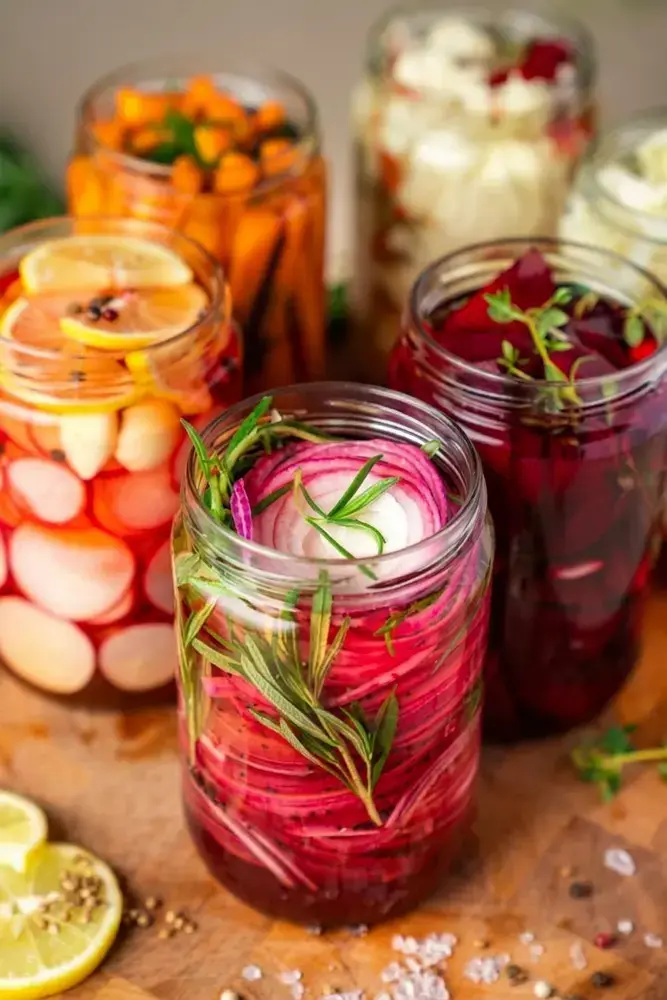
How to Quick Pickle Any Vegetable in Just 10 Minutes of Prep!
If you have ever stood at the counter with a crisper drawer full of summer produce and no real plan, quick pickling is your answer. Honestly, this is one of my favorite kitchen tricks.
Each batch needs about 10 minutes or less of prep, one clean jar, and a simple brine. There is no canning pot, no heat sealing, and no special equipment. Just a brine, a jar, and the refrigerator.
10 Ways To Quick Pickle Any Vegetable For Crisp, Tangy Results 4
Quick pickling means soaking fresh vegetables in a brine made with vinegar so they turn tangy, crisp, and full of flavor in just a few hours. Unlike traditional canning, you are not heat sealing jars for long term pantry storage. These pickles live in the fridge and stay good for 2 to 4 weeks.
Almost any vegetable can take a quick pickle bath. I keep jars of beets, cauliflower, green beans, carrots, onions, and cucumbers going all summer. Red onions go straight onto tacos, cucumbers slide onto sandwiches and burgers, and garlic cloves are honestly good enough to eat straight from the jar.
The best part? Some vegetables are ready in 30 minutes to 1 hour, so you can taste the results the same afternoon you make them. Others need a full day or two to reach their best flavor. That is the beauty of this method. You can pickle a little at a time and let the fridge do the work.
10 Ways To Quick Pickle Any Vegetable For Crisp, Tangy Results 5
If you are feeding a crowd, packing lunches, or simply trying to use up what you have, quick pickling is super easy to work into your week.
Grab a jar, stir up that brine, and you will have crunchy, tangy pickles ready before you know it. New to pickling? Start with one vegetable and one jar, then branch out once you see how simple the whole thing is.
Almost anything can be quick pickled, even grapes. That said, some vegetables really shine because they hold their crunch and soak up flavor fast. Here are the ones I reach for most, along with the way I like to serve them.
Red onions: Thin slices soften quickly and taste fantastic on tacos, burgers, and salads. This was the first pickle I ever made and it is still the one I make most.
Cucumbers: The classic. Sliced into rounds or spears, they belong on burgers, sandwiches, and snack plates.
Garlic cloves: Mellow, savory, and honestly good enough to eat straight from the jar. Chop them into dressings or mash them into butter.
Beets: Roasted and sliced beets turn silky and sweet. They work beautifully in salads or as a simple side.
Carrots: Sticks or coins stay snappy. Great for snacking and a natural fit for banh mi sandwiches.
Jalapenos or mixed hot peppers: Rings of heat for tacos, nachos, sandwiches, and salads.
Cherry tomatoes: They burst with tangy juice and are wonderful in pasta salads, grain bowls, or eaten cold from the fridge.
Cauliflower florets: Sturdy little bites that hold up on platters, snack boards, and BBQ sides.
Corn kernels: Sweet and surprising. Pile them on tacos, toss them into salads, or spoon them over grilled meats.
Cabbage: Shredded slaw style cabbage brings crunch to sandwiches, tacos, and BBQ plates.
Other vegetables worth a try include green beans, baby potatoes, bell peppers, zucchini, and even swiss chard stems. They all take to a quick brine nicely, as long as you cut them into pieces that fit your jar. If you are not sure where to start, pick the vegetable you have the most of right now and work from there.
One note about mixing. Vegetables with similar textures and pickling times can share a jar, but beets will stain lighter vegetables pink. If that bothers you, give the beets their own jar.
I learned that one the hard way with a batch of cauliflower that turned bright magenta. It tasted great, but it was not what I expected when I opened the lid.
The Best Mason Jars for Quick Pickling
You do not need fancy equipment, but the right jar makes the whole process easier. For small batch pickling I reach for SEWANTA Wide Mouth Mason Jars in the 16 oz size. The wide mouth is the detail that matters most.
It makes filling, pouring, and pulling vegetables back out simple, and it means no fishing around with a fork for the last slice of onion.
The 16 oz size is ideal for a pint of pickles. It fits neatly on a fridge shelf and holds just about the right amount for a single vegetable batch.
The jars also come with lids and bands, so you are ready to go the moment the box arrives. They are microwave, freezer, and dishwasher safe too, which keeps cleanup quick.
The set I use came as a 10 pack on Amazon, and honestly, having several jars on hand is what keeps me pickling all summer long. When one jar empties, I rinse it, let it dry, and start the next batch the same day.
A small stack of clean jars in the cabinet is the real secret to keeping quick pickles in rotation.
Quick Pickling Ingredients
Here is the good news. One all purpose brine works for any vegetable on the list. You do not need a different recipe for carrots than you do for onions. Just adjust the spices if you want to change the flavor direction.
Ingredient
Amount
Notes
Vinegar
1 cup
White vinegar is my go to, and apple cider vinegar works too
Water
1 cup
Plain tap water is fine
Salt
1 tablespoon
This is the backbone of the brine
Sugar
1 tablespoon
Optional, but it rounds out the tang
Optional spices make each jar your own. Black peppercorns, mustard seeds, garlic cloves, and fresh dill are all fair game. I usually drop the spices into the bottom of the jar before the vegetables go in, so the flavor travels up through the whole batch.
This base recipe makes enough brine for one pint sized jar, which is 2 cups or 16 oz of pickled vegetables. If you are filling several jars, simply double or triple the amounts. If you like a sharper pickle, use a little more vinegar.
If you prefer a softer tang, add the sugar. Honestly, there is no wrong answer here, and that is what makes this brine so useful for whatever produce you happen to have.
How to Quick Pickle Vegetables (10 Minute Prep Method
The method is the same no matter what you are pickling. Once you have done it one time, you will not even need to look it up again.
Wash and slice, shred, or cut your vegetables into the shape you want. Rings, coins, sticks, and wedges all work. Thin slices for onions and cucumbers, sticks for carrots, and wedges for beets are my favorites.
Place any optional spices or herbs in the bottom of a clean mason jar, then pack the prepared vegetables in tightly.
In a small saucepan, combine the vinegar, water, salt, and sugar. Heat gently until the salt and sugar dissolve, about 3 to 5 minutes. Do not let it come to a full boil.
Carefully pour the hot brine over the vegetables until they are fully submerged. Press gently with a spoon to release any trapped air bubbles.
Let the jar cool at room temperature, then cover it and refrigerate.
Timing depends on the vegetable. Here is a quick reference for how soon you can dig in and when each jar hits its best flavor.
Vegetable
Ready to eat
Best flavor
Red onions
30 minutes to 1 hour
2 to 4 hours
Cucumbers
1 to 2 hours
24 hours
Garlic
12 to 24 hours
2 days
Beets
12 to 24 hours
2 to 3 days
Carrots
12 to 24 hours
2 days
Jalapenos
1 hour
24 hours
Cherry tomatoes
2 to 3 hours
1 day
Cauliflower
12 to 24 hours
2 days
Corn kernels
1 to 2 hours
6 to 8 hours
Bell peppers
4 to 6 hours
Overnight
Green beans
12 to 24 hours
2 days
Kale or chard stems
12 to 24 hours
Overnight
Zucchini
2 to 4 hours
1 day
Baby potatoes
24 hours
2 to 3 days
Asparagus
12 to 24 hours
2 days
Snap peas
2 to 3 hours
1 day
Shallots
30 minutes to 1 hour
4 hours
Radishes
30 minutes to 1 hour
2 to 4 hours
Cabbage slaw
2 to 4 hours
Overnight
Quick pickles are not shelf stable. They must stay in the refrigerator, and they keep for 2 to 4 weeks. Always use a clean fork or spoon when you reach into the jar so you do not introduce bacteria.
10 Ways To Quick Pickle Any Vegetable For Crisp, Tangy Results 6
A few more practical notes from my own kitchen. If the brine looks a little cloudy after a few days, that is normal and nothing to worry about. If the vegetables feel slimy, smell off, or show any mold, toss the jar right away.
You can also reuse the brine once within a few days, though the second batch will taste milder than the first.
Start with one jar this week. Pick a vegetable you already have on hand, mix up the brine, and let the fridge do the rest. Once you see how fast and forgiving this method is, you will be filling jars all season long.