Ingredients
– 5.1 oz vanilla instant pudding for creamy filling
– 3 cups cold milk for setting the pudding
– 3 large bananas, thinly sliced, or 4 medium bananas for fresh fruit flavor
– 8 oz whipped topping for fluffy texture
– 1 box vanilla wafer cookies for layered base
– Additional bananas for garnish
Instructions
1-First Step: Mix the pudding base Grab a large mixing bowl and add the 5.1 oz vanilla instant pudding with 3 cups cold milk. Stir until the mixture is fully blended and starts to thicken. This takes only a few minutes, and using cold milk helps the pudding come together faster. Next, stir in half of the 8 oz whipped topping. This gives the filling a softer, creamier feel and keeps the dessert from tasting too heavy. If you are making the dessert ahead of time for a busy day, you can prepare this pudding mixture up to a day in advance and keep it in the refrigerator until you are ready to layer.
2-Second Step: Slice the bananas Peel your bananas and cut them into thin slices. You will need 3 large bananas or 4 medium bananas for the filling. Thin slices work best because they layer neatly and give you a little banana in every bite. If you want the fruit to look especially fresh, slice the last banana right before assembling the dessert so it does not brown too quickly. If you are serving a group that likes fruit desserts, this step is the one that gives the whole dish its fresh, sweet smell. It is also the best point to adjust for personal taste. Some people like more banana in every layer, while others prefer a little less fruit and more cream.
3-Third Step: Build the first cookie layer Use a 9 x 13 baking dish for the classic version. Place a layer of vanilla wafer cookies on the bottom so they cover the whole surface as evenly as possible. This cookie layer gives the dessert its familiar texture and makes each serving feel more like a true banana pudding. If the dish has corners that are hard to cover, break a few cookies into smaller pieces to fill the gaps. That helps the pudding hold together better when you scoop it later. For a more relaxed presentation, you can also use a trifle bowl or set up individual glasses for easy serving at a picnic or party.
4-Fourth Step: Add the banana layer Arrange a layer of thin banana slices over the vanilla wafers. Try to spread them out so the fruit reaches most of the dish. The bananas should sit close together, but they do not have to overlap perfectly. The goal is to give each serving a mix of cookies, pudding, and fruit. This is also where the recipe starts to look like the dessert people remember from family gatherings. As the bananas rest inside the pudding, they soften a little and blend their flavor into the creamy filling. If you want to make the dessert a touch richer, a banana cream pudding mix can also work well in place of the vanilla instant pudding.
5-Fifth Step: Add half of the pudding mixture Spoon half of the pudding mixture over the bananas and spread it evenly with a spatula. Take your time here so every corner gets covered. A smooth layer helps the dessert chill into neat slices later, which is helpful when you are serving guests or bringing it to a potluck. After the first pudding layer is in place, the dessert already starts to look full and creamy. If you prefer a lighter finish, you can fold in a bit less whipped topping, but the recipe as written gives a classic texture that most people enjoy.
6-Sixth Step: Repeat the layers Add another layer of vanilla wafer cookies, followed by more sliced bananas, then the remaining pudding mixture. Spread it evenly over the top so the layers stay balanced. This second round of cookies and bananas gives the dessert that classic stacked look and makes sure every serving has the right mix of textures. For families with picky eaters, layering the ingredients this way helps keep the dessert familiar and easy to enjoy. The cookies soften as the pudding chills, so the finished dish feels spoonable and creamy instead of crunchy.
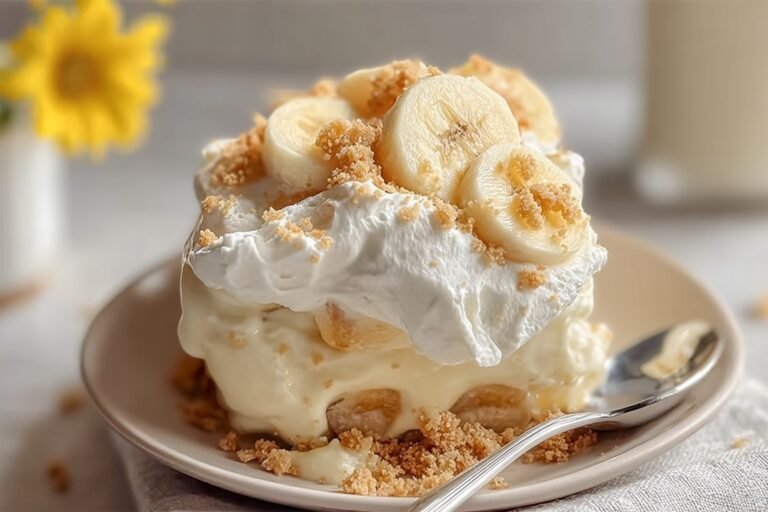
7-Seventh Step: Finish with whipped topping Spread the rest of the whipped topping over the top of the pudding layer. You can smooth it out with the back of a spoon or make little swirls for a homemade look. This final layer gives the dessert a pretty finish and helps seal in the creamy filling beneath it. If you are making this for a special event, a light topping of crushed vanilla wafers adds a simple bakery-style look. Fresh banana slices also look nice, though they are best added close to serving time so they stay bright.
8-Eighth Step: Chill until set Refrigerate the dessert for 2 hours or overnight. A chill time of 1 to 2 hours helps the cookies soften and the flavors blend, while overnight chilling gives you an even firmer texture. This is one of the best parts of the recipe because it frees up your time and makes the pudding even better later. The full timing for this recipe is simple: prep time is 15 minutes, cook time is 0 minutes, chilling time is 2 hours, and total time is 2 hours 15 minutes. It serves 12, which makes it a smart choice for families and gatherings.
9-Ninth Step: Garnish and serve Right before serving, add fresh banana slices and crushed cookies on top if desired. This little finish makes the dish look extra inviting. Then scoop it into bowls or cut it into squares if you want cleaner portions from the baking dish.
Last Step:
Please leave a rating and comment letting us know how you liked this recipe! This helps our business to thrive and continue providing free, high-quality recipes for you.Notes
⏰ Chill for at least 2 hours or overnight for the best texture and flavor fusion.
🍌 Use ripe but firm bananas to avoid sogginess and browning.
🧊 Make ahead up to 1 day; store leftovers in an airtight container for 2-3 days.
- Prep Time: 15 minutes
- Chill Time: 2 hours
- Cook Time: 0 minutes
- Category: Dessert
- Method: No Bake
- Cuisine: American
- Diet: Vegetarian
Nutrition
- Serving Size: 1 serving
- Calories: 134 kcal
- Sugar: 20 g
- Sodium: 119 mg
- Fat: 2 g
- Saturated Fat: 1 g
- Unsaturated Fat: 1.2 g
- Trans Fat: 0.05 g
- Carbohydrates: 27 g
- Fiber: 1 g
- Protein: 3 g
- Cholesterol: 8 mg