Ingredients
– 1 1/2 cups heavy whipping cream Creates the fluffy topping and filling
– 1/2 cup, divided powdered sugar Adds sweetness to both cream layers
– 1 teaspoon vanilla extract Brings warm flavor
– 8 oz cream cheese Gives the cheesecake body
– 1 cup graham cracker crumbs Makes the crust
– 1/4 cup butter Helps the crust hold together
– 3/4 cup seedless strawberry jam Provides the strawberry layer
– Optional fresh strawberries Used as garnish
Instructions
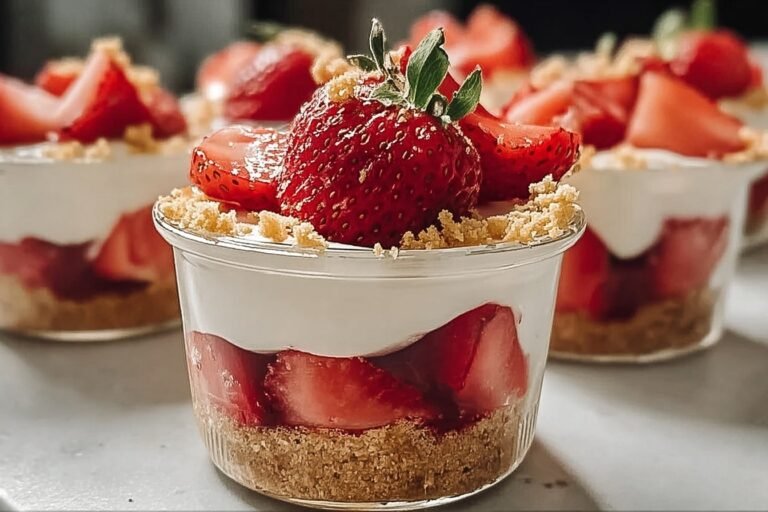
1-First Step: Prep your bowls and ingredients Start by gathering all your ingredients and measuring everything before you begin. Set the cream cheese out so it can soften to room temperature, since that helps it blend smoothly. Chill a large mixing bowl and the beaters in the fridge for a few minutes if you can, because cold tools help whipped cream form faster. Also, set out six 9-ounce dessert cups so they are ready for layering. Clear cups work especially well because they show off the pretty layers of crust, cheesecake filling, and strawberry jam. This simple setup saves time and keeps the process smooth from start to finish.
2-Second Step: Whip the cream Add the 1 1/2 cups heavy whipping cream, 1/4 cup powdered sugar, and 1 teaspoon pure vanilla extract to the chilled large mixing bowl. Beat with an electric mixer for about 4 minutes, or until stiff peaks form. The cream should hold its shape when you lift the beaters. If you are using store-bought whipped topping instead of fresh whipped cream, keep it chilled until you are ready to fold it in. That swap saves time and still gives you a soft, creamy result. It is a handy choice for busy parents, students, or anyone making dessert in a hurry.
3-Third Step: Make the cheesecake filling In a second large mixing bowl, beat the softened 8 oz cream cheese with the remaining 1/4 cup powdered sugar until smooth and combined. There should be no lumps left in the mixture. A hand mixer works well here, but you can also use a stand mixer with the paddle attachment. Next, reserve one rounded cup of the whipped cream and set it aside for the topping. Fold the rest of the whipped cream into the cream cheese mixture. Fold gently so the filling stays light and airy. Overmixing can knock out some of the fluffiness, so use slow strokes and stop as soon as everything looks blended.
4-Fourth Step: Mix the crust In a small bowl, combine the 1 cup graham cracker crumbs with the 1/4 cup melted butter. Stir until the crumbs look evenly moistened and crumbly. This should feel like a soft, sandy mixture that presses together lightly when you pinch it. Do not pack the crust too firmly into the cups. A light press gives you the right texture and makes scooping easier later. If you like a different base, crushed vanilla wafers or shortbread cookies work well too, especially for readers who enjoy a sweeter crust.
5-Fifth Step: Layer the dessert cups Now it is time to build the dessert. Evenly divide the crust mixture among the six 9-ounce cups. Add a layer of cheesecake filling on top, then spoon in the 3/4 cup seedless strawberry jam. Repeat the layering if needed, depending on the look you want in each cup. Keep the portions even so every serving has a good balance of crust, cream, and fruit. If the jam is thick, warm it in the microwave for 20 to 30 seconds so it spreads more easily. That small step helps the strawberry layer sit smoothly over the filling. Homemade strawberry sauce also works well here if you want a fresher fruit flavor.
6-Sixth Step: Add the finishing swirl and chill Top each cup with a swirl of the reserved whipped cream. You can pipe it for a bakery-style look or spoon it on for a more casual finish. Either way, the topping gives the dessert cups a pretty, finished appearance. Chill the cups for at least 20 minutes, or until ready to serve. This brief rest helps the layers settle and makes the cheesecake filling firmer. For best presentation, add sliced fresh strawberries just before serving so they stay bright and do not release extra moisture.
Last Step:
Please leave a rating and comment letting us know how you liked this recipe! This helps our business to thrive and continue providing free, high-quality recipes for you.Notes
🥶 Chill bowl and beaters for whipped cream that whips up faster and holds peaks better.
🍓 Add sliced strawberries right before serving to avoid sogginess from moisture.
🔥 Warm jam in microwave 20-30 seconds if too thick for smooth layering.
- Prep Time: 25 minutes
- Chill: 20 minutes
- Category: Dessert
- Method: No-Bake
- Cuisine: American
- Diet: Vegetarian
Nutrition
- Serving Size: 1 cup
- Calories: 621 kcal
- Sugar: 37g
- Sodium: 302mg
- Fat: 44g
- Saturated Fat: 26g
- Unsaturated Fat: 13g
- Trans Fat: 0.3g
- Carbohydrates: 54g
- Fiber: 1g
- Protein: 5g
- Cholesterol: 126mg