Ingredients
– 24 chocolate sandwich cookies
– 1/3 cup butter, melted
– 2 blocks (8 ounces each) cream cheese, room temperature
– 1 jar (13 ounces) chocolate hazelnut spread
– 2 tablespoons cocoa powder
– 1 cup powdered sugar
– 1 container (8 ounces) whipped topping
Instructions
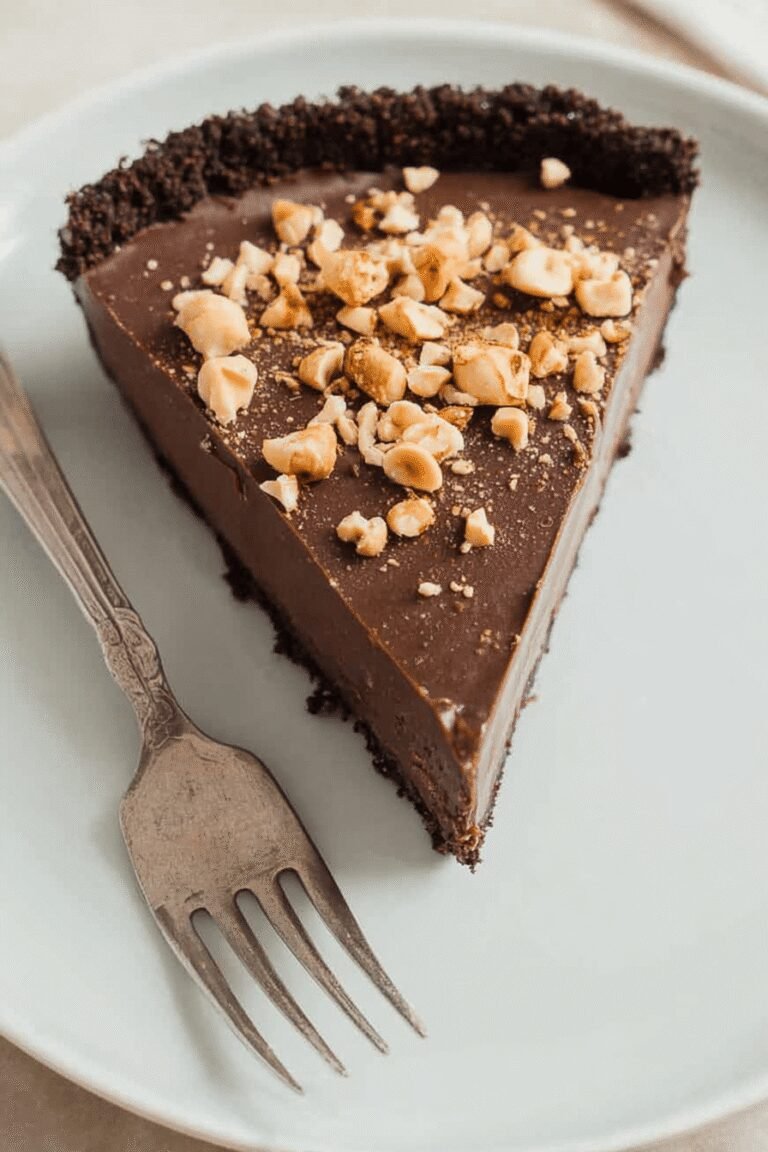
1-Getting started: Getting started with this no bake Nutella cheesecake is as simple as mixing a few items in your kitchen. First, crush the 24 chocolate sandwich cookies into fine crumbs using a blender or food processor, then mix them with the 1/3 cup of melted butter until it holds together like wet sand. Press this mixture firmly into the bottom and up the sides of a 9-inch springform pan, and pop it in the fridge for about 20 minutes to set while you work on the filling.
2-Next, in a stand mixer with the paddle attachment, beat the 2 blocks of cream cheese (8 ounces each) with the 1 jar (13 ounces) of chocolate hazelnut spread on medium speed until it’s smooth and creamy this usually takes a couple of minutes. Add the 2 tablespoons of cocoa powder and 1 cup of powdered sugar, mixing well and scraping down the sides to ensure everything blends evenly. For dietary adjustments, if you’re going vegan, substitute the cream cheese with a plant-based version at this stage.
3-Then, gently fold in the 1 container (8 ounces) of whipped topping until the mixture is light and uniform. Pour this filling over your chilled crust, smooth it out with a spatula, and cover the pan before refrigerating for at least 4 hours overnight works even better for that perfect set. Finally, garnish with whipped cream or your favorite toppings right before serving to keep it fresh and appealing. This method, with its total time of just 4 hours and 20 minutes, makes it a breeze for busy parents or working pros.
Last Step:
Please leave a rating and comment letting us know how you liked this recipe! This helps our business to thrive and continue providing free, high-quality recipes for you.Notes
🥄 Use the bottom of a glass or measuring cup to press the crust firmly into the pan for a sturdy base.
🍓 Add whipped cream topping and fresh fruit just before serving for an appealing presentation.
❄️ Chill the cheesecake for at least 4 hours to allow the filling to set and make slicing easier.
- Prep Time: 20 minutes
- Chill Time: 4 hours
- Cook Time: 0 minutes
- Category: Cheesecake
- Method: No Bake
- Cuisine: American
- Diet: Vegetarian
Nutrition
- Serving Size: 1 slice
- Calories: Approximately 400 calories per slice
- Sugar: About 30 grams per slice
- Sodium: Approximately 150 mg per slice
- Fat: About 28 grams per slice
- Saturated Fat: Approximately 14 grams per slice
- Unsaturated Fat: Approximate 12 grams per slice
- Trans Fat: Negligible
- Carbohydrates: Approximately 35 grams per slice
- Fiber: About 2 grams per slice
- Protein: Approximately 6 grams per slice
- Cholesterol: About 50 mg per slice