Ingredients
– 14 ounces sweetened condensed milk
– 1 tablespoon unsweetened cocoa powder
– 3 cups milk chocolate chips
– 2 teaspoons vanilla extract
– 1 cup marshmallow bits
Instructions
1-Step 1: Prepare Your Pan Start by lining a 9×9-inch pan with aluminum foil. This step is crucial because it allows you to easily lift the finished fudge out of the pan for clean cutting. Press the foil smoothly into the corners and up the sides of the pan. You can also lightly spray the foil with non-stick cooking spray for extra insurance, though the fudge typically releases easily due to its high fat content from the chocolate and condensed milk.
2-Step 2: Combine Condensed Milk and Cocoa Powder In a small saucepan over medium-low heat, whisk together the sweetened condensed milk and unsweetened cocoa powder. Keep the heat at medium-low this is essential for preventing the milk from scorching. Whisk continuously until the cocoa powder is fully incorporated and no lumps remain. The mixture should be smooth and uniform in color, with a rich chocolate brown appearance.
3-Step 3: Melt the Chocolate Chips Once the cocoa powder is fully blended into the condensed milk, reduce the heat to low. Add the milk chocolate chips and stir constantly until completely melted. This step requires patience and attention. Stirring constantly prevents hot spots that could cause the chocolate to seize or become grainy. Important tip: Avoid overheating the chocolate. If the mixture gets too hot, the cocoa butter can separate, resulting in an oily or grainy texture. Keep the heat low and remove the pan from the heat source if you notice any signs of separation. The residual heat will continue melting the chips.
4-Step 4: Add Vanilla Extract Once all the chocolate chips have melted and the mixture is silky smooth, remove the pan from the heat entirely. Stir in the vanilla extract, mixing thoroughly to incorporate the flavor throughout the fudge. The vanilla adds a subtle warmth that enhances the chocolate and gives the fudge that classic hot cocoa taste.
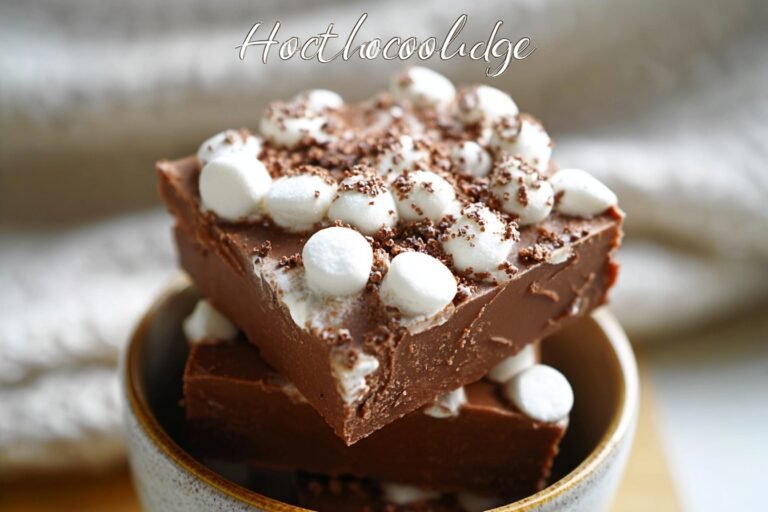
5-Step 5: Pour and Top with Marshmallows Pour the hot fudge mixture into your prepared pan, using a spatula to scrape every last bit from the saucepan. Spread the mixture evenly across the pan, creating a uniform layer. Immediately press the marshmallow bits onto the surface while the fudge is still warm and soft. Distribute them evenly across the top, gently pressing so they adhere to the surface. The marshmallows will set into the fudge as it chills, creating that iconic hot cocoa look.
6-Step 6: Chill Until Set Cover the pan with plastic wrap or aluminum foil and refrigerate for at least 4 hours. For best results, refrigerate overnight. The extended chilling time ensures the fudge is completely set throughout, making it much easier to cut clean squares. You’ll know the fudge is ready when it feels firm to the touch and holds its shape when you press gently on the surface.
7-Step 7: Cut and Serve Remove the fudge from the pan by lifting the foil edges. Place the entire slab on a cutting board. Using a sharp knife, cut the fudge into pieces. A 9×9-inch pan typically yields about 36 to 64 pieces, depending on how large you cut them. For the cleanest cuts, run your knife under hot water, wipe it dry, and make each cut with a single downward motion. Wipe the knife clean between cuts for picture-perfect results.
Last Step:
Please leave a rating and comment letting us know how you liked this recipe! This helps our business to thrive and continue providing free, high-quality recipes for you.Notes
🔥 Low heat constant stir – prevents grainy seize.
🍫 Unsweetened cocoa pure flavor; no evap milk sub.
❄️ Single-layer freeze first, then bag 3 months easy.
- Prep Time: 10 minutes
- Chill: 4 hours
- Cook Time: 5 minutes
- Category: Dessert
- Method: Stovetop
- Cuisine: American
- Diet: Vegetarian
Nutrition
- Serving Size: 1 piece
- Calories: 118 kcal
- Sugar: 16g
- Sodium: 16mg
- Fat: 5g
- Saturated Fat: 3g
- Unsaturated Fat: 2g
- Trans Fat: 0g
- Carbohydrates: 17g
- Fiber: 0.1g
- Protein: 1g
- Cholesterol: 4mg