Ingredients
– 1/4 cup pea protein powder, 28g
– 1/4 cup cacao powder, 22g
– 1/8 teaspoon salt
– 1/2 cup sunflower seed butter
– 1 teaspoon vanilla extract
– 3 tablespoons water, adjust as needed
– 3 to 4 ounces dark chocolate, for coating
– 1 teaspoon coconut oil, for coating
– Flaked sea salt, for topping
Instructions
1-First Step: Mix the dry ingredients Start by adding the pea protein powder, cacao powder, and salt to a medium bowl. Stir them together so the protein and cocoa are evenly distributed. This small step matters because it helps prevent pockets of dry powder in the finished dough. If you are making these for a group, this is a good time to line a baking sheet with parchment paper. That makes the next steps smoother and keeps the chocolate coating from sticking later. It also helps to get your toppings ready before the chocolate melts.
2-Second Step: Add the wet ingredients Mix in the sunflower seed butter and vanilla extract. At first, the mixture may look crumbly, but keep stirring and pressing it together with a spoon or clean hands. The dough usually starts coming together once the butter is evenly worked through the dry ingredients. Next, add the water one tablespoon at a time. Use just enough to create a soft dough that can be rolled. Because pea protein powder is absorbent, some batches need all 3 tablespoons while others need a little less. If the mixture feels too dry, add a small splash more water. If it feels too sticky, add a touch more pea protein powder or cacao powder.
3-Third Step: Knead into dough Use your hands to knead the mixture until it forms a smooth, thick dough. Press and fold it a few times so everything combines well. The texture should feel like a soft truffle dough that holds together when pinched. If you want a sweeter version, you can replace the water with maple syrup. That changes the flavor a bit, but it can be a nice option when you want a treat that tastes more dessert-like. For a lower sugar snack, stick with water as written.
4-Fourth Step: Shape the protein balls Roll the dough into balls about 1 tablespoon in size. You should get around 16 balls from this batch, depending on how large you make them. Keeping them all close in size helps them chill evenly and makes the final coating look neat. If the dough sticks to your hands, lightly dampen your palms with water. This can make rolling much easier. You can also chill the dough for a few minutes before shaping if your kitchen is warm.
5-Fifth Step: Freeze until firm Place the rolled balls on the parchment-lined sheet and freeze them for 30 minutes. This step helps them hold their shape when you dip them in melted chocolate. A firm center also gives you a cleaner coating. Do not skip the freeze time if you want the chocolate shell to set nicely. If the balls are too soft, they may break apart in the warm coating. The chill time also makes these Dark Chocolate Protein Balls (No Bake, Low Carb) easy to store later, which is handy for meal prep.
6-Sixth Step: Melt the chocolate coating Place the dark chocolate and coconut oil in a small saucepan over low heat. Stir often so the chocolate melts smoothly and does not scorch. Keep the heat gentle because chocolate can seize if it gets too hot. If you prefer, you can melt the coating in short bursts in the microwave, stirring between each round. The saucepan method works well for a shiny, smooth finish, especially if you are coating several balls at once. Take your time here, since a calm melt gives the best texture.
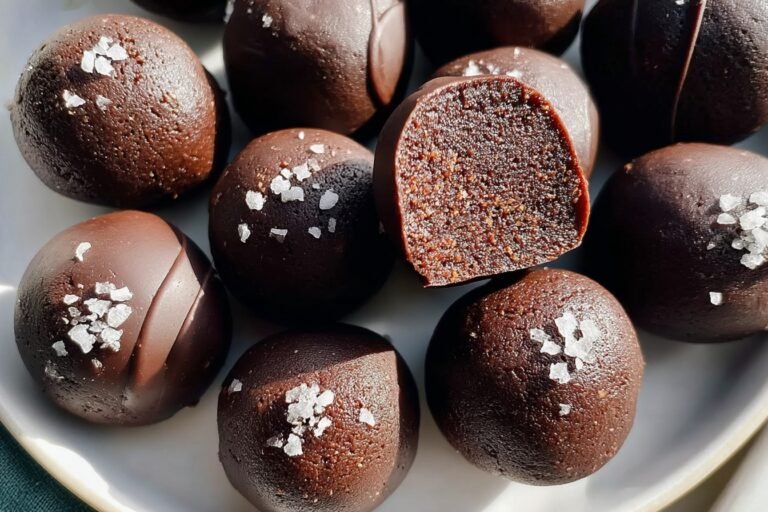
7-Seventh Step: Dip, drizzle, and top Use a fork or dipping tool to coat each frozen ball in the melted chocolate. Lift it out carefully and let the extra chocolate drip off before placing it back on the parchment paper. Repeat until all the balls are coated. Once the batch is dipped, drizzle any extra chocolate over the tops for a bakery-style look. Finish with a small pinch of flaked sea salt. The salt is not just decoration. It helps balance the richness and makes the chocolate flavor pop.
8-Eighth Step: Chill and serve Let the chocolate coating set at room temperature or in the fridge for a short time. Once firm, the protein balls are ready to eat. Serve them cold for the best texture, or pack them into snack containers for later.
Last Step:
Please leave a rating and comment letting us know how you liked this recipe! This helps our business to thrive and continue providing free, high-quality recipes for you.Notes
💧 Pea protein is very absorbent; adjust water or try maple syrup for sweetness if needed.
🔄 Swap sunflower seed butter with peanut or almond butter if nuts are okay.
❄️ Store in fridge up to 2 weeks or freezer up to 2 months for grab-and-go snacks.
- Prep Time: 15 minutes
- Freeze: 30 minutes
- Category: Snacks
- Method: No Bake
- Cuisine: American
- Diet: Vegan, Paleo, Gluten-Free, Nut-Free, Low-Carb
Nutrition
- Serving Size: 1 ball
- Calories: 90 kcal
- Sugar: 1 g
- Sodium: 50 mg
- Fat: 7 g
- Saturated Fat: 2 g
- Unsaturated Fat: 4.5 g
- Trans Fat: 0 g
- Carbohydrates: 4 g
- Fiber: 2 g
- Protein: 6 g
- Cholesterol: 0 mg