Ingredients
– 1.5 cups graham cracker crumbs for the crust base
– 1/4 cup melted butter for binding the crust
– 2 tablespoons ground coffee for infusing nutty flavor
– 2 tablespoons sugar for sweetening the crust
– 24 ounces softened cream cheese for the creamy filling
– 1 cup sugar for sweetening the filling
– 1 cup sour cream for extra creaminess
– 1 teaspoon vanilla extract for aromatic flavor
– 1 tablespoon lemon juice for fresh zing
– 1 cup lingonberries or raspberries for juicy flavor
– 1/2 cup chopped hazelnuts for crunch
– Whipped cream (optional) for topping
– Extra berries (optional) for garnishing
– 1 package cocoa cookies with cream filling (crushed) for the base
– 100 grams cream cheese for binding
– Chocolate pops (to cover) for pine cone texture
– Powdered sugar (for light dusting) for sweet finish
Instructions
1-First Step: Prepare Your Equipment and Ingredients Begin by getting a 9-inch springform pan ready and ensure your cream cheese is at room temperature for easy mixing. For the pine cones, crush the cocoa cookies finely in a bowl. This step sets you up for success and helps everything blend well later.
2-Second Step: Make the Crust for the Full Cake Combine 1.5 cups graham cracker crumbs, 1/4 cup melted butter, 2 tablespoons ground coffee, and 2 tablespoons sugar in a bowl. Press this mixture firmly into the base of your pan and chill it for about 30 minutes. If you want a firmer crust, bake it at 350°F for 8-10 minutes, but remember, no-bake is the traditional way.
3-Third Step: Prepare the Filling Beat 24 ounces of softened cream cheese with 1 cup sugar until it’s smooth and creamy. Add 1 cup sour cream, 1 teaspoon vanilla extract, and 1 tablespoon lemon juice, mixing until fully combined. For dietary tweaks, use plant-based alternatives here if needed.
4-Fourth Step: Add the Mix-Ins and Assemble Fold in 1 cup lingonberries or raspberries and 1/2 cup chopped hazelnuts gently to keep the texture light. Pour this filling over the chilled crust, smooth the top, and cover it before refrigerating for 4-6 hours or overnight. This resting time lets the flavors meld beautifully.
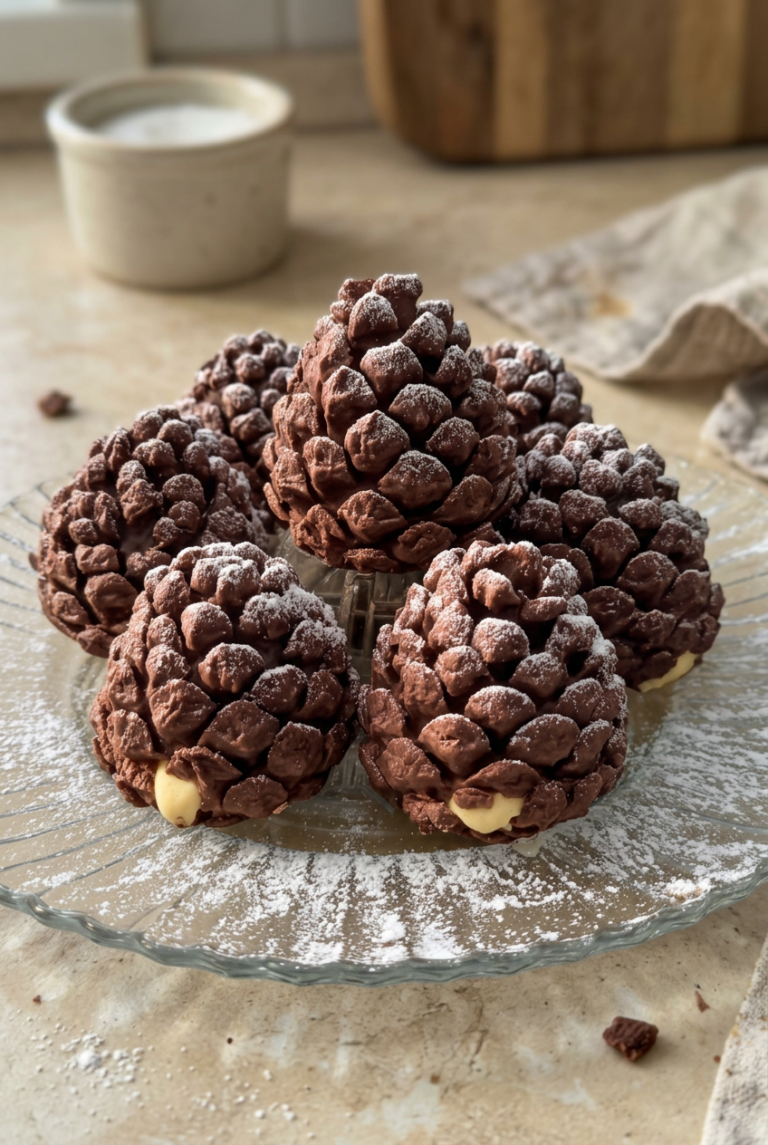
5-Fifth Step: Shape the Pine Cones Variation For the pine cones, mix the crushed cocoa cookies with 100 grams of room-temperature cream cheese until smooth. Form the mixture into about seven balls, shaping peaks to look like pine cones, then attach chocolate pops in an overlapping pattern to cover them fully.
6-Final Step: Chill and Serve Refrigerate the full cake for at least 4 hours to set, and chill the pine cones for 1-2 hours. Dust the pine cones with powdered sugar just before serving, and top the cake with whipped cream or extra berries. The full cheesecake takes 25 minutes active time plus chilling, while pine cones need 15-25 minutes plus chill time. Enjoy with loved ones, and for more dessert ideas, try our magic three-layer custard cake.
Last Step:
Please leave a rating and comment letting us know how you liked this recipe! This helps our business to thrive and continue providing free, high-quality recipes for you.Notes
❄️ Chill the cookie-cheese mixture for 15-20 minutes before shaping to prevent stickiness, ensuring clean, defined pine cone forms that hold their structure without falling apart.
🎁 Work quickly when applying chocolate pops while the dough is still slightly tacky from chilling, pressing firmly for secure attachment and a textured, realistic scale pattern that impresses guests.
📦 Store assembled pine cones in an airtight container in the fridge for up to 3 days, dusting with powdered sugar fresh each time to maintain the snowy holiday look without absorbing moisture.
- Prep Time: 25 minutes
- Chilling: 1 hour 20 minutes
- Category: Desserts
- Method: No Bake
- Cuisine: American
- Diet: Vegetarian
Nutrition
- Serving Size: 1 pine cone
- Calories: 185
- Sugar: 22g
- Sodium: 150mg
- Fat: 10g
- Saturated Fat: 6g
- Unsaturated Fat: 4g
- Trans Fat: 0g
- Carbohydrates: 20g
- Fiber: 1g
- Protein: 2g
- Cholesterol: 20mg