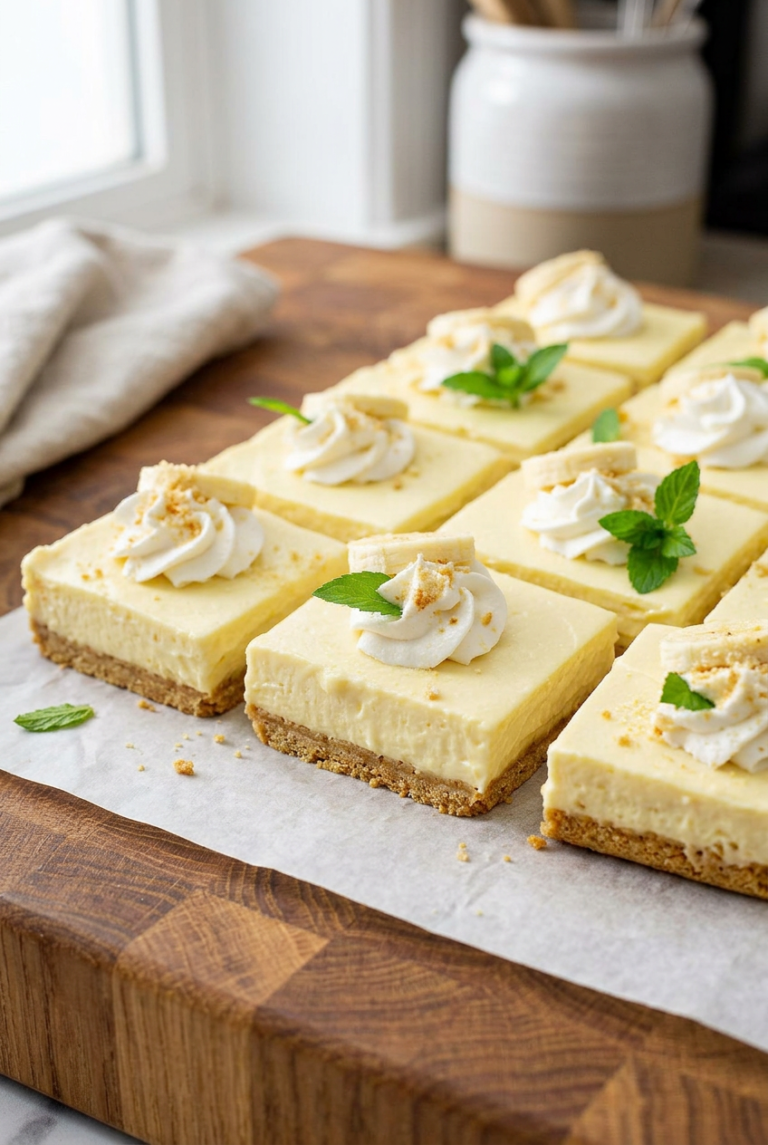
Ingredients
– 60 vanilla wafers, finely crushed (about 1 1/2 cups) for crust base
– 1/3 cup melted butter for binding crust
– 3 bananas, sliced for natural sweetness and moisture
– 2 packages (3.4 oz each) vanilla instant pudding mix for creamy filling
– 3 cups cold milk for pudding mixture
– 2 1/2 cups whipped topping, divided for middle layer and topping
Instructions
1-First Step: Prepare the Crust Start by preheating your oven to 325°F, as this brief bake sets the base just right. Mix the 60 finely crushed vanilla wafers with 1/3 cup melted butter until it holds together, then press this mixture firmly into a 13×9-inch baking dish using the bottom of a glass for a solid structure. Bake for 8 minutes, then let it cool for 10 minutes on a wire rack so the crust firms up without cracking.
2-Second Step: Add the Banana Layer Once the crust has cooled, layer on the 3 sliced bananas evenly across the top to build that fresh fruit element. This step adds natural sweetness and nutrients, but remember to slice them just before use to keep them from browning too quickly. If you’re making this for a crowd, like a community picnic, you can dip the slices in a bit of lemon juice for extra freshness, adapting to dietary tweaks if needed.
3-Third Step: Mix and Layer the Pudding Next, whisk the 2 packages of vanilla instant pudding mix with 3 cups of cold milk in a large bowl until it thickens, which takes about 2 minutes for that creamy consistency. Spread 2 cups of this mixture over the banana layer to seal in the flavors, ensuring it’s even so every bite is perfect. For variations, you could use a different flavor of pudding here if you’re experimenting for dietary needs, like a lower-sugar option.
4-Fourth Step: Incorporate the Whipped Topping Stir 1 cup of whipped topping into the remaining pudding mixture to create a lighter layer, then spread it smoothly over the first pudding layer for added texture. Top everything with the remaining 1 1/2 cups of whipped topping to finish off the bars with a fluffy cap. This step makes the dessert feel indulgent yet light, and it’s a great spot to think about substitutions if you’re aiming for a dairy-free version.
5-Fifth Step: Chill and Serve Refrigerate the assembled bars for at least 3 hours to let the layers set and the flavors meld, resulting in a dessert that’s easy to slice and serve cold. For the best results, chill overnight if you can, as the wafers soften slightly for a nicer bite. Just before serving, garnish with extra crushed wafers and fresh banana slices to keep things looking vibrant, and consider linking this to similar treats like chocolate chip cheesecake bars for more ideas on layered desserts.
Last Step:
Please leave a rating and comment letting us know how you liked this recipe! This helps our business to thrive and continue providing free, high-quality recipes for you.Notes
🍌 Use firm, ripe bananas and layer them immediately after cooling the crust to prevent oxidation, adding a squeeze of lemon juice to slices if prepping ahead for preserved color and tang.
🥛 Stick to instant pudding and measure milk precisely for a thick, stable filling that doesn’t run—whisk just until set to avoid incorporating air bubbles that could make layers airy instead of creamy.
❄️ Press crust firmly with a flat tool for sturdy structure that withstands chilling, refrigerating overnight for intensified flavors even if wafers soften slightly; store covered in fridge up to 3 days, and for variety, swap half the wafers for chocolate for a twist.
- Prep Time: 25 minutes
- Chilling: 3 hours
- Cook Time: 8 minutes
- Category: Desserts
- Method: No Bake
- Cuisine: American
- Diet: Vegetarian
Nutrition
- Serving Size: 1 bar
- Calories: 212
- Sugar: 14g
- Sodium: 153mg
- Fat: 10g
- Saturated Fat: 5g
- Unsaturated Fat: 5g
- Trans Fat: 0g
- Carbohydrates: 26g
- Fiber: 0g
- Protein: 2g
- Cholesterol: 15mg